Categories

Blog posts about QNAP's products and technologies.
Many countries have applied stringent regulations on how information is used, requiring government agencies, financial institutions, and healthcare providers to think about how and where customer/client data is stored. As these regulations often include restrictions on altering archived data, Write-Once-Read-Many (WORM) has become increasingly common.
What is WORM?
WORM prevents any modification to saved data, making it suitable for photos, contracts, financial reports, emails, employee information, and other “finalized” documentation. When recording and tracking huge data sets, WORM is ideal for preserving findings for future reference.
QuTS hero also provides WORM auto-committing. WORM shared folders can be set up and files saved within them cannot be altered.
Object Lock: A WORM solution for Cloud Services
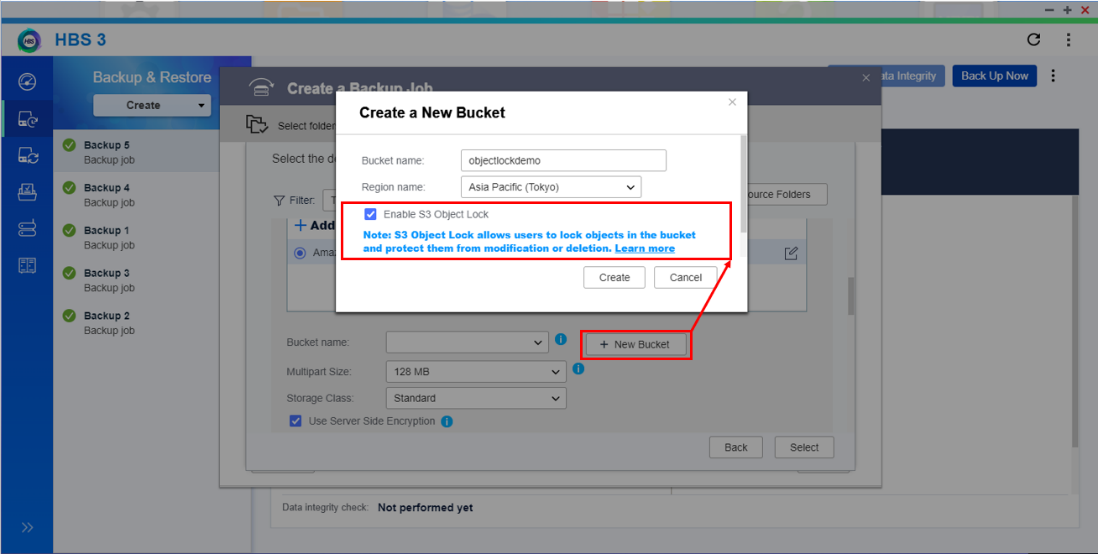
To meet the security requirements of enterprise storage, HBS 3 now supports S3 Object Lock to help you protect important organizational information when saved to cloud storage. This assists with data protection when storing objects in the cloud, preventing accidental deletion or overwrites for a fixed time period or indefinitely.
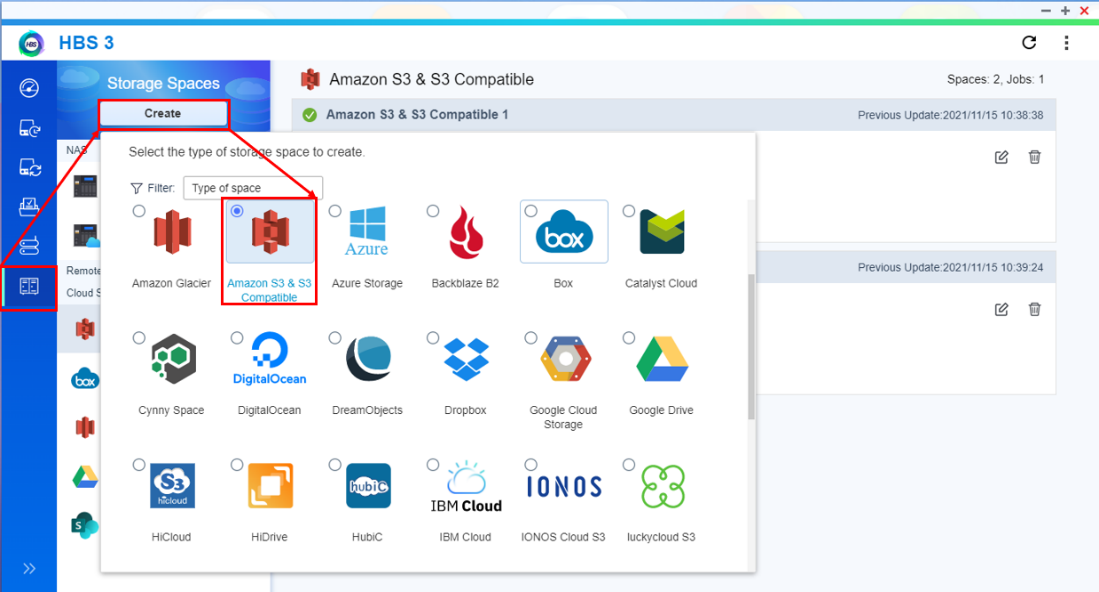
How to connect to Amazon S3 and create an Object Lock Bucket in HBS3
You need an Amazon S3 access key and secret key.

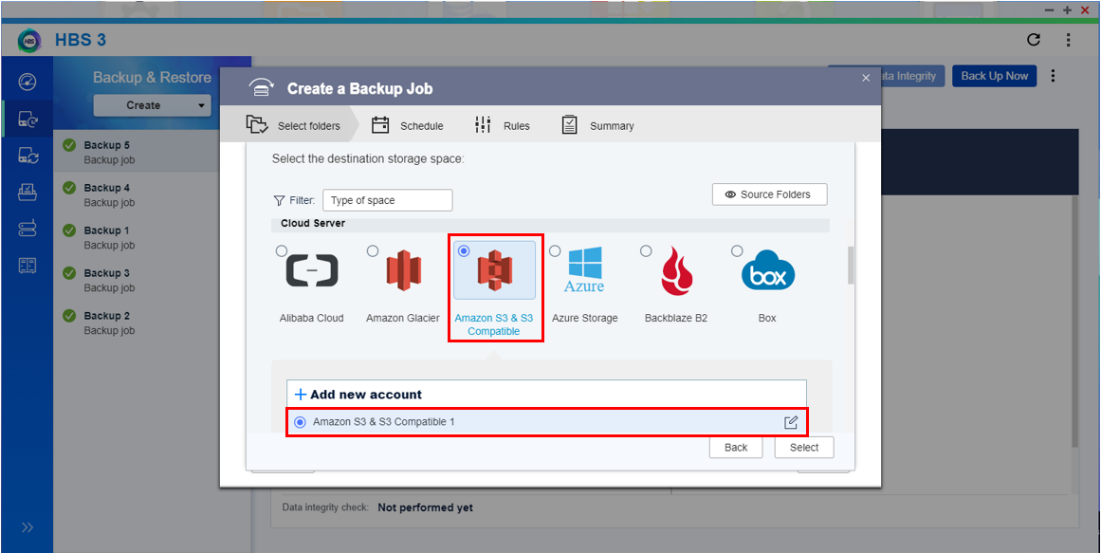
How to create a New Backup Job

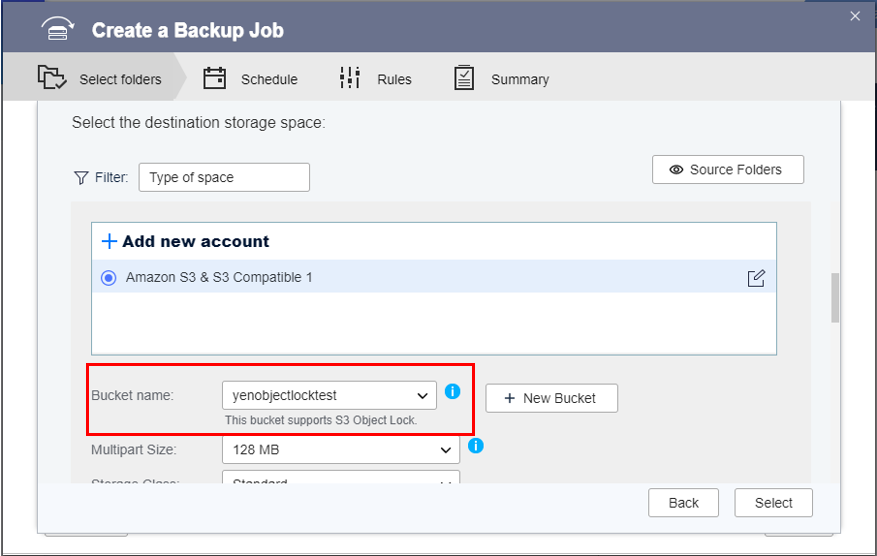
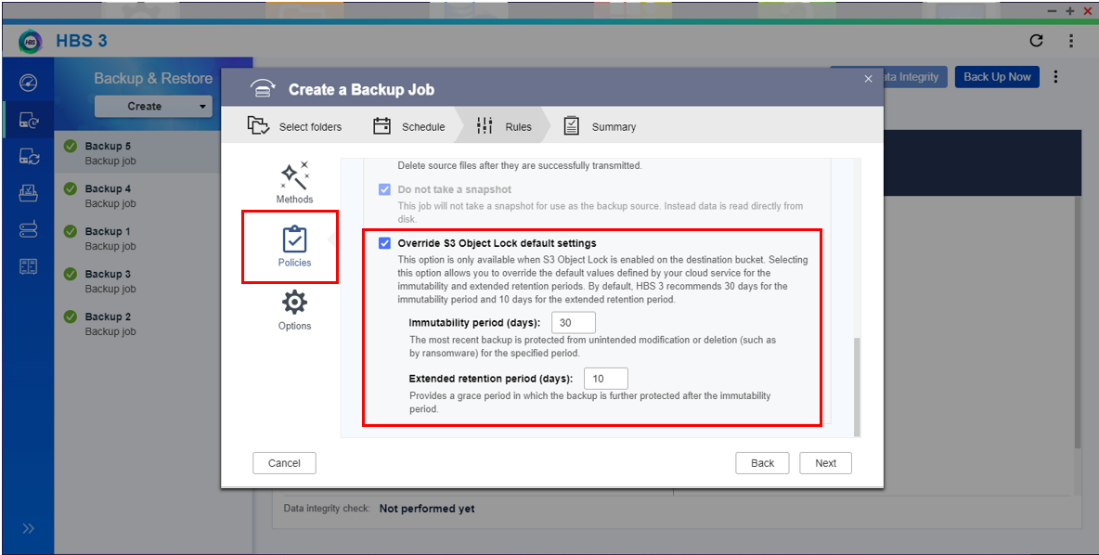
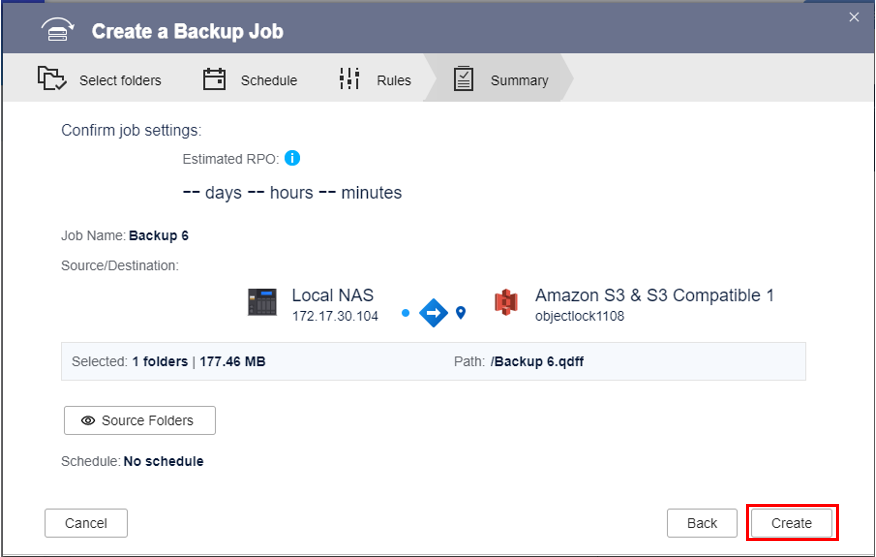
You can now start backing up to your S3 Object Lock storage space.