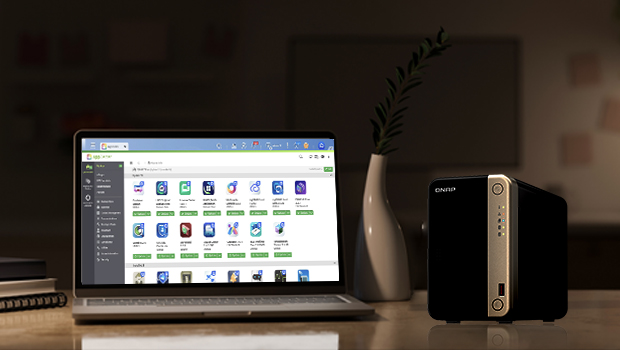
I finally got my new QNAP NAS. After unboxing, installing hard drives, adding M.2 SSDs, expanding the RAM, and plugging in the cables, I am ready to share you the nine must-use settings for your QNAP NAS.
I will demonstrate with my new QNAP TS-264 2-bay NAS.
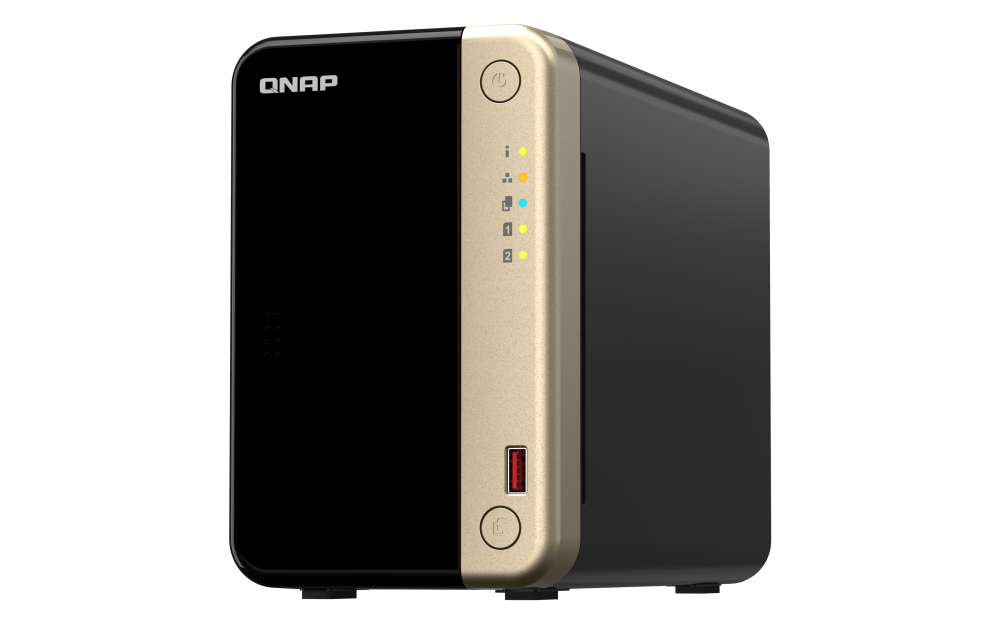
QNAP TS-264 2-bay NAS
Change the network ports
You can access your QNAP NAS from the login portal and change the network ports on Control Panel. The global default system port and port number is HTTP:8080 and HTTPS: 443, and you can change them to any number between 1 and 65535, such as 42294. To avoid overlapping with other network ports used by QNAP’s services, it is more advised to adopt ports number bwtween 20000 and 65535. After changing the system port and port number, make sure you click “Force secure connecting (HTTPS) only”.

Reset the system port and port number
Log in myQNAPcloud
In most cases, it is too difficult for general users to configure DDNS or port forwarding settings for a public IP or fixed IP. QNAP has made it easier by myQNAPcloud for achieving NAT traversal.
After logging in and adding your QNAP NAS to myQNAPcloud, you can remotely access your QNAP NAS using a dedicated link (for example: https://qlink.to/yourID). No networking expertise is required! Besides NAT traversal, myQNAPcloud can also help you generate your own second-level domain, such as yourID.myqnapcloud.com.
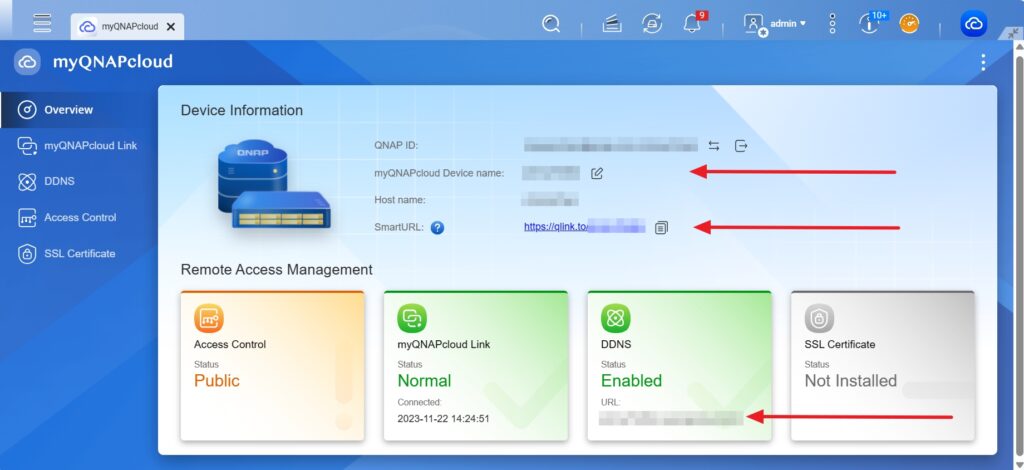
myQNAPcloud’s user interface
Enable home folders for all users
QNAP NAS’ Linux-based system allows each NAS user to have their own storage space. To ensure everyone’s privacy, these folders can’t be accessed by non-admin users.
Open Home Folder and enable home folder for all users from User → Advanced Settings
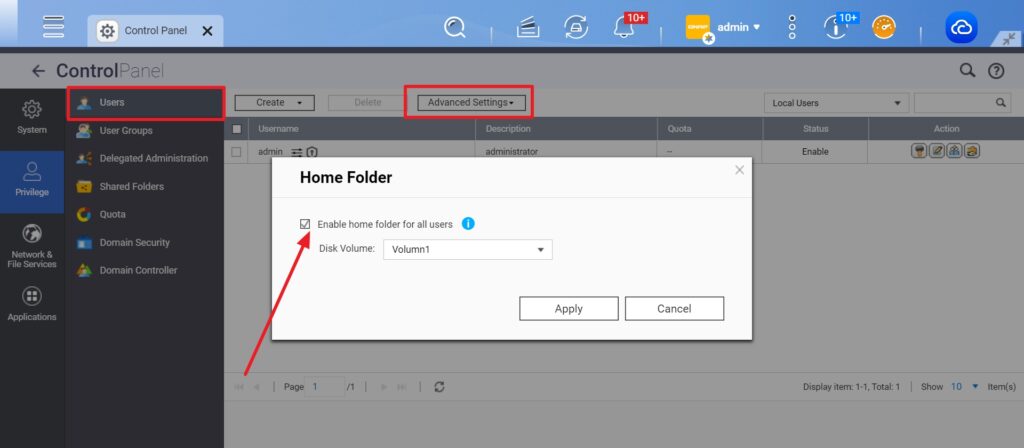
Enable home folder for all users
You will find a home folder is added in File Station, and the files are identical between home folder and homes folder. You can see the home folder as a shortcut to access homes folder.
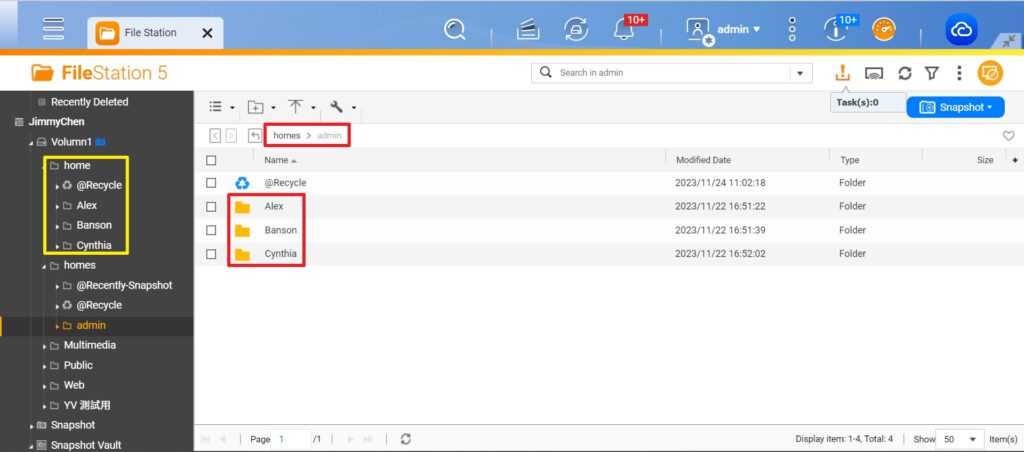
Homes folders
If you have multiple users sharing one QNAP NAS, you will have independent folders for each user. For example, homes/User A and homes/User B. User A cannot access User B’s file folder, and vice versa for User B.
Need to backup photo albums or your files from PC to NAS? Just save it to your homes folder!
Enable WebDAV
With the WebDAV service, you can mount your QNAP NAS to your Windows PC and access the data just as you would with folders on your Windows PC.
You can enable WebDAV from the Control Panel. Ensure that you change the port numbers.
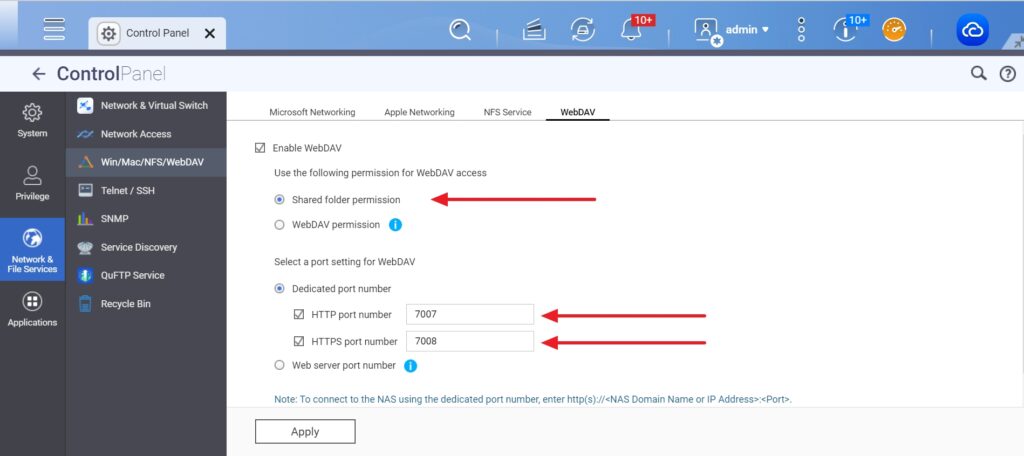
Enable WebDAV
Raidrive is also recommended for Windows PC users to mount a QNAP NAS to PC.
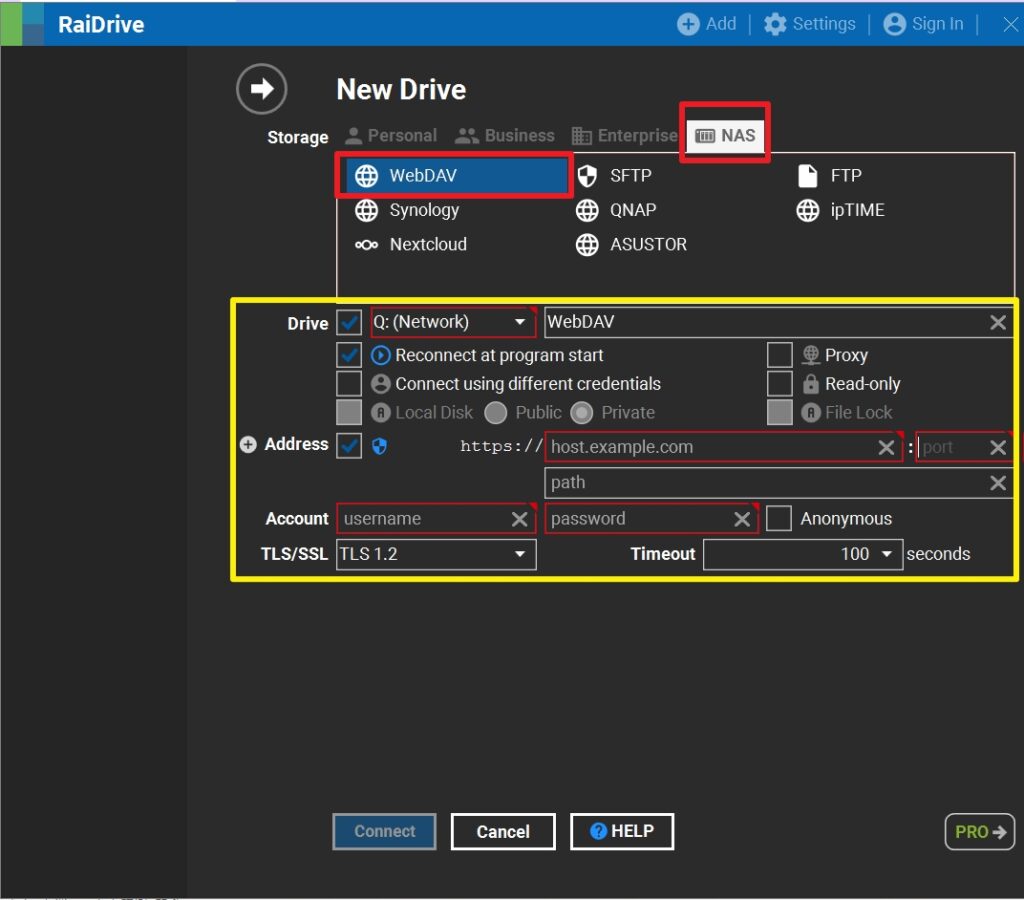
RaiDrive user interface
After enabling WebDAV, you can have a new network drive where you can access files in QNAP NAS directly from your Windows PC.
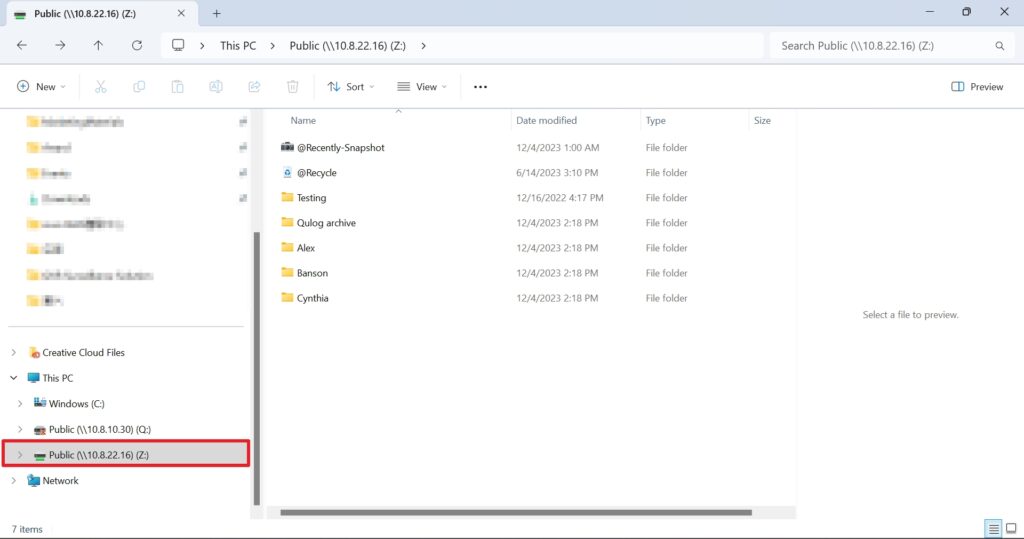
A new network drive mounted from QNAP NAS to Windows PC
Log setting
Log setting is seldom used by home users, whereas it can help business users keep track of every action about system operations, server, or IT system.
You can enable log setting and store the log files in QuLog archive.
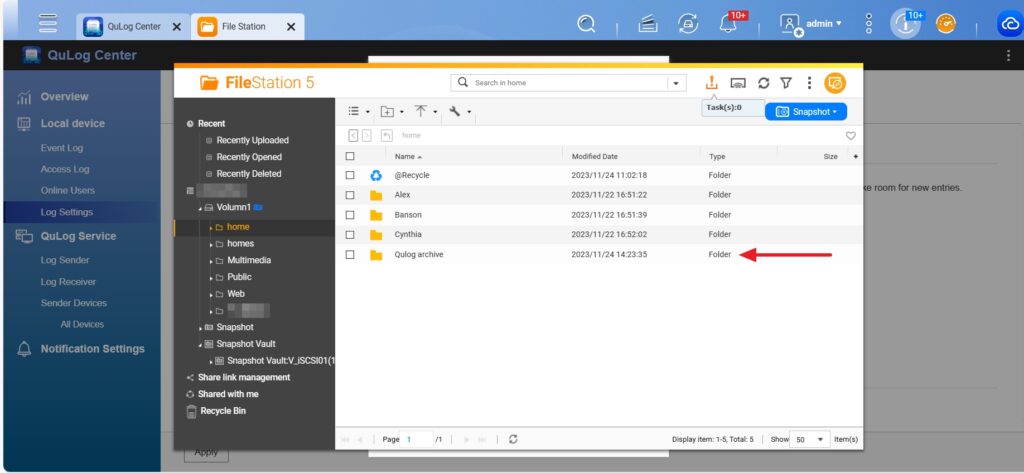
Store the log files in QuLog archive
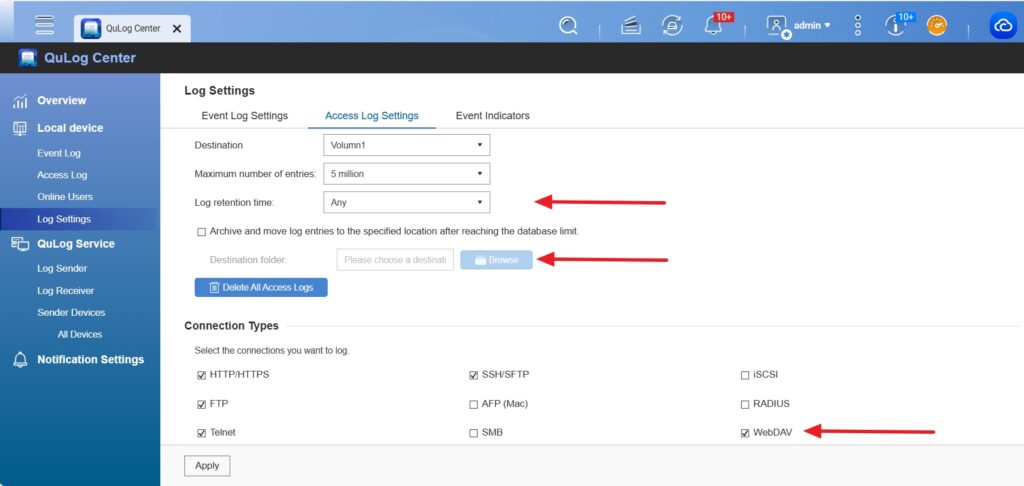
Details of log setting
Optional: SSL certificate
SSL certificates are sold separately and can be imported from Control Panel→Security.
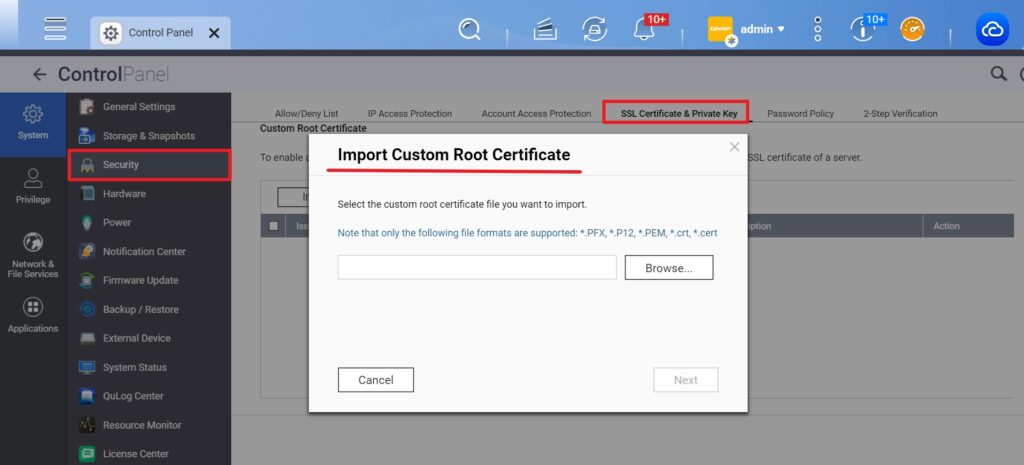
Import the SSL certificate
Receive notifications
You can monitor how your QNAP NAS is working anytime with Qmanager App.
Download Qmanager app on your mobile devices.
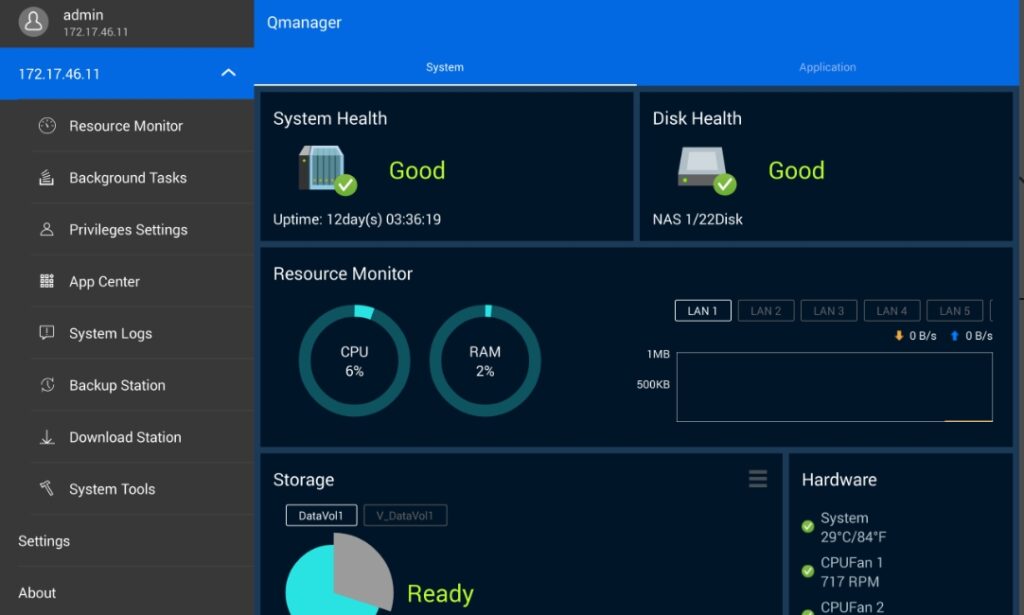
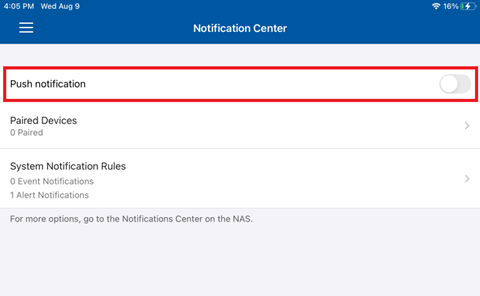
Receive push notifications
You can also use Notification Center on your web browser:
1. Create a notification rule.
2. Choose a delivery method, such as email or via app.
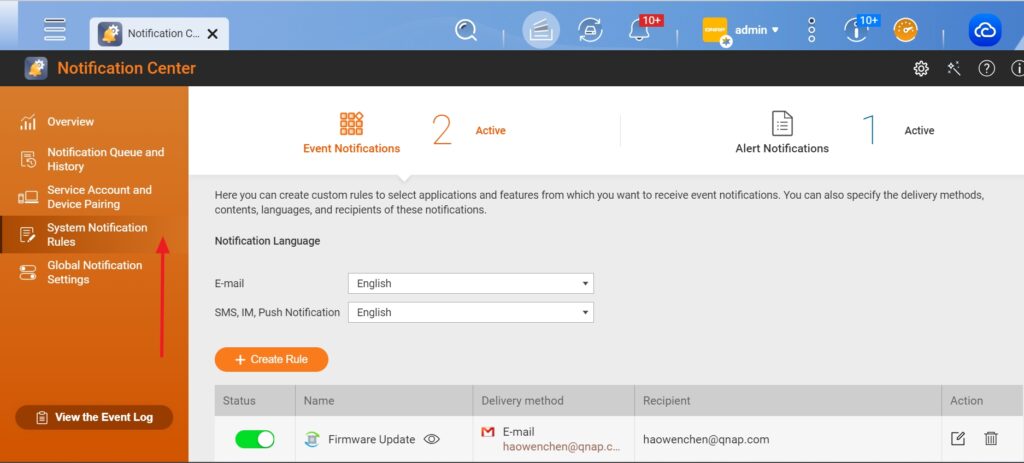
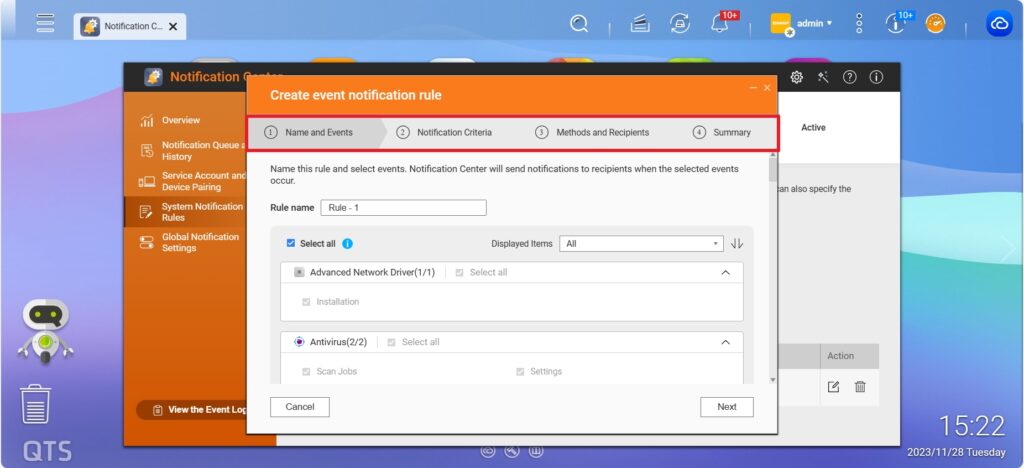
Create notification method
3. Test the notification settings and you can add or change the rule.
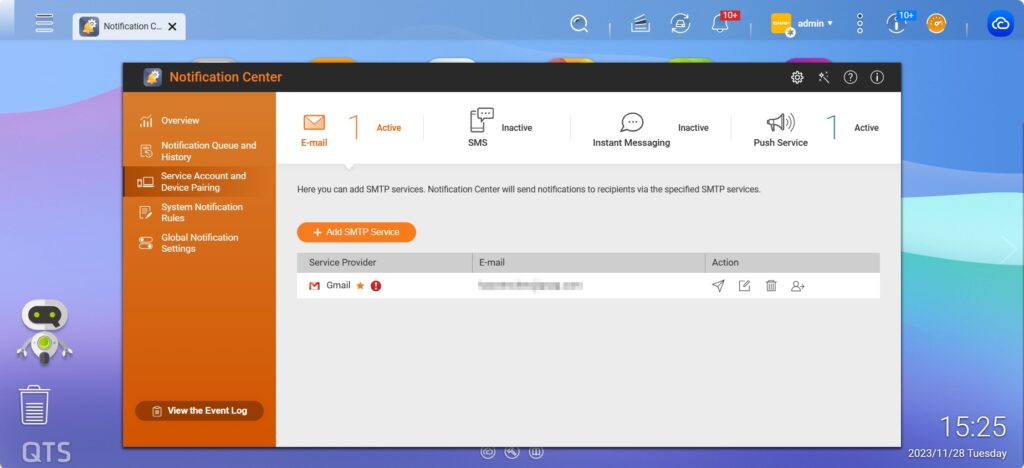
Test the notification settings
Simple Mail Transfer Protocol (SMTP) can be configured for sending email notifications.
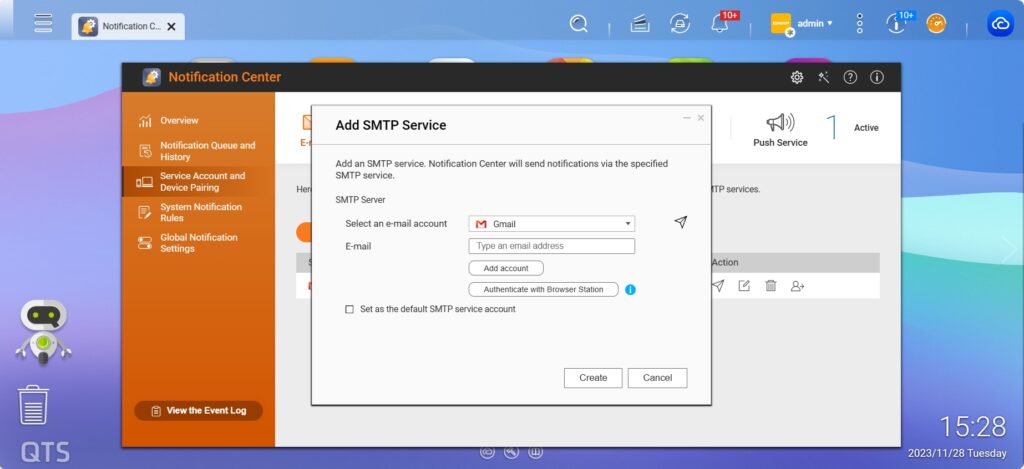
SMTP service
Reset password and 2-step verification
A strong password consisting of upper/lower case letters, numbers, and special characters is highly recommended. You can also enter your email to receive notifications.
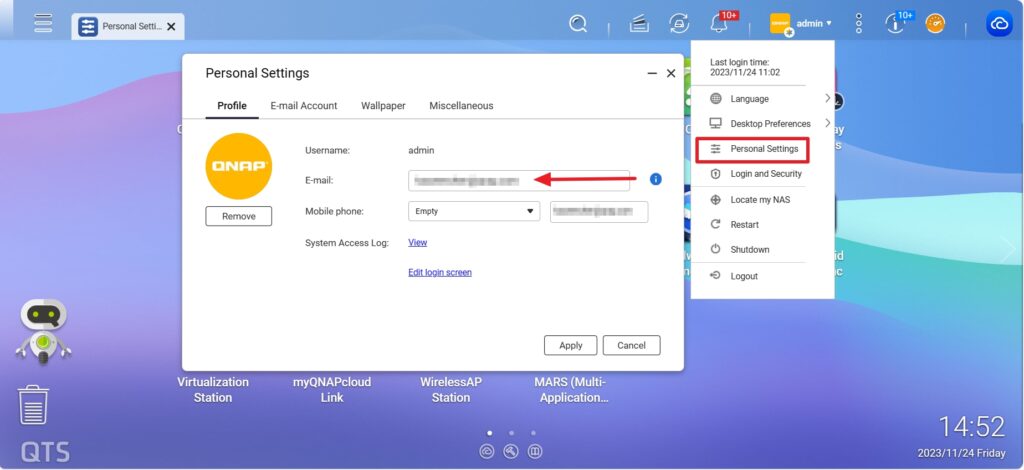
Reset password
Two-step verification is recommended for data security, and I personally prefer Microsoft Authenticator.
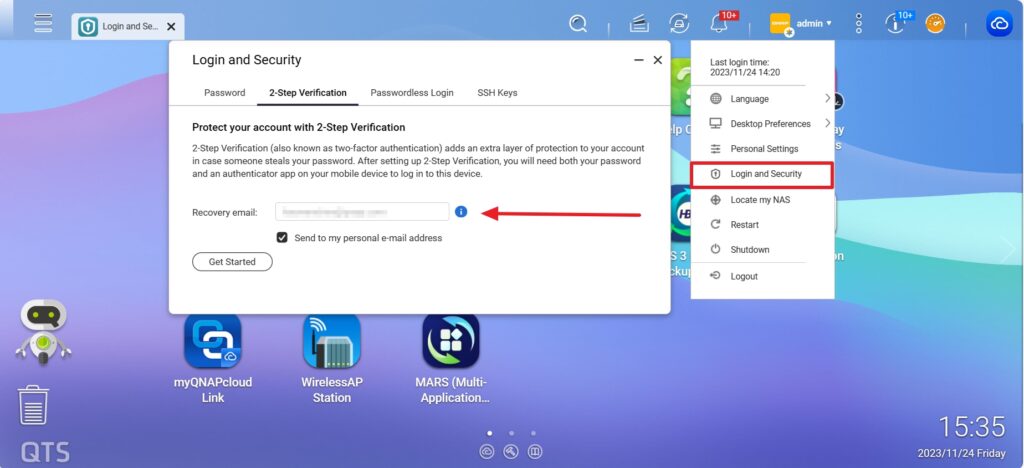
Enable 2-step verification
Enable thumbnails and indexing
Significant system resources may be consumed when searching for specific files stored in your QNAP NAS. Indexing your files can greatly assist in optimizing the resource use of finding and accessing files. Generating thumbnails also helps for at-a-glance identification of multimedia files.
You must download Multimedia Console from the App Center instead of the Control Panel.
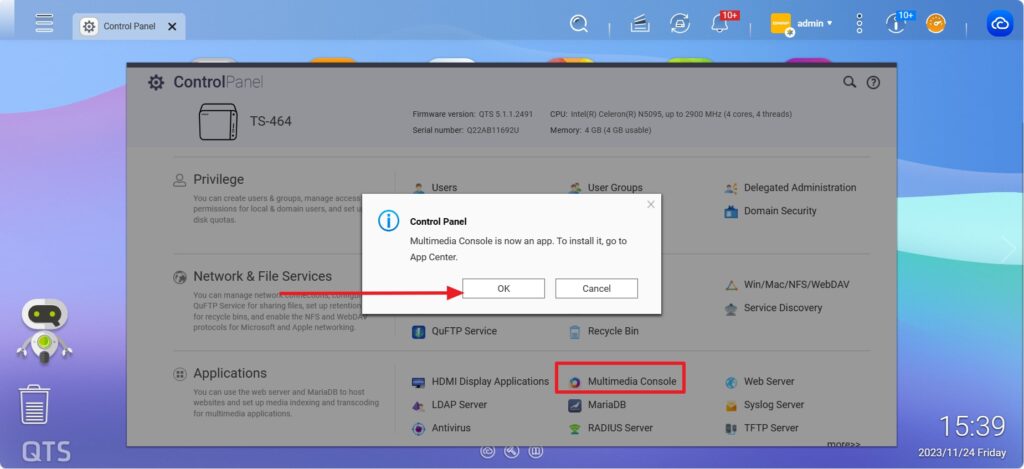
Download notice for Multimedia Console
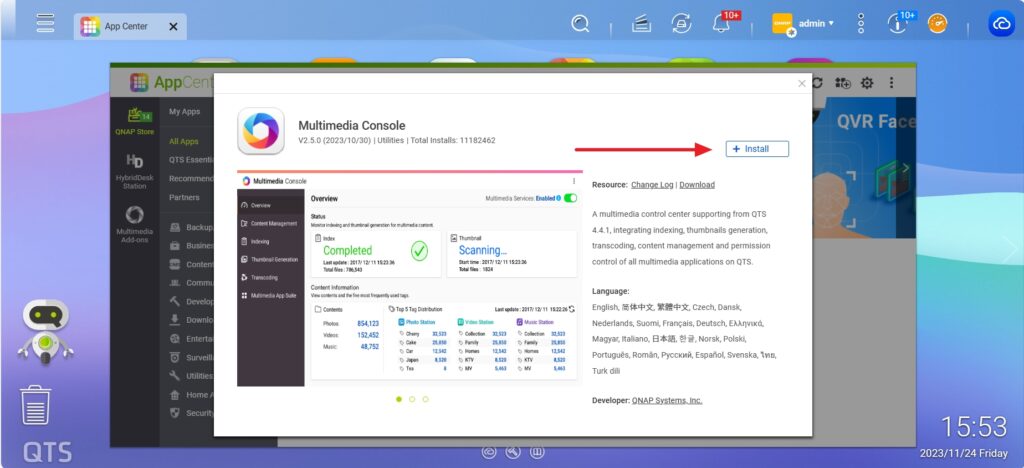
Download Multimedia Console in App Center
Enable thumbnail generation and index.
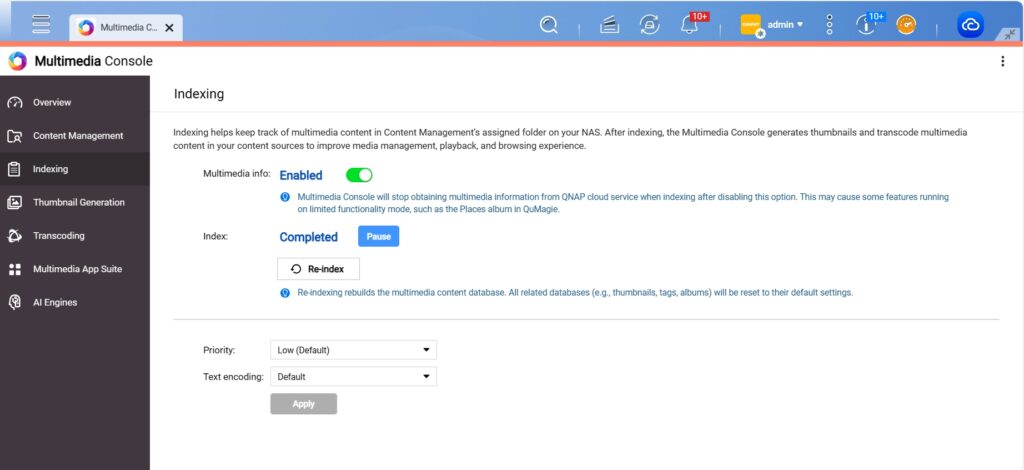
Enable the index
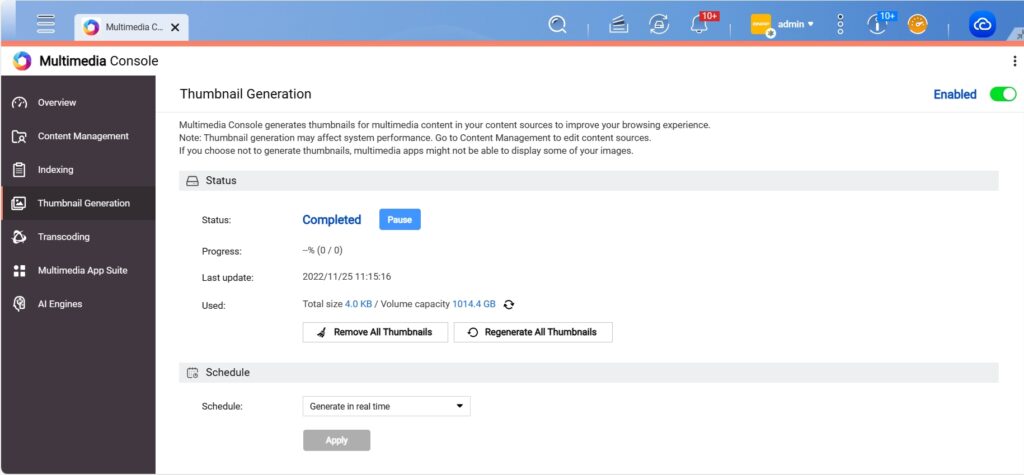
Enable thumbnail generation
The App Center provides install-on-demand apps to extend NAS features.
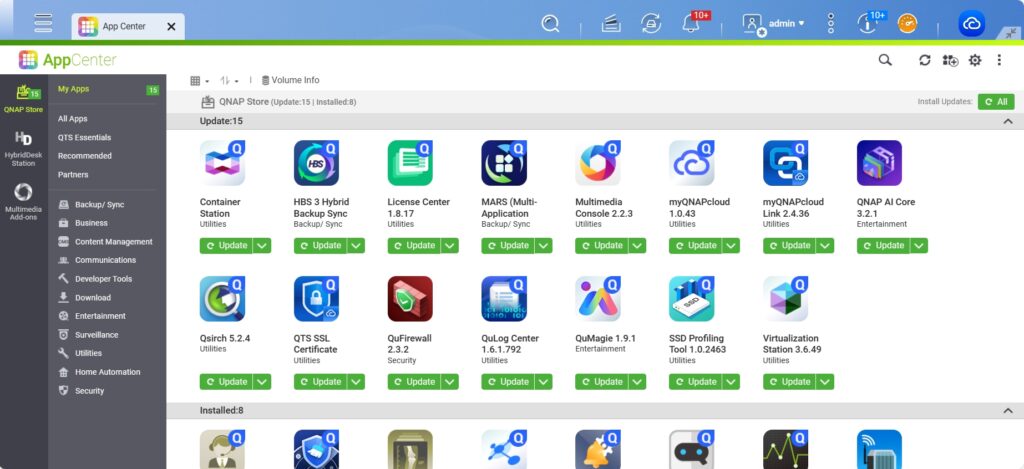
App Center
The above are the 9 settings recommended to kick off your new QNAP NAS. Hope you find it useful.
( Sourced and translated from: https://mp.weixin.qq.com/s?__biz=Mzg5Nzc1ODE1MQ==&mid=2247491633&idx=1&sn=3247f669eb361ca2bdaac74c2f843a05&chksm=c06e4699f719cf8fd393bf329d8094b3004c2d72b595afb3e3028715834f7bdb0381533af8b2&scene=178&cur_album_id=2454793680734846977#rd )