Categories
Blog posts about QNAP's products and technologies.
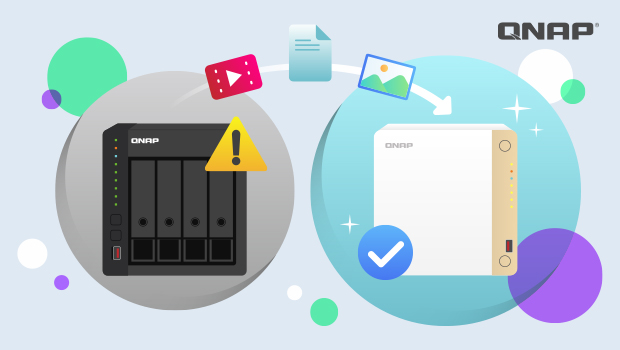
Have you ever run into this?
One day, you try to access your NAS, but it won’t respond. It won’t boot up, and even the hard drives seem unreadable. Your photos, videos, and important work files — all stuck inside. It’s a nightmare.
But even if you’re facing this rare but devastating issue, don’t worry. There’s still a good chance you can migrate your data to a new NAS and keep everything intact. In this article, we’ll walk you through a safe and practical method to rescue your files — even if the original NAS is completely dead.
Whether or not you had a backup, this step-by-step guide will walk you through the recovery process. No technical background needed — we’ll make it easy to understand and follow.
Just because your NAS failed doesn’t mean your data is gone forever.
All you need is another NAS that works — it will become the “new home” for your data.
Why? Because we’ll use one of two recovery methods:
Either way, you’ll need a functioning NAS to proceed.
Before you start, check the following:
A common question we hear:
I didn’t back up my drives — is all my data lost?
Not necessarily!
If your old NAS is broken but the hard drives are intact, just follow these steps to safely migrate your data:
Step-by-Step Guide:
Step 1: Check if your new NAS supports system migration
Step 2: Update the new NAS firmware

Step 3: Power off and remove the drives from the old NAS
Step 4: Install the drives into the new NAS
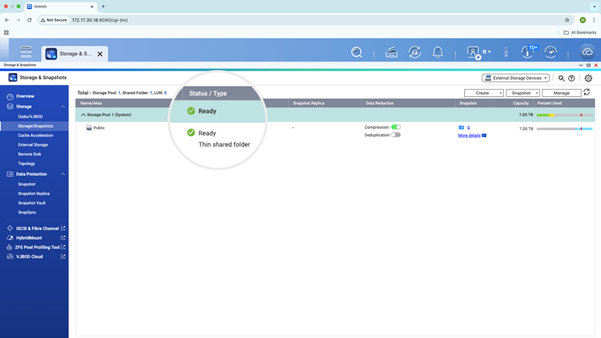
Step 5: Verify that data is intact


Important: If the new NAS shows RAID as “degraded” or cannot detect disks, do not initialize the system. Contact QNAP support immediately
If everything looks good — congratulations! Your data is safely recovered.
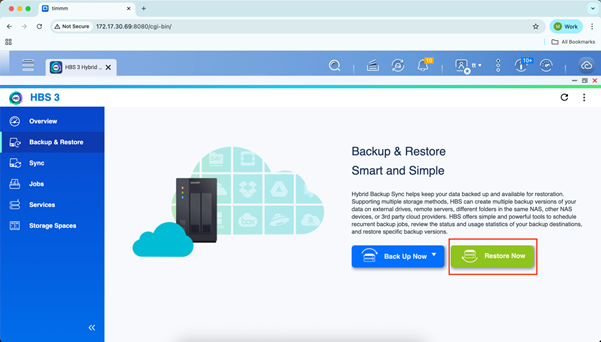
If you’ve previously backed up your data — to a USB drive, cloud, or another NAS — that’s even better.
You can restore everything using QNAP’s Hybrid Backup Sync (HBS) app in just a few steps.
Method 1: Restore from external USB drive
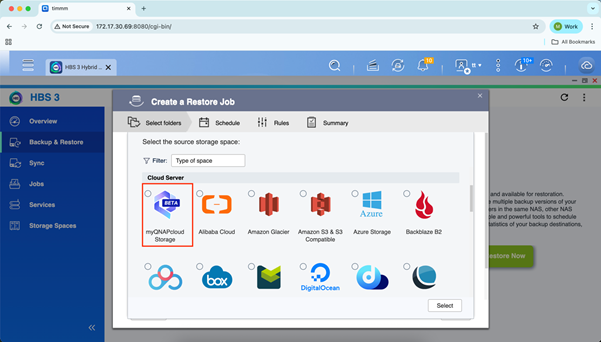
Method 2: Restore from cloud (myQNAPcloud Storage, Google Drive, OneDrive, etc.)
Method 3: Restore from another NAS
After restoration, don’t forget to set up your backup schedule and policies again to prevent future data loss.
A NAS failure is frustrating, but remember:
Data recovery is still possible — and often easier than you think.
By following this guide, whether via direct disk migration or backup restoration, you’ll be able to move your data safely and get back to work.
Final Tip:
Once your NAS is repaired or replaced, set up a proper backup strategy immediately!
We recommend following the 3-2-1 backup rule to protect your data from future risks.
If you’re unsure about any step, feel free to contact QNAP Support or leave a comment.
Don’t forget to save this guide — it could be a lifesaver when you least expect it.