Categories

Blog posts about QNAP's products and technologies.
It’s a busy day, you are overwhelmed by work, your fingers are tapping on the keyboard madly. Then, all of a sudden, the screen flashed and garbled texts, white characters on a blue background, emerged from nowhere, and the computer rebooted, and then stuck mid-way, with warning messages that the system needs to be repaired, then booted again, as if being trapped in a loop, or worse still, you cannot even find your hard disk in the BIOS, as if it has suddenly evaporated, into thin air, into the internals of the computer. Alas, your precious data, your hard work, all gone, all gone! without a trace!
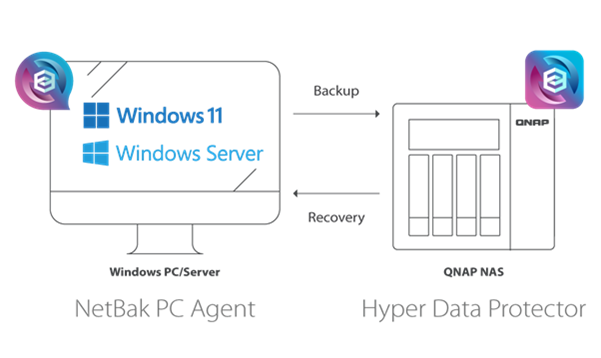
NetBak PC Agent is a powerful Windows system backup tool. In addition to downloading and installing it on a Windows PC/server, before using it, make sure that the QNAP NAS user account is an administrator account, and QNAP NAS has Hyper Data Protector 2.0 (or later version) installed. If you intend to use a USB boot disk for system restoration, please first use a USB drive with at least 1GB of space to create the boot disk. It is recommended to do this immediately after completing the first backup to ensure that the system can be restored at any time.
Compared to traditional hard disk drives (HDD), solid disk drive (SSD) is considered by most users to be a better performing storage solution due to their faster read/write speeds, lower power consumption, compactness, and enhanced durability, especially when used as the operating system drive. Once an user has seen the advantages of SSD, basically there’s no way for the user to go back to using traditional HDDs anymore.
But SSDs are not without their drawbacks, such as: generally higher cost per unit of storage compared to traditional HDD, smaller storage capacities, limited write endurance, and a potential decrease in performance over time with usage. When an SSD fails, there are often no warning signs or SMART error messages as typically seen with traditional HDDs, it is often a ‘sudden death’ without warning. For the lucky ones, there might still be a chance to have the SSD in a protected read-only mode and there might be a chance to rescue data. For the less fortunate, if it happens that the controller or flash memory chip got damaged, data recovery becomes an almost impossible task.
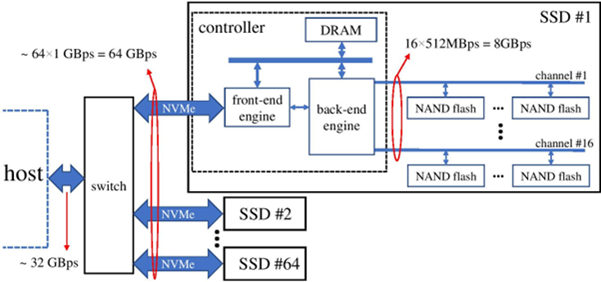
SSDs based on NAND flash memory are thin, shock-resistant, and have superior performance, and SSD’s potential has been unleashed even further by transitioning to the native PCIe NVMe interface. However, compared to traditional HDDs, SSD is more prone to sudden failure without warning, almost impossible to predict, and difficult to recover data. Image source: Wikipedia.
Therefore, with the current widespread use of SSDs, especially for notebooks with only a single SSD drive, regular system backups become an increasingly pressing necessity. It is generally recommended that users perform a system backup immediately after unboxing a new laptop to avoid unforeseen circumstances, allowing for a quick restoration of the system without the time-consuming task of reinstalling the operating system, drivers, and applications. Regular backups should be performed thereafter to ensure that no valuable files and data are lost. This is not limited to laptops and SSDs; desktops and servers also require regular backups.
For users of the Windows operating system, not everyone has specialized backup software readily available, so the ‘free’ built-in simple system backup tool in Windows (which started back from Windows 7, showing its “longevity”) becomes a go-to solution. However, its functionality is quite limited, such as lacking compression of backup files, requiring a large amount of storage space, and the backup time is very long.
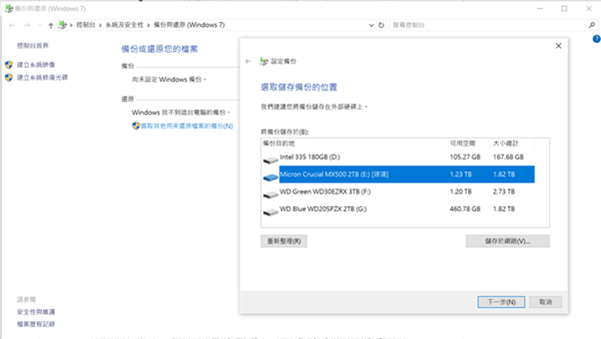
Built-in backup and restore tools in the operating system from Windows 7 are extremely basic, and severely lack flexibility, unable to backup multiple versions in a single storage medium.
What’s more frustrating is that the system backup software built within Windows 10 mainly backs up the system disk (C drive) along with system-related partitions (such as the D drive partitioned by disk), and only creates a single disk image. It cannot restore individual disk partitions, let alone ‘restoration of single file or data folder ‘, and it does not provide a mechanism for multiple version backups. Therefore, when using the same external storage media, each execution of the ‘create system image’ function will overwrite the previous backup and only keep the data from the last backup.
Moreover, not only the tool has limitations, it is also difficult to use. Using the Windows boot disc or installing a portable disc to perform the ‘Repair Your Computer → Troubleshoot → Advanced Options → System Image Recovery’ requires a step-by-step execution that heavily relies on user experience. If one has not practiced restoring from a system backup file regularly, encountering an unexpected issue can easily lead to confusion. Additionally, if an error occurs during the initial creation of the system image file and went unnoticed, it becomes impossible to smoothly restore the system. While there is no lack of third-party system backup software supporting Windows 10, it is a widely accepted practice that when it comes to commercial offerings, ‘free trial version’ has limited functionality, and only the ‘paid full version’ can be fully functional.
When you own a QNAP x86 platform NAS, these backup problems are easily solved. QNAP recently launched a new backup feature, NetBak PC Agent, which can back up the operating system and data on personal computers or servers with just a few clicks. Users can complete QNAP NAS connection settings and create backup tasks on their Windows devices, and then manually or automatically back up to NAS as needed through Hyper Data Protector (HDP). Even if the operating system is damaged and cannot operate normally, you can also use NetBak PC Agent to create a USB boot disk, and then restore the entire system. NetBak PC Agent also supports restoration without shutting-down to make it more flexible.
More importantly, by integrating NetBak PC Agent and HDP, not only does it backup data through ‘Synthetic Incremental (only backing up the changed parts afterwards)’ which significantly saves storage space, it also speeds up future restore speeds (restore only needs to use the original backup, combined with specific time synthetic incremental backups), with three different levels of backup and restore : restoring all disk partitions of the device, only restoring the operating system partition, and individual files and folders. In terms of functionality, performance, and efficiency, it far surpasses general backup software, and is even free for QNAP users.
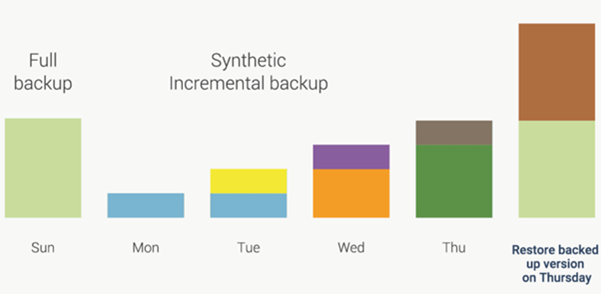
Synthetic Incremental backup not only significantly reduces the storage space for backups, but also accelerates restore, especially when it is necessary to restore to a specific date.
Usage environment:
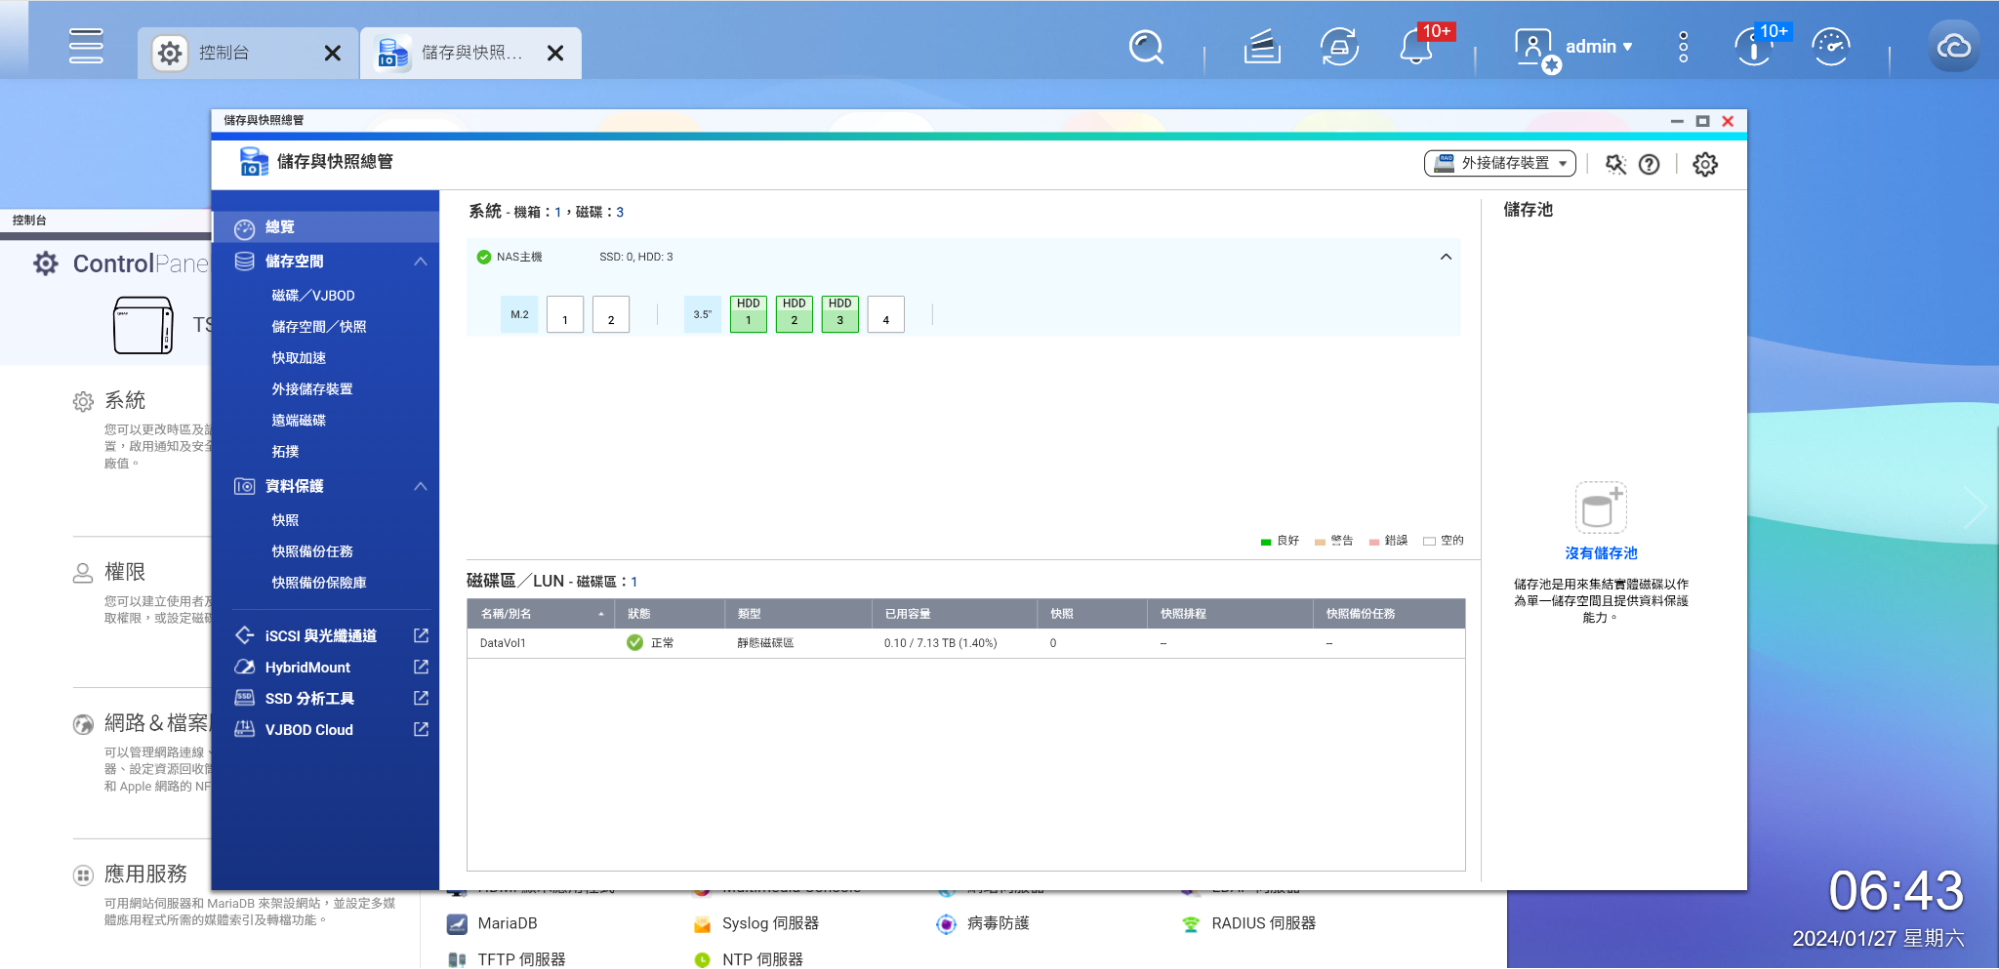
Use the system with three Seagate IronWolf 4TB hard drives to form a RAID 5 disk area with an effective capacity of 7.15TB.
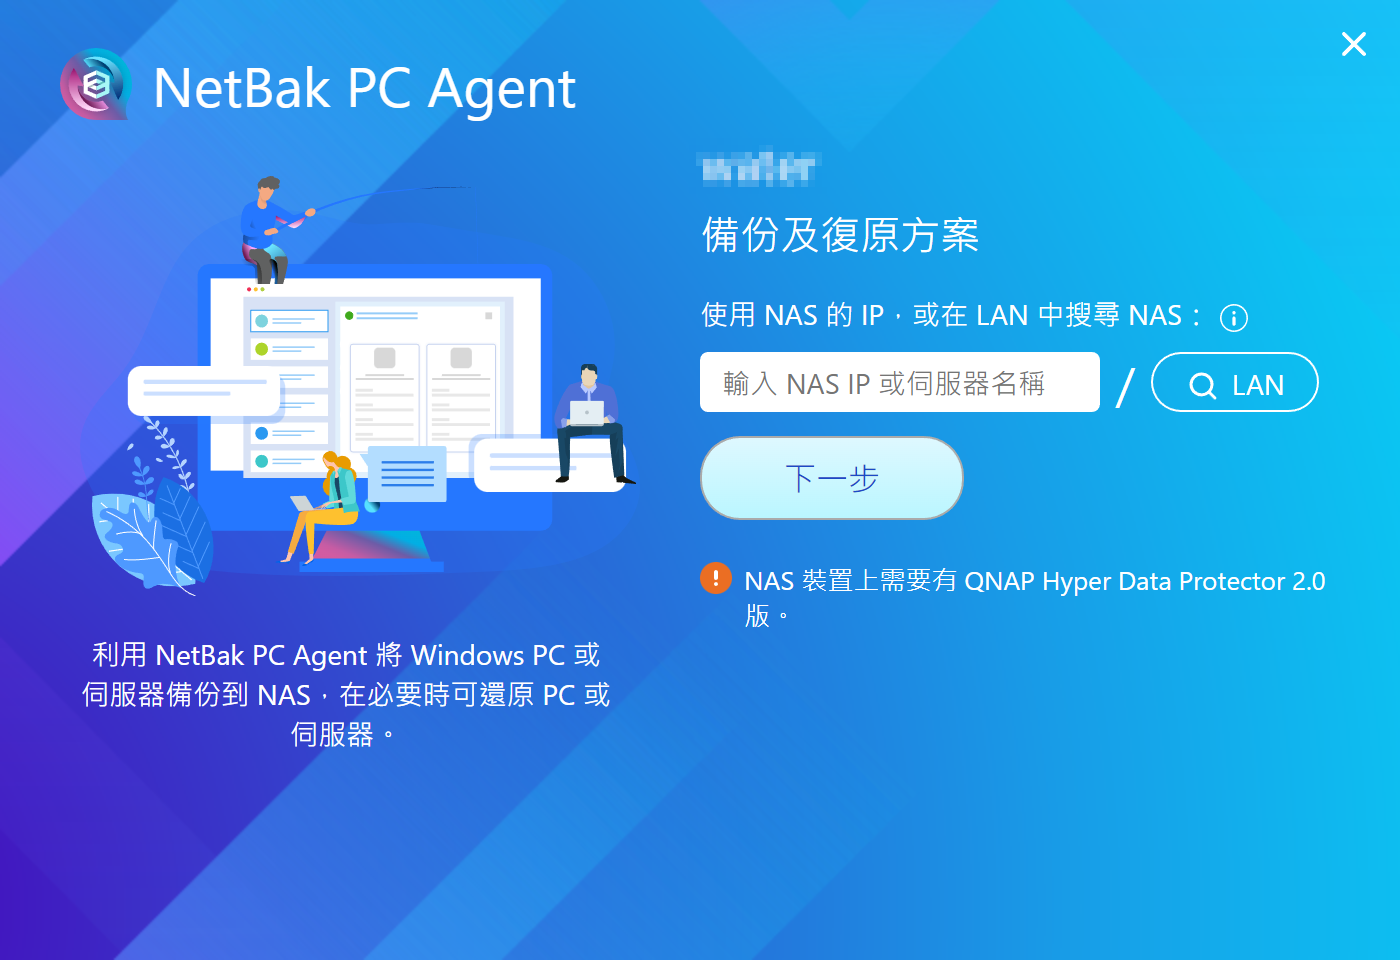
Install and launch NetBak PC Agent on Windows PCs.
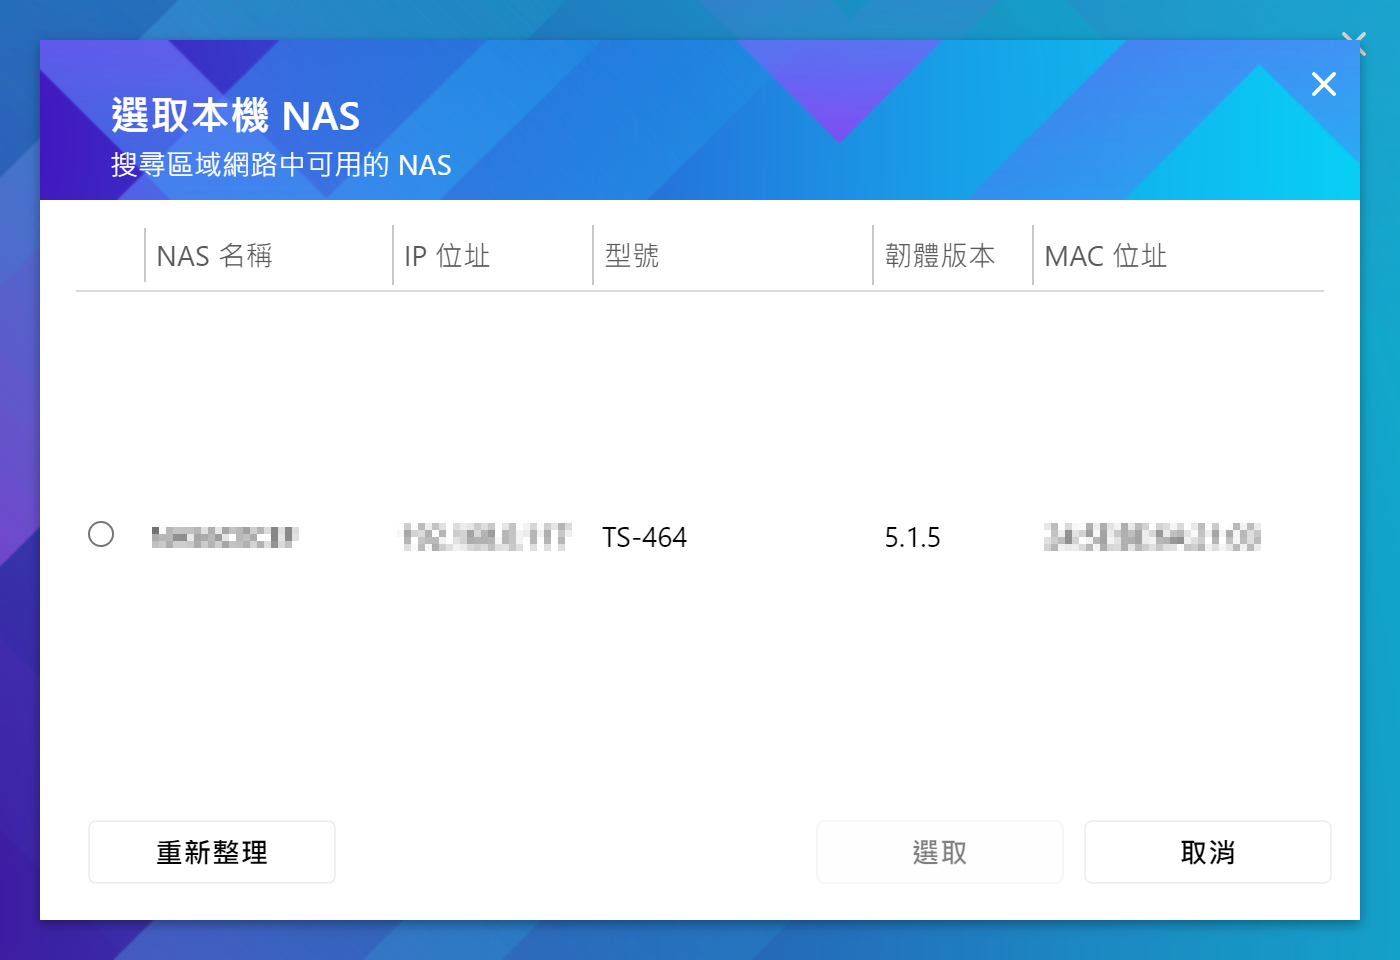
If you are unsure of the IP address or name of NAS, search in the LAN to find the NAS for backup.
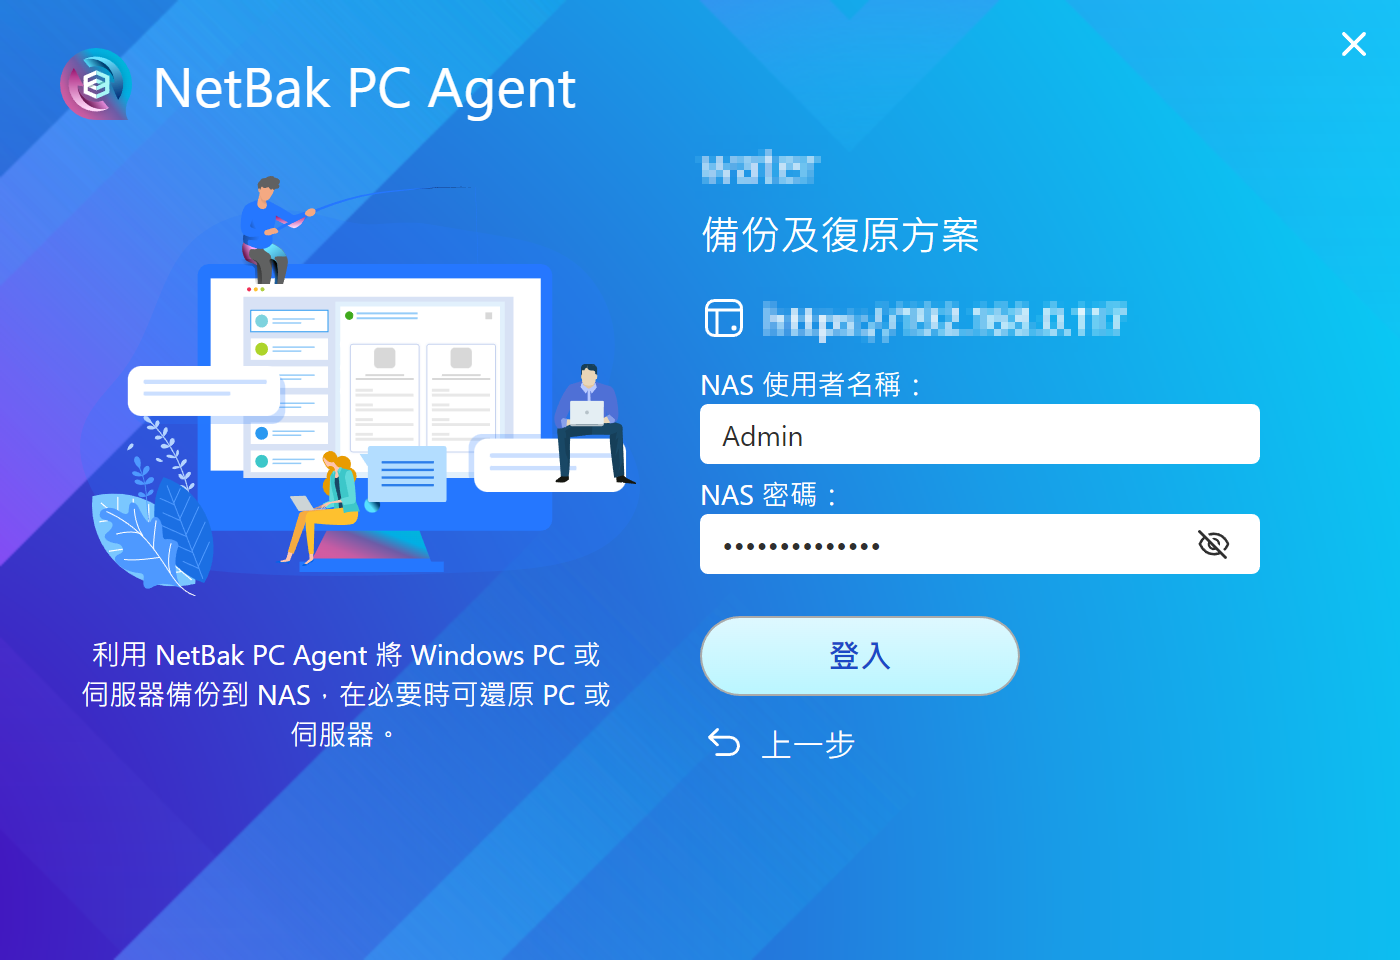
After logging into NAS with NetBak PC Agent, an HDP details directory is automatically created.
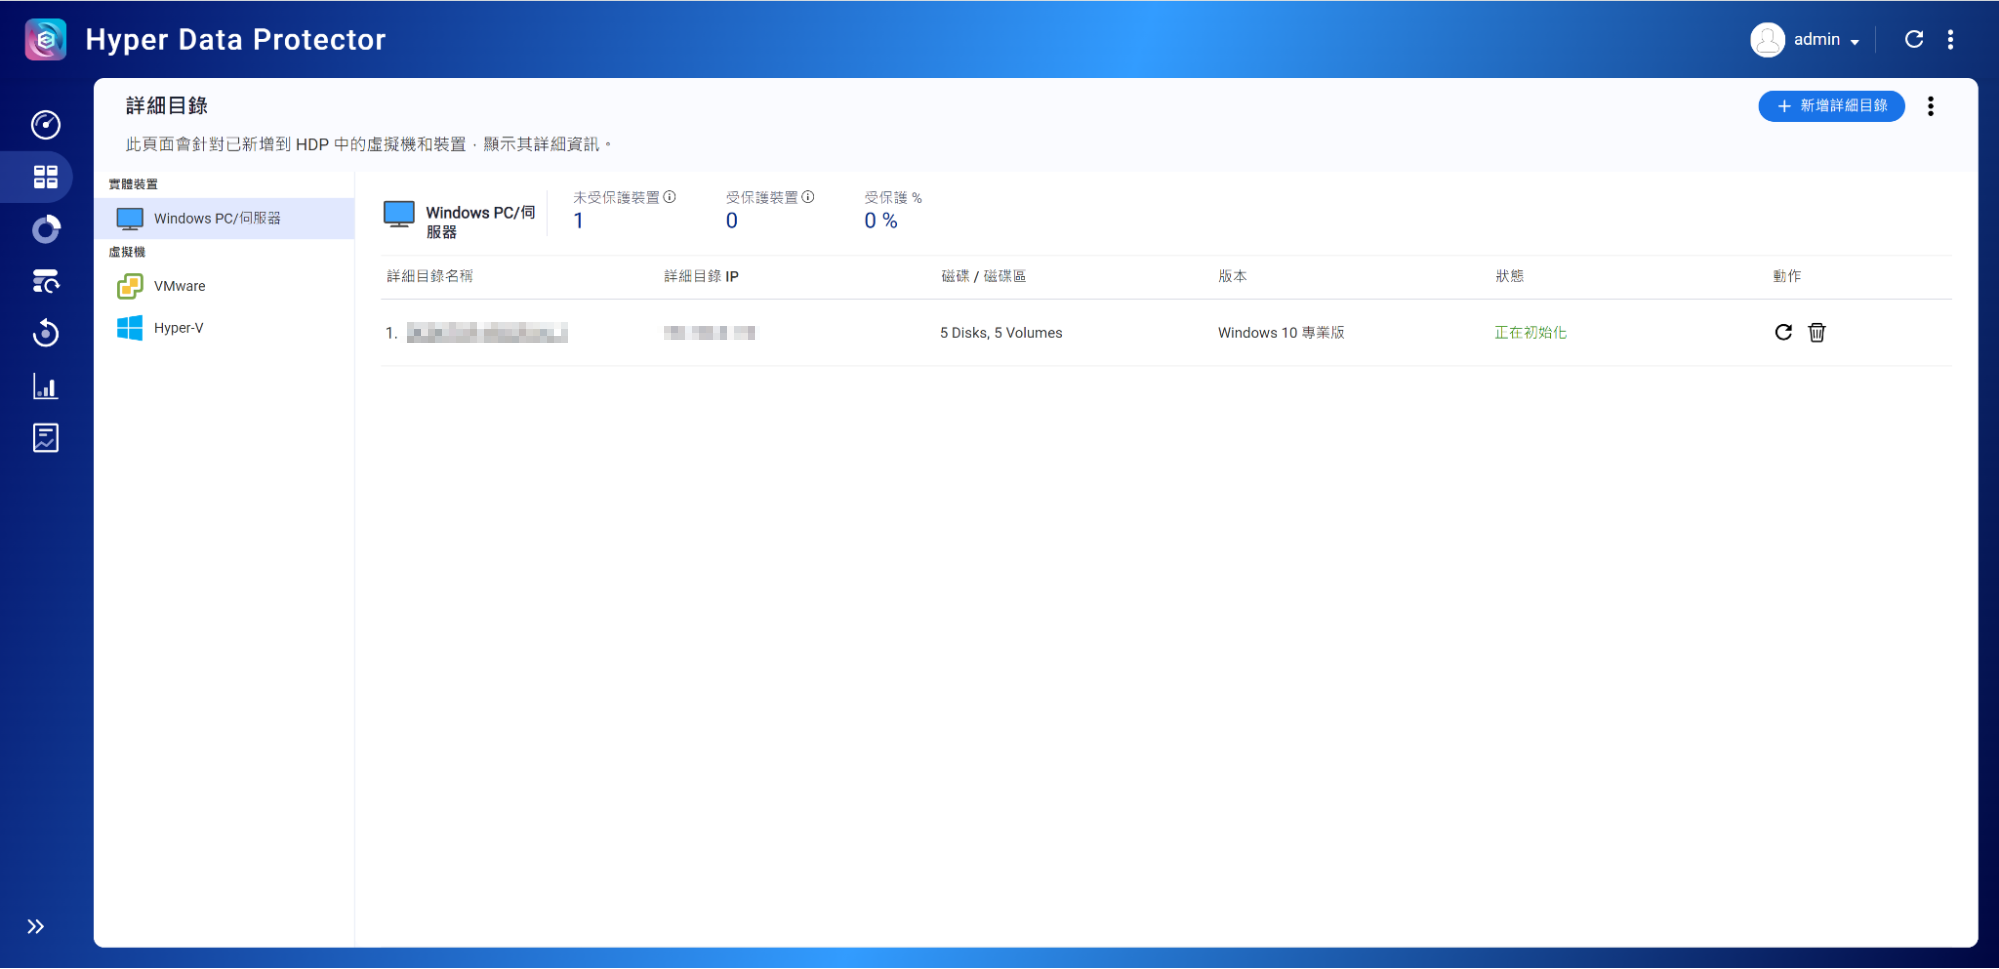
Now, in App Center of NAS, open HDP or use the ‘Open Hyper Data Protector’ at the bottom right of NetBak PC Agent to see the initialization process.
Create a repository on NAS as the location for backing up storage data.
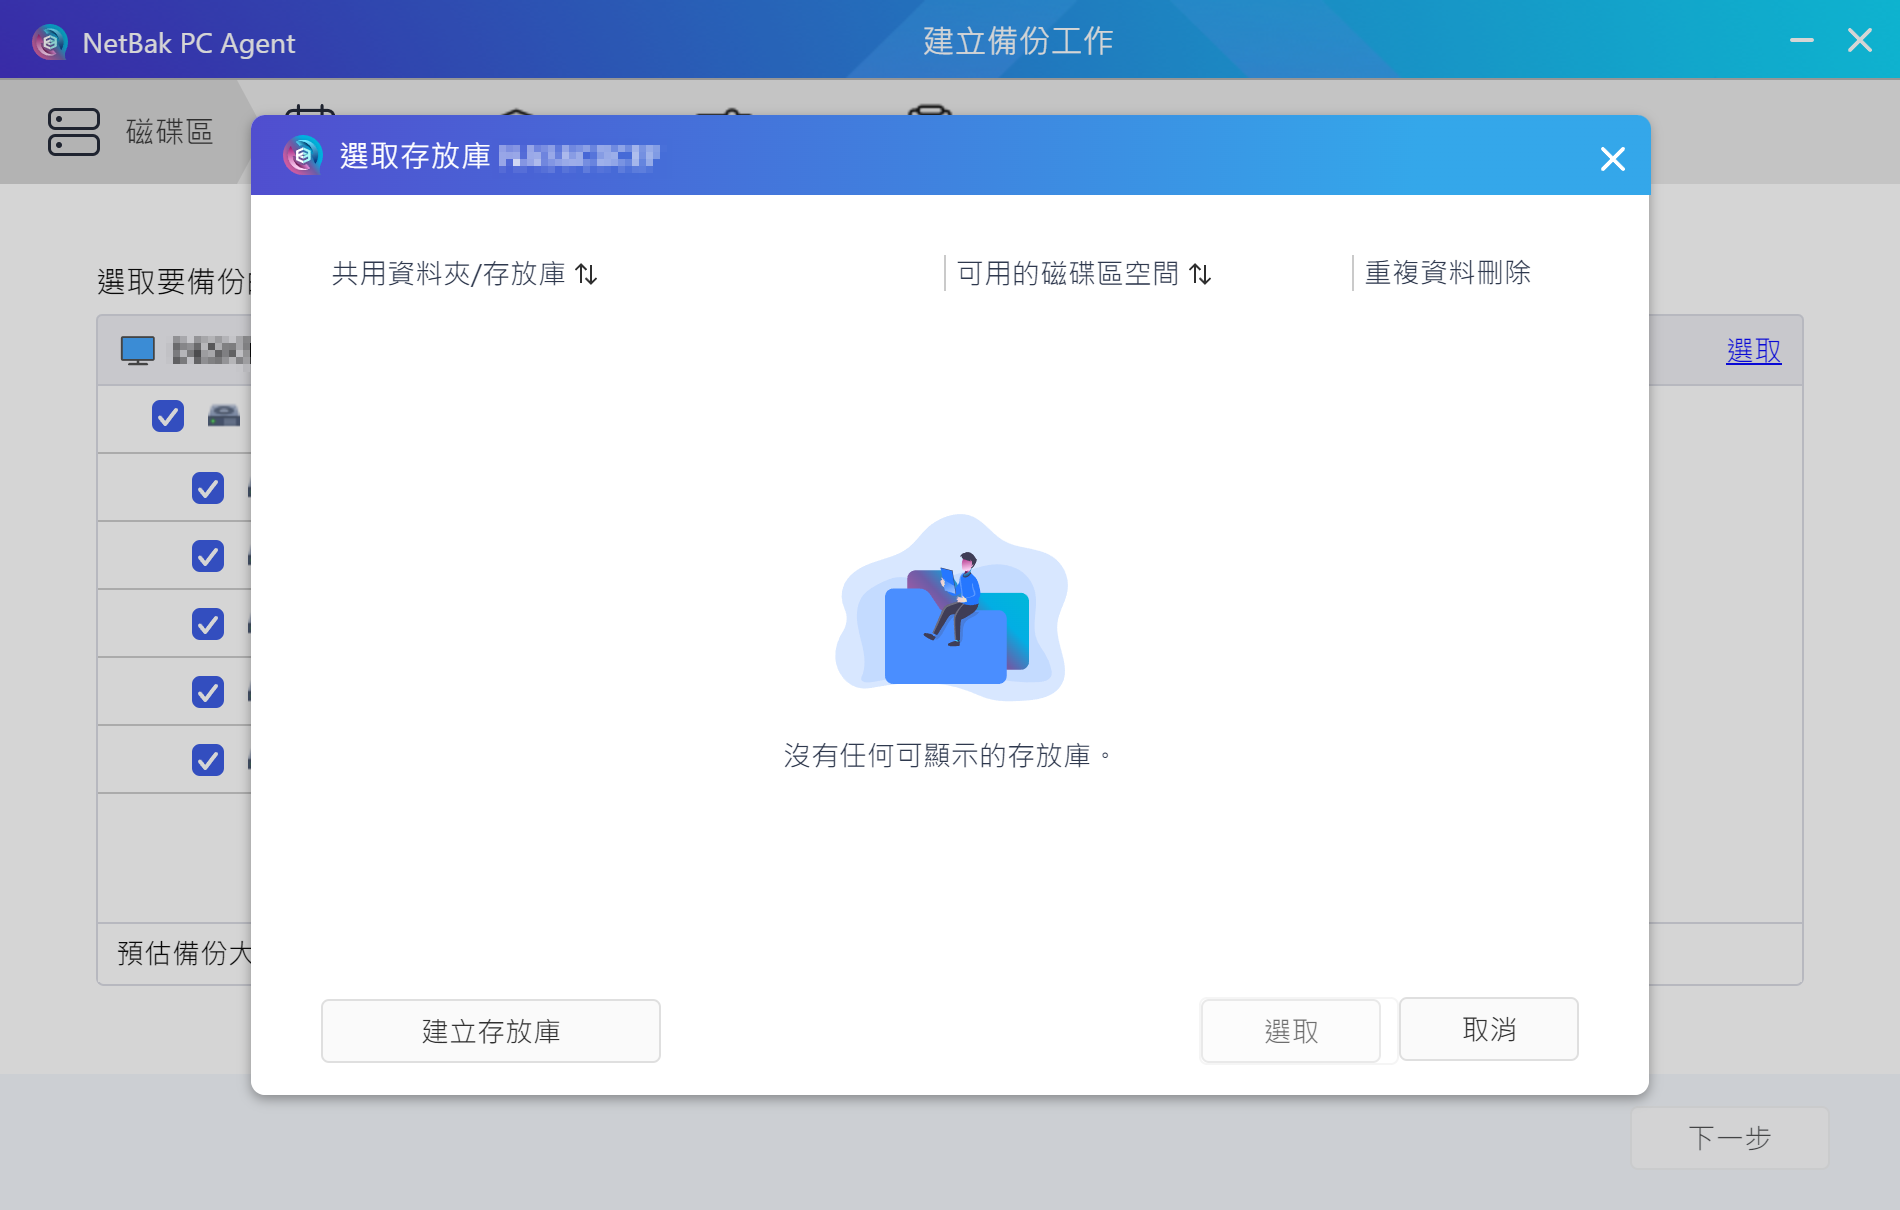
There is currently no repository, it must be created manually.
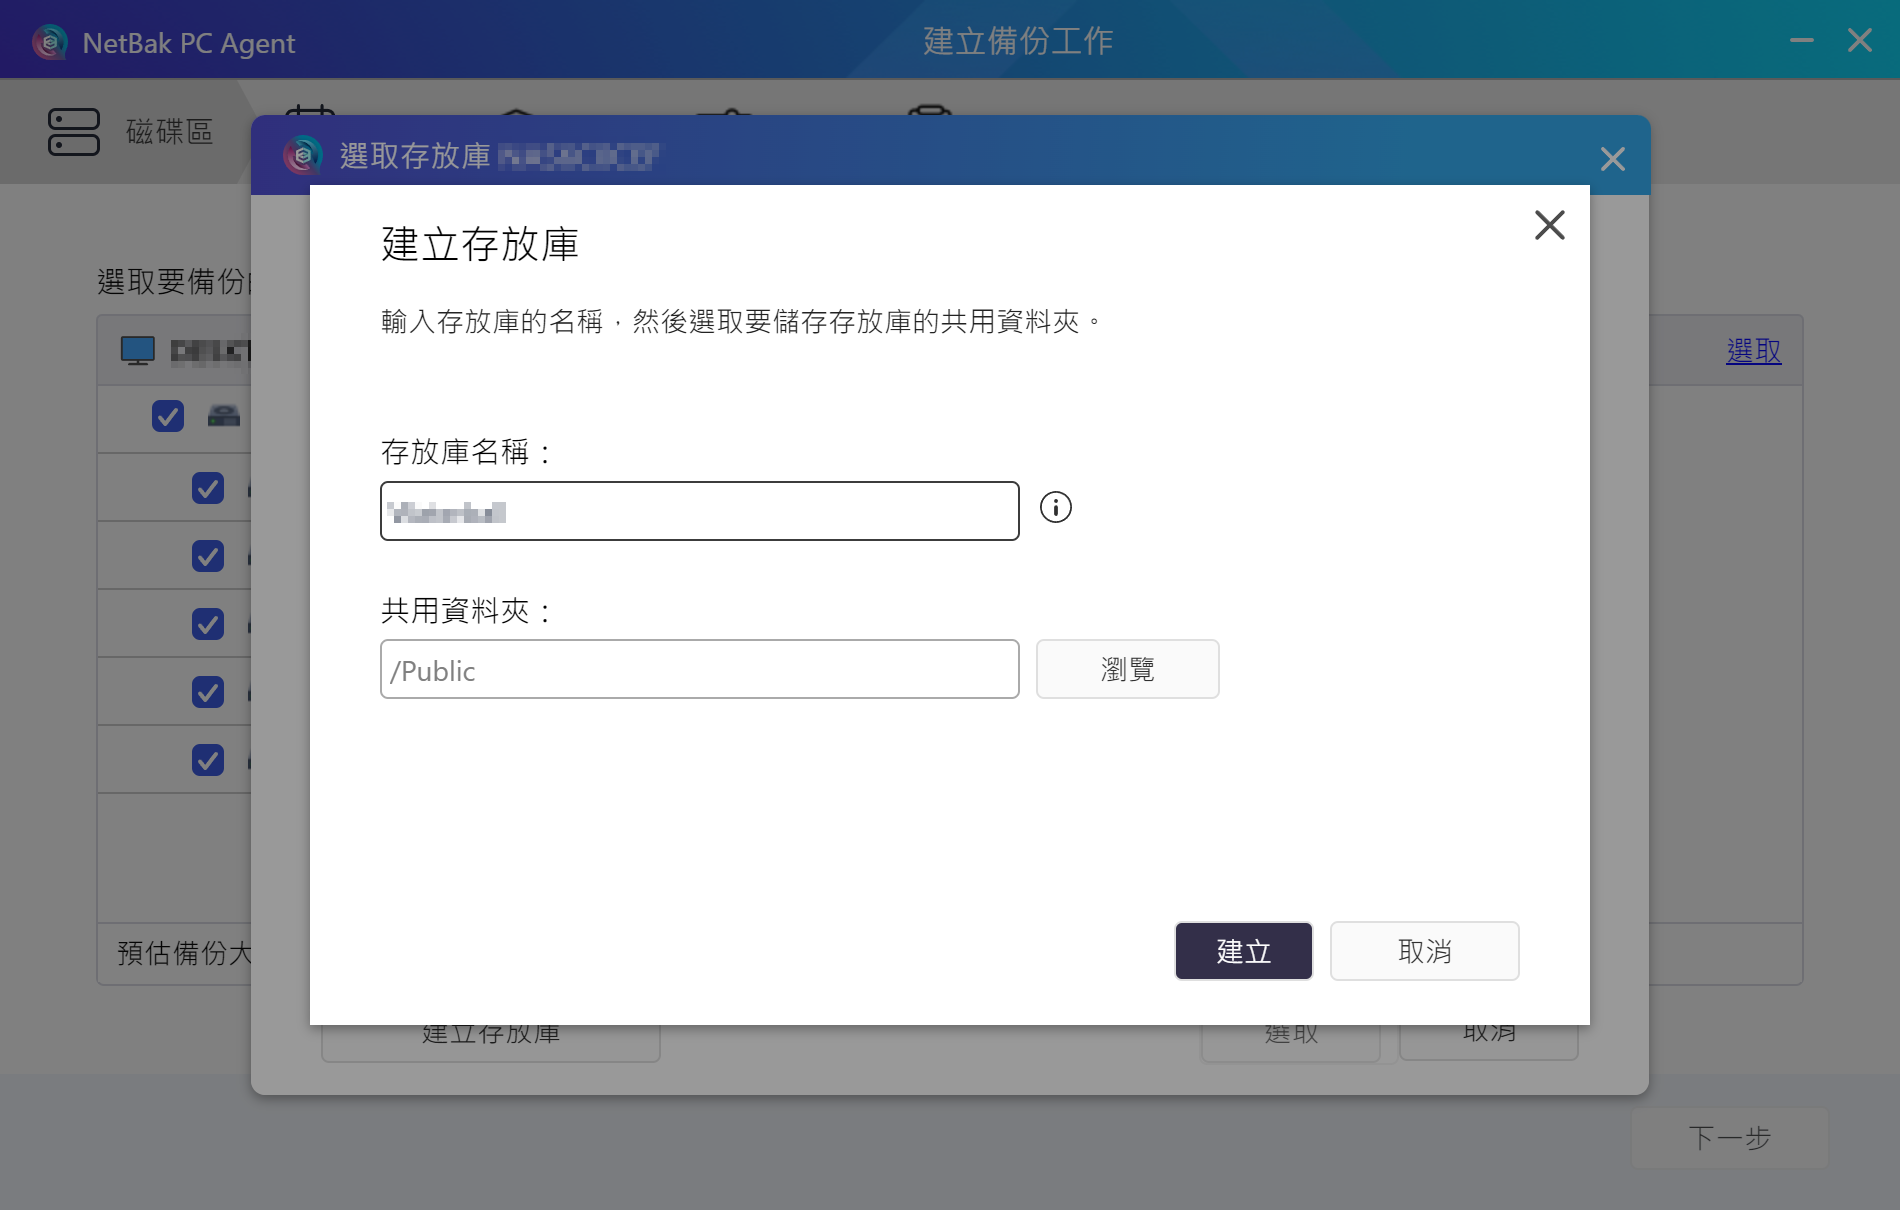
Enter the name of the repository and the shared data folder.
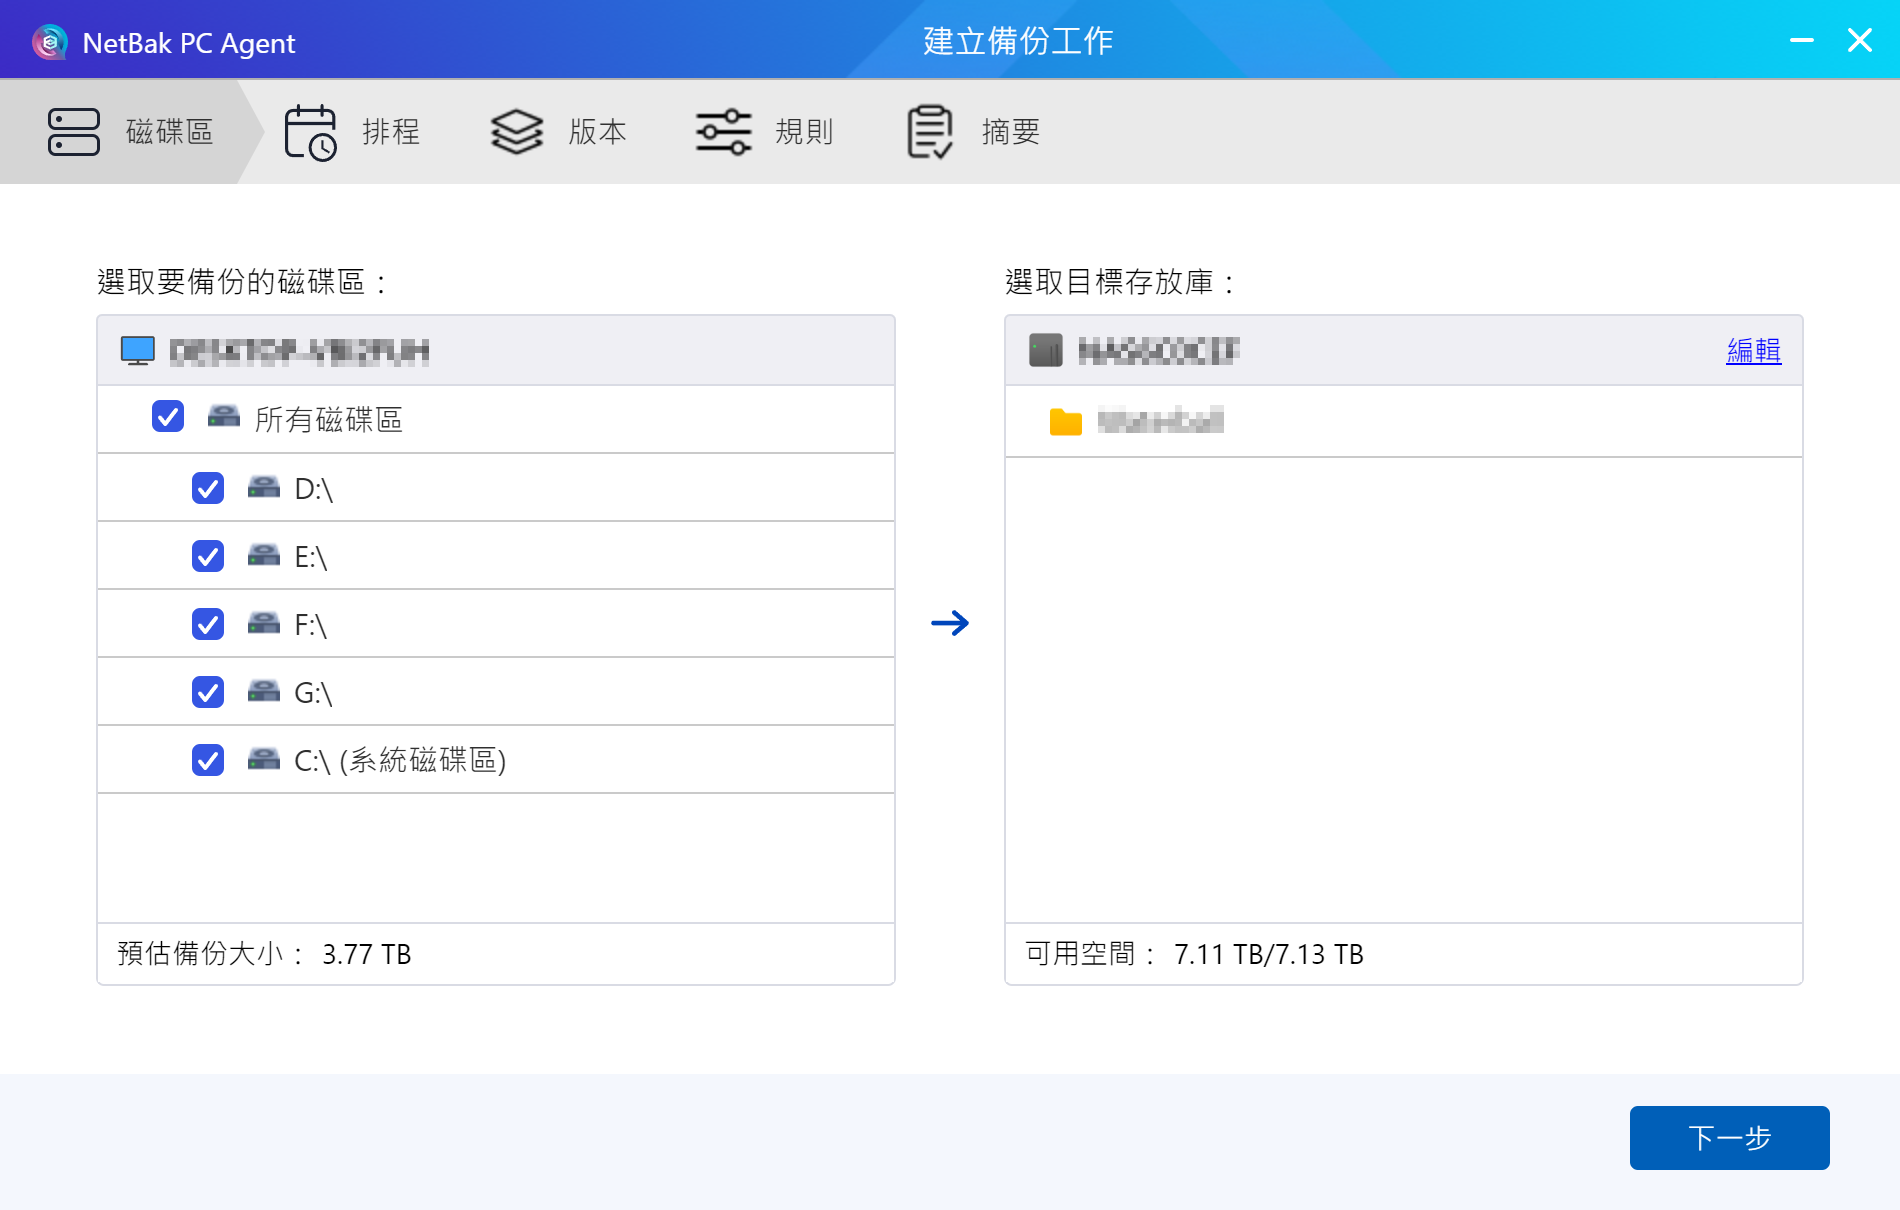
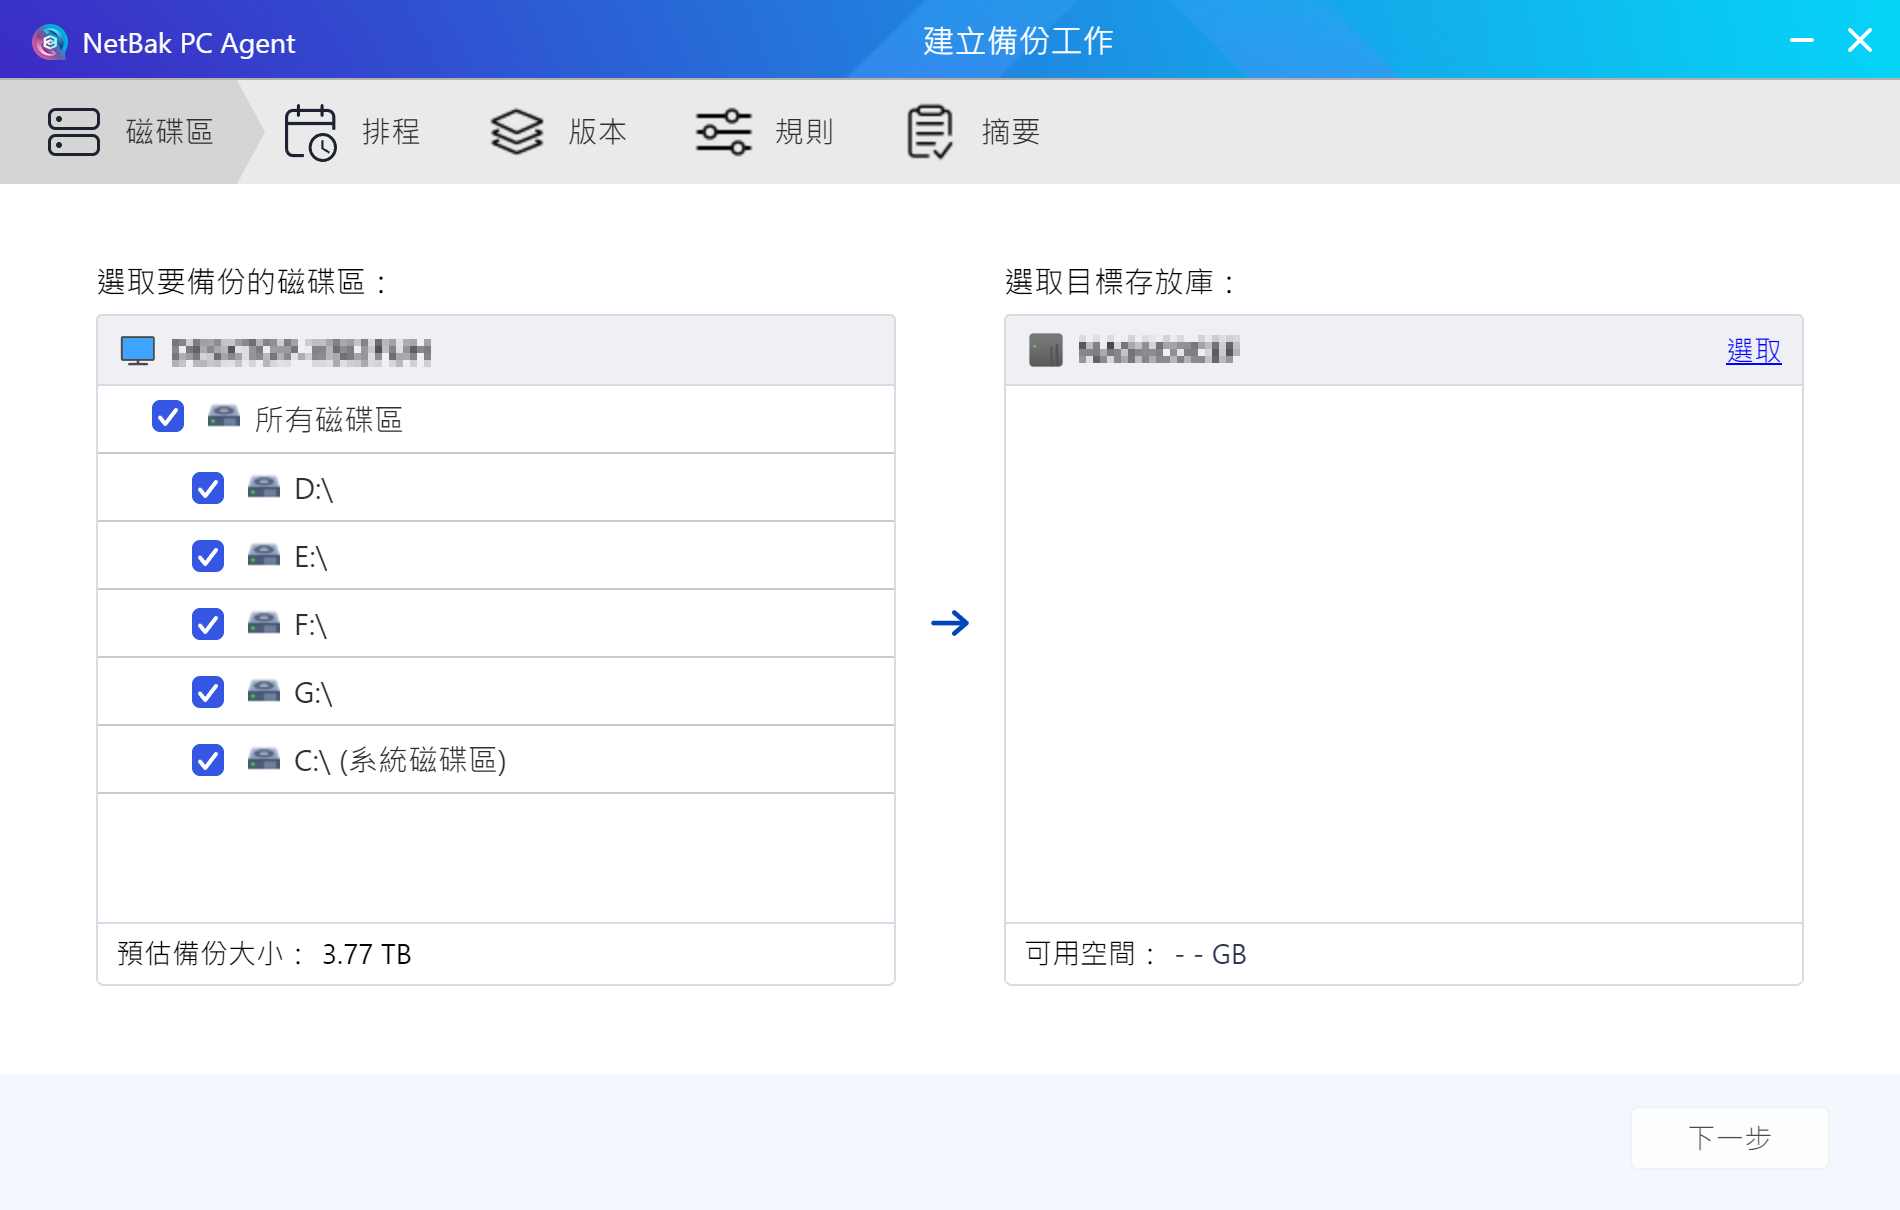
Choose the disk partitions that need to be backed up. Please note that the disk partitions to be backed up must retain a minimum of 5% free space, otherwise, the backup will fail.
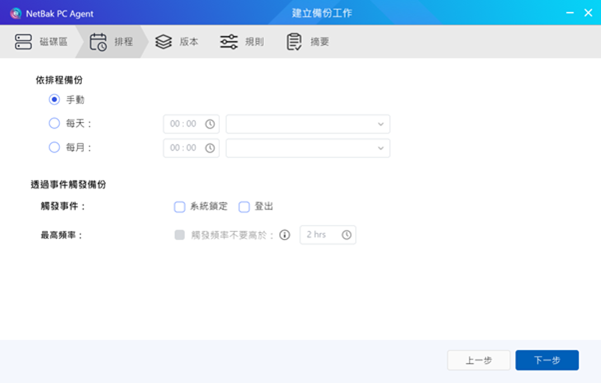
Setting up a backup schedule allows you to choose to manually execute, automatically execute daily or monthly, or execute after triggering certain system events.
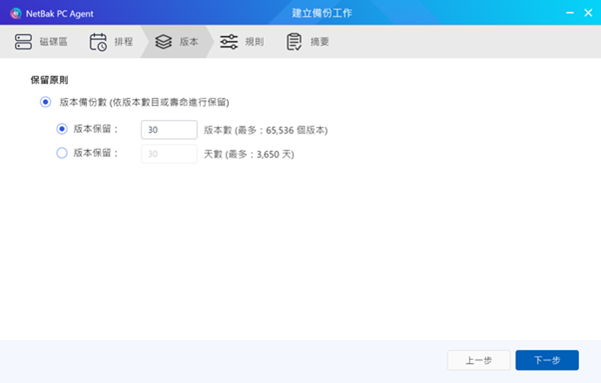
Specify the number of backup versions to be stored in the repository. When restoring a PC/server, select one of the backup versions, up to 65536 versions can be stored, or for a maximum period of ten years.
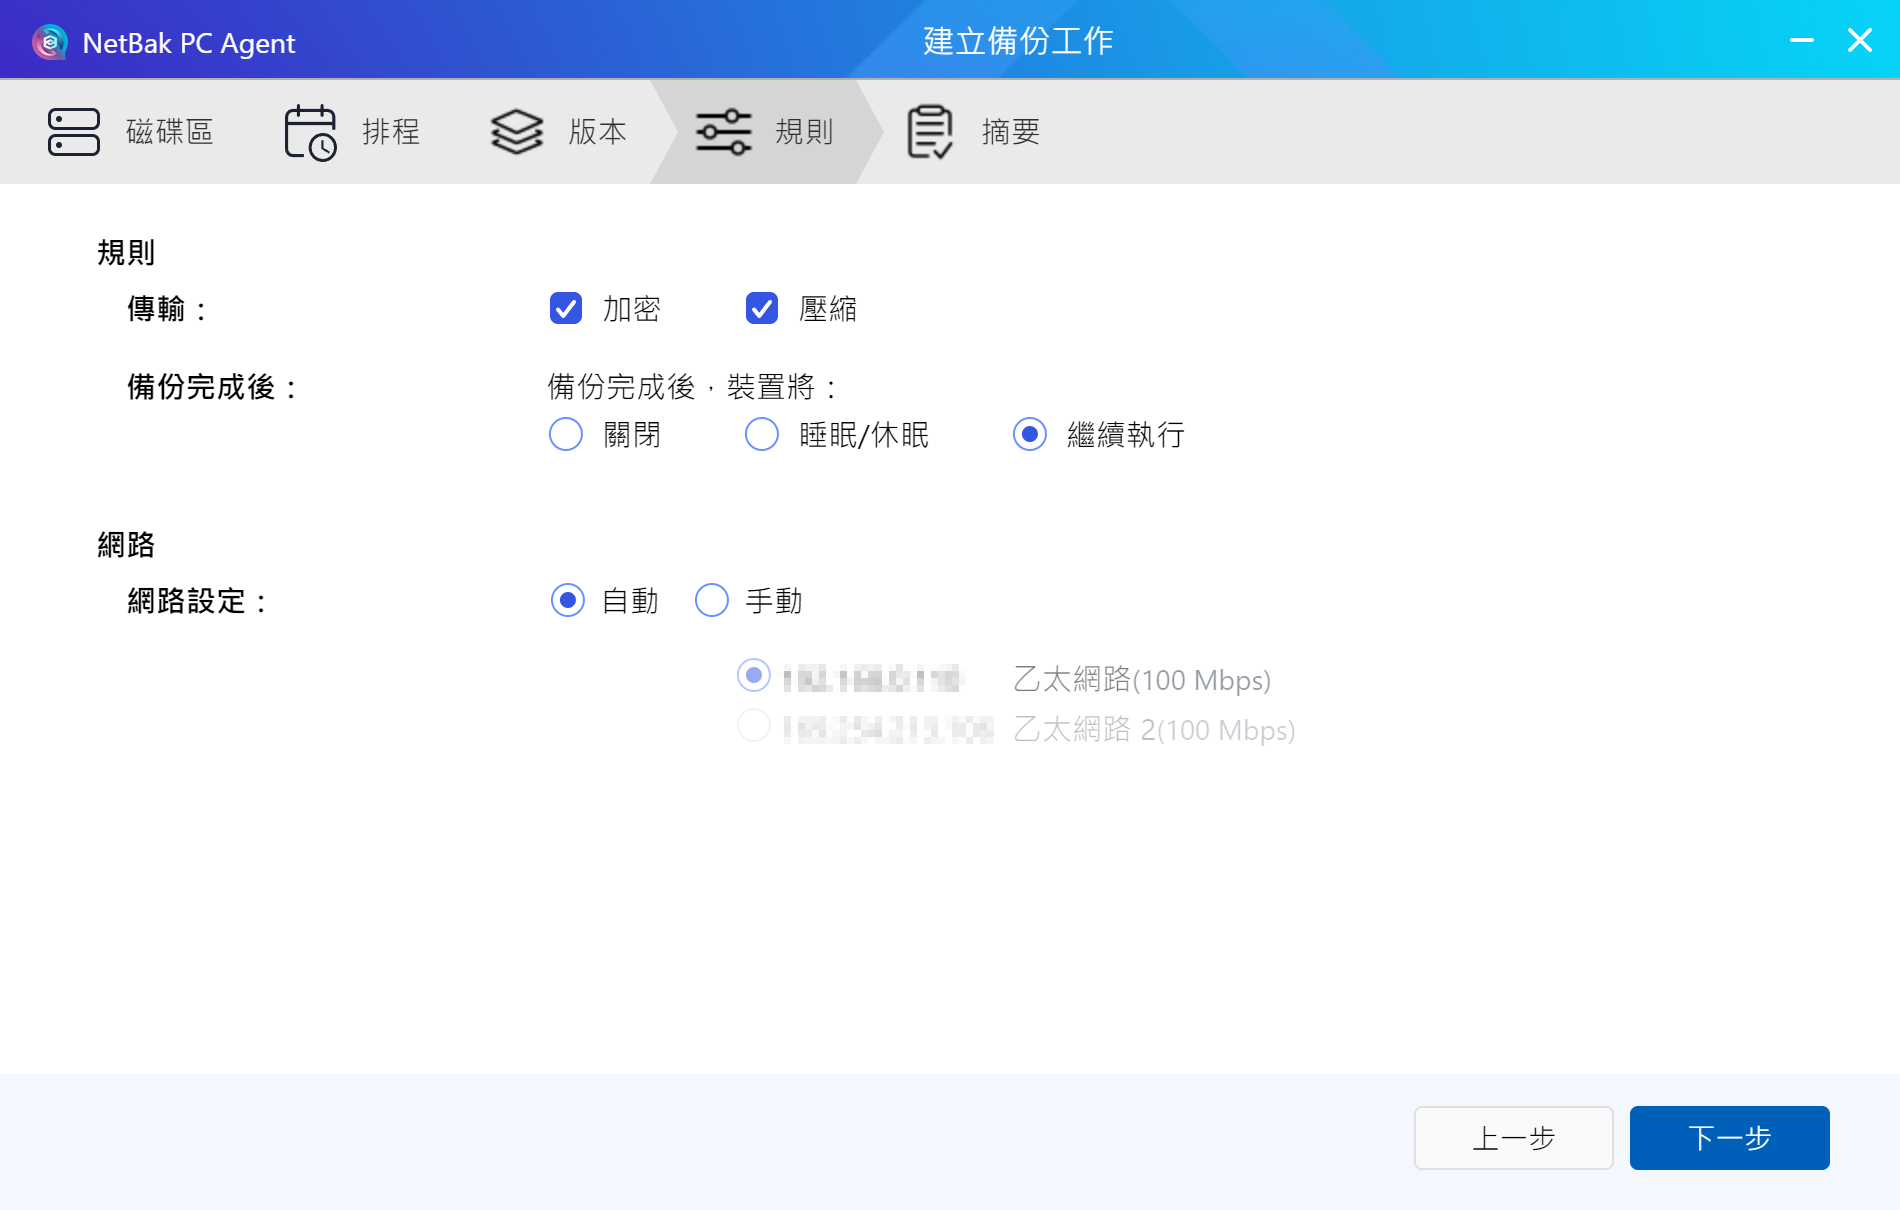
Specify other options to apply, including encryption and data compression during transmission.
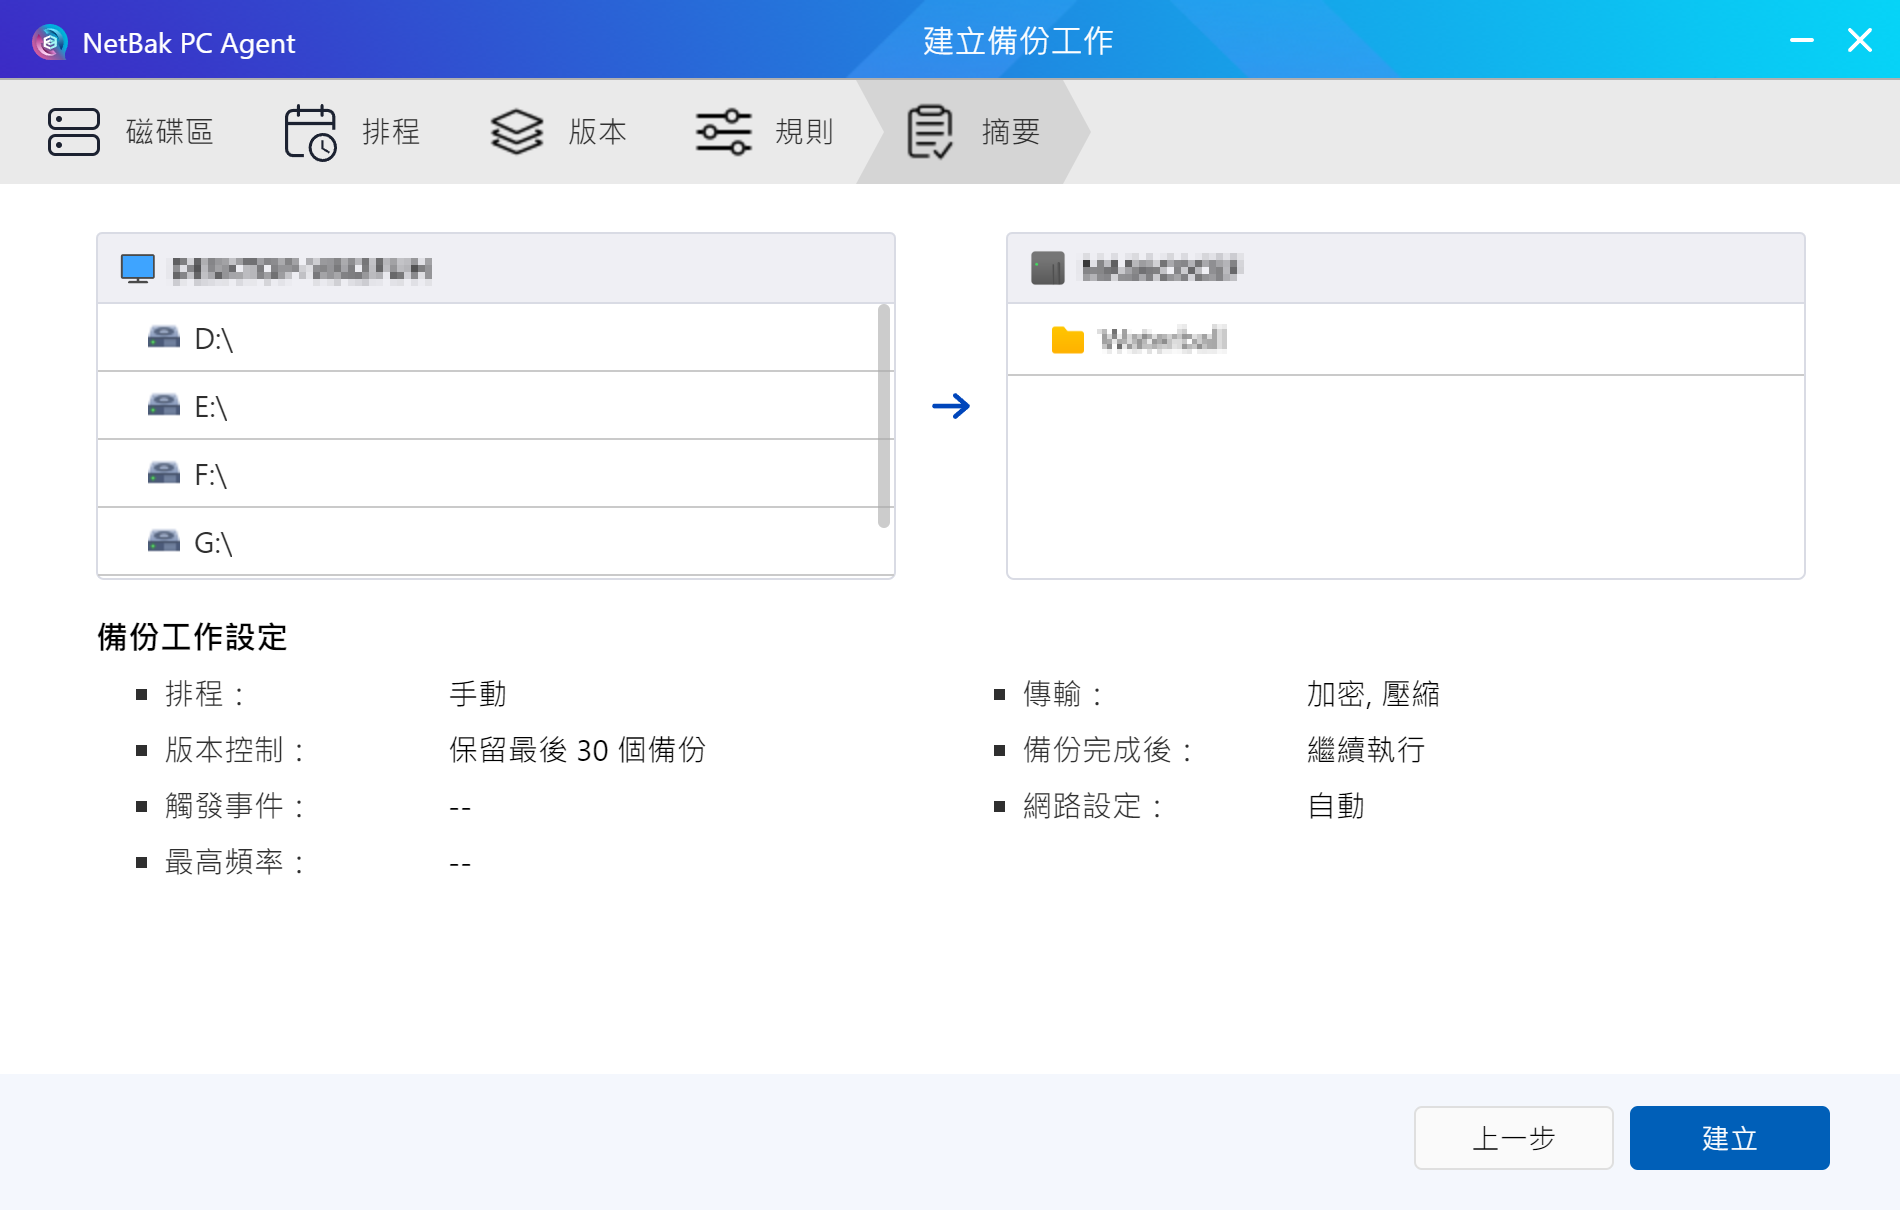
After setting is completed, a summary will display the relevant setup results, and you can proceed to create the backup job.

After creating the backup job, the status will also show as connected in HDP.
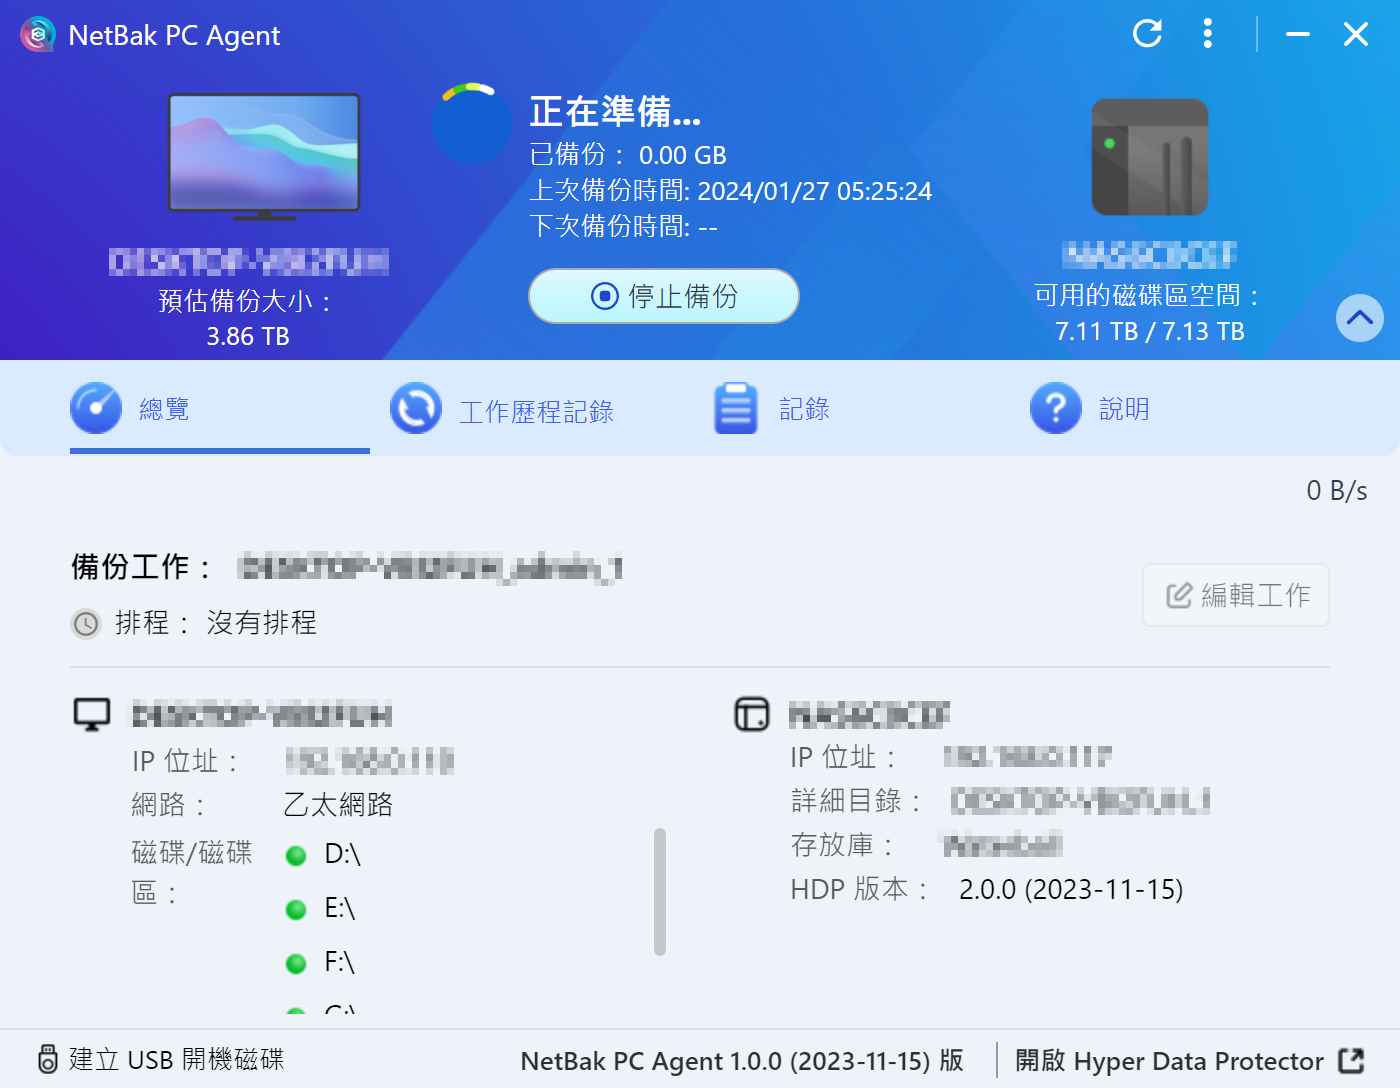
After creating the backup job, execute the backup immediately.
During backup job execution, please do not shut down, enter sleep mode, or log out of the device.
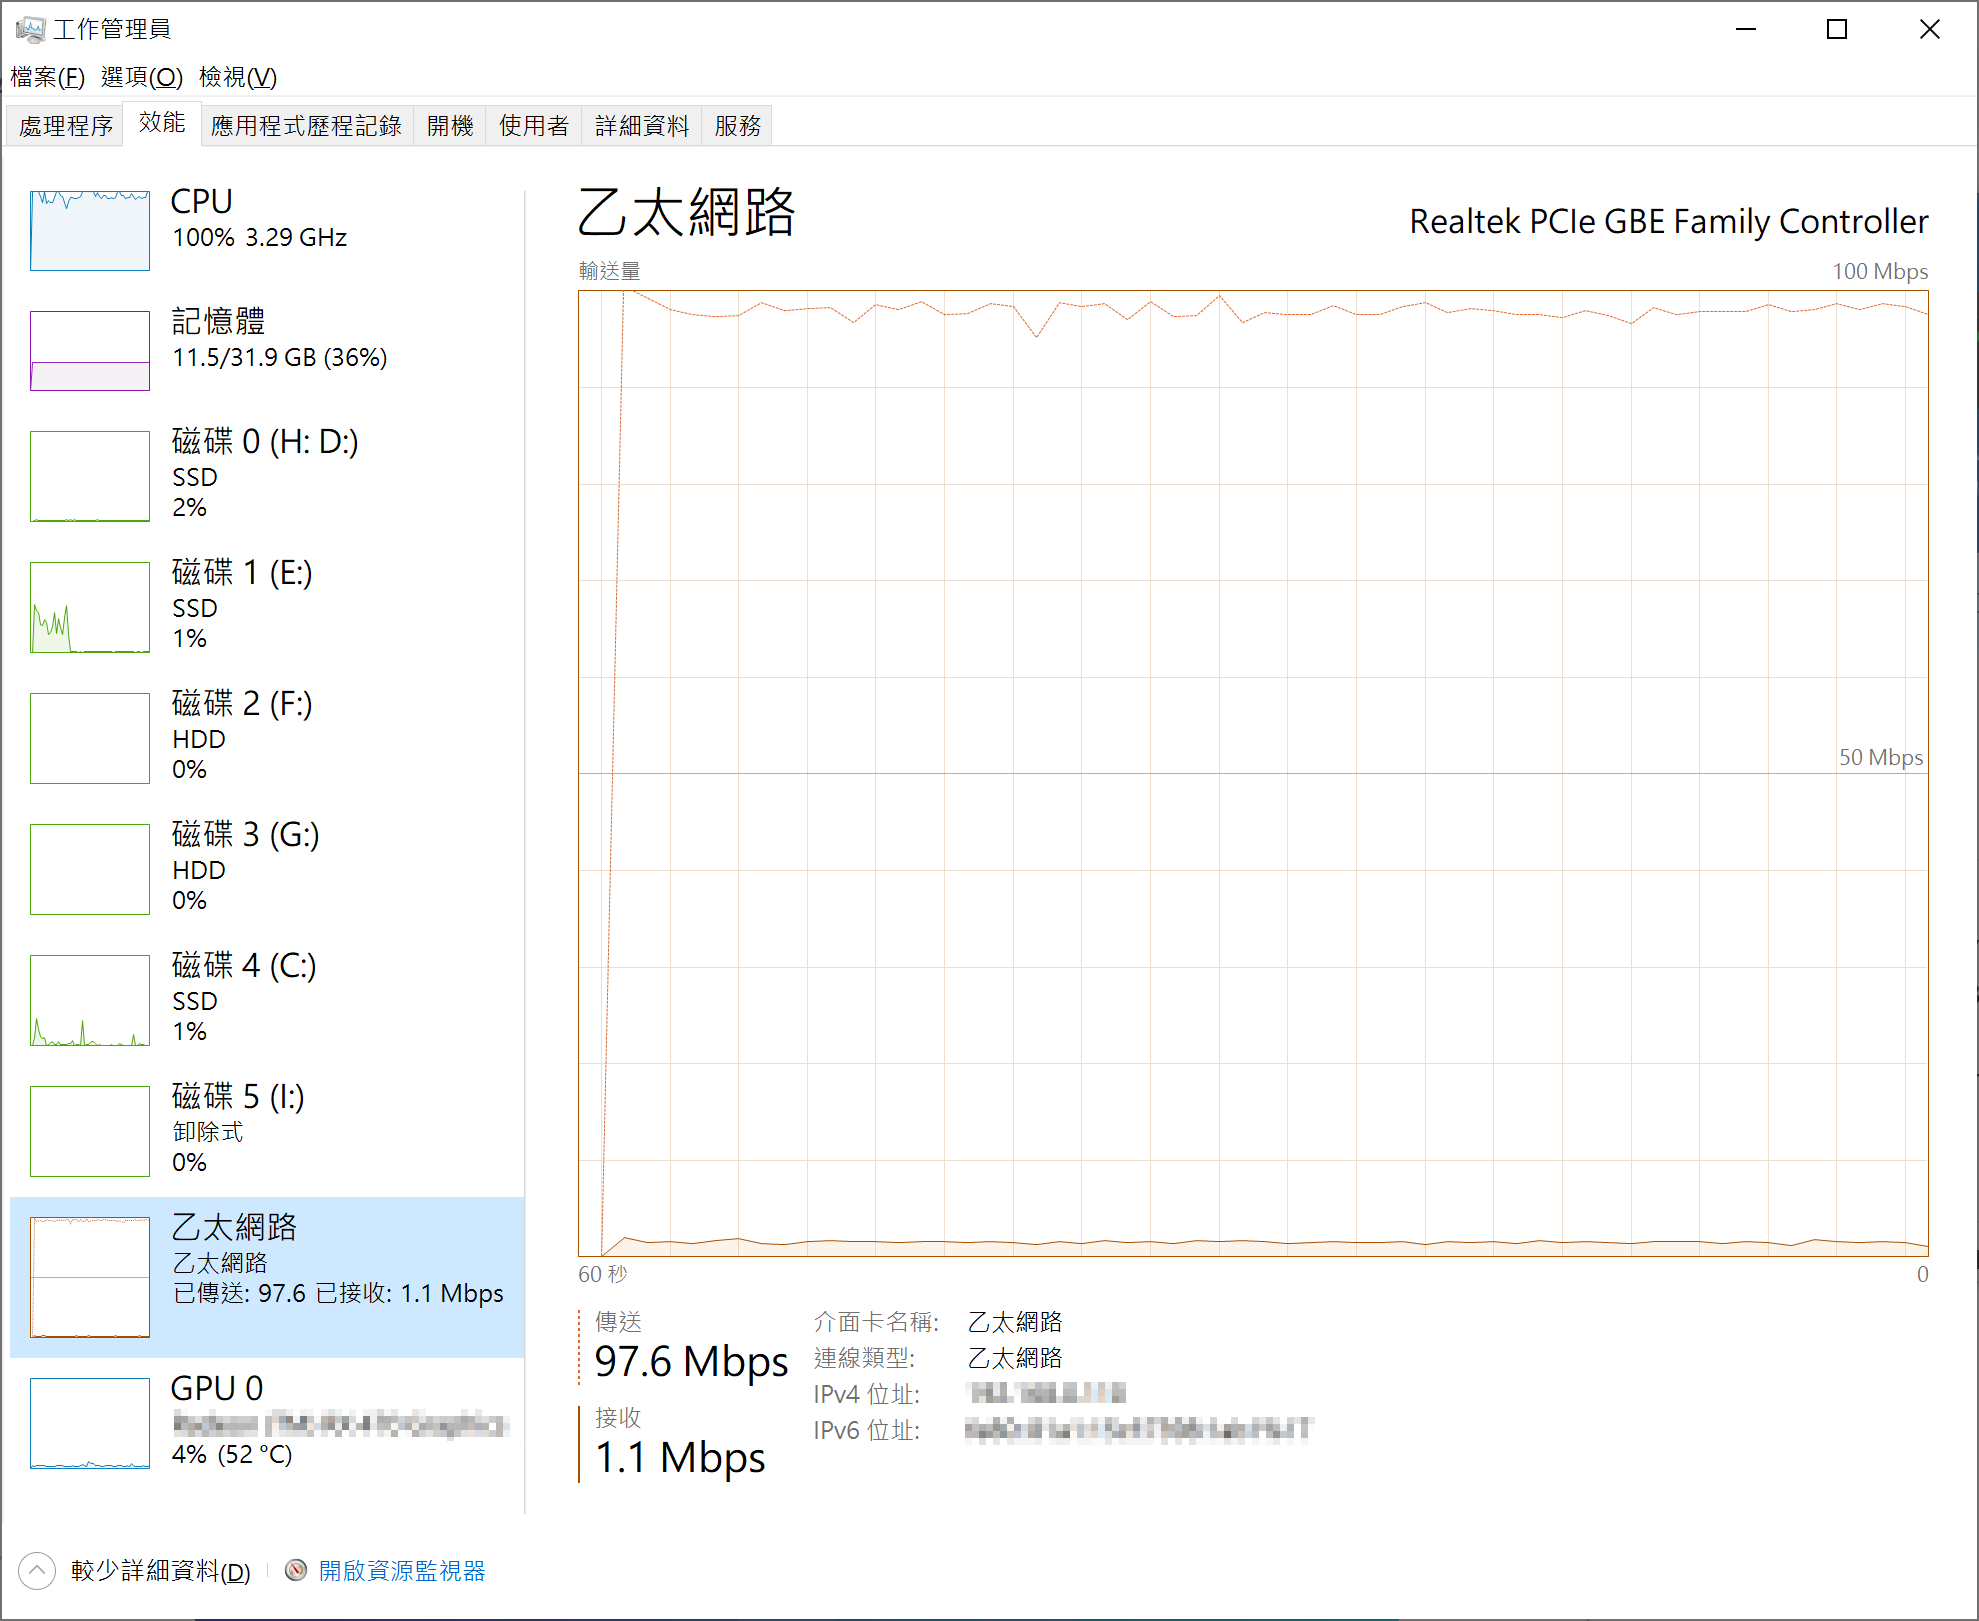
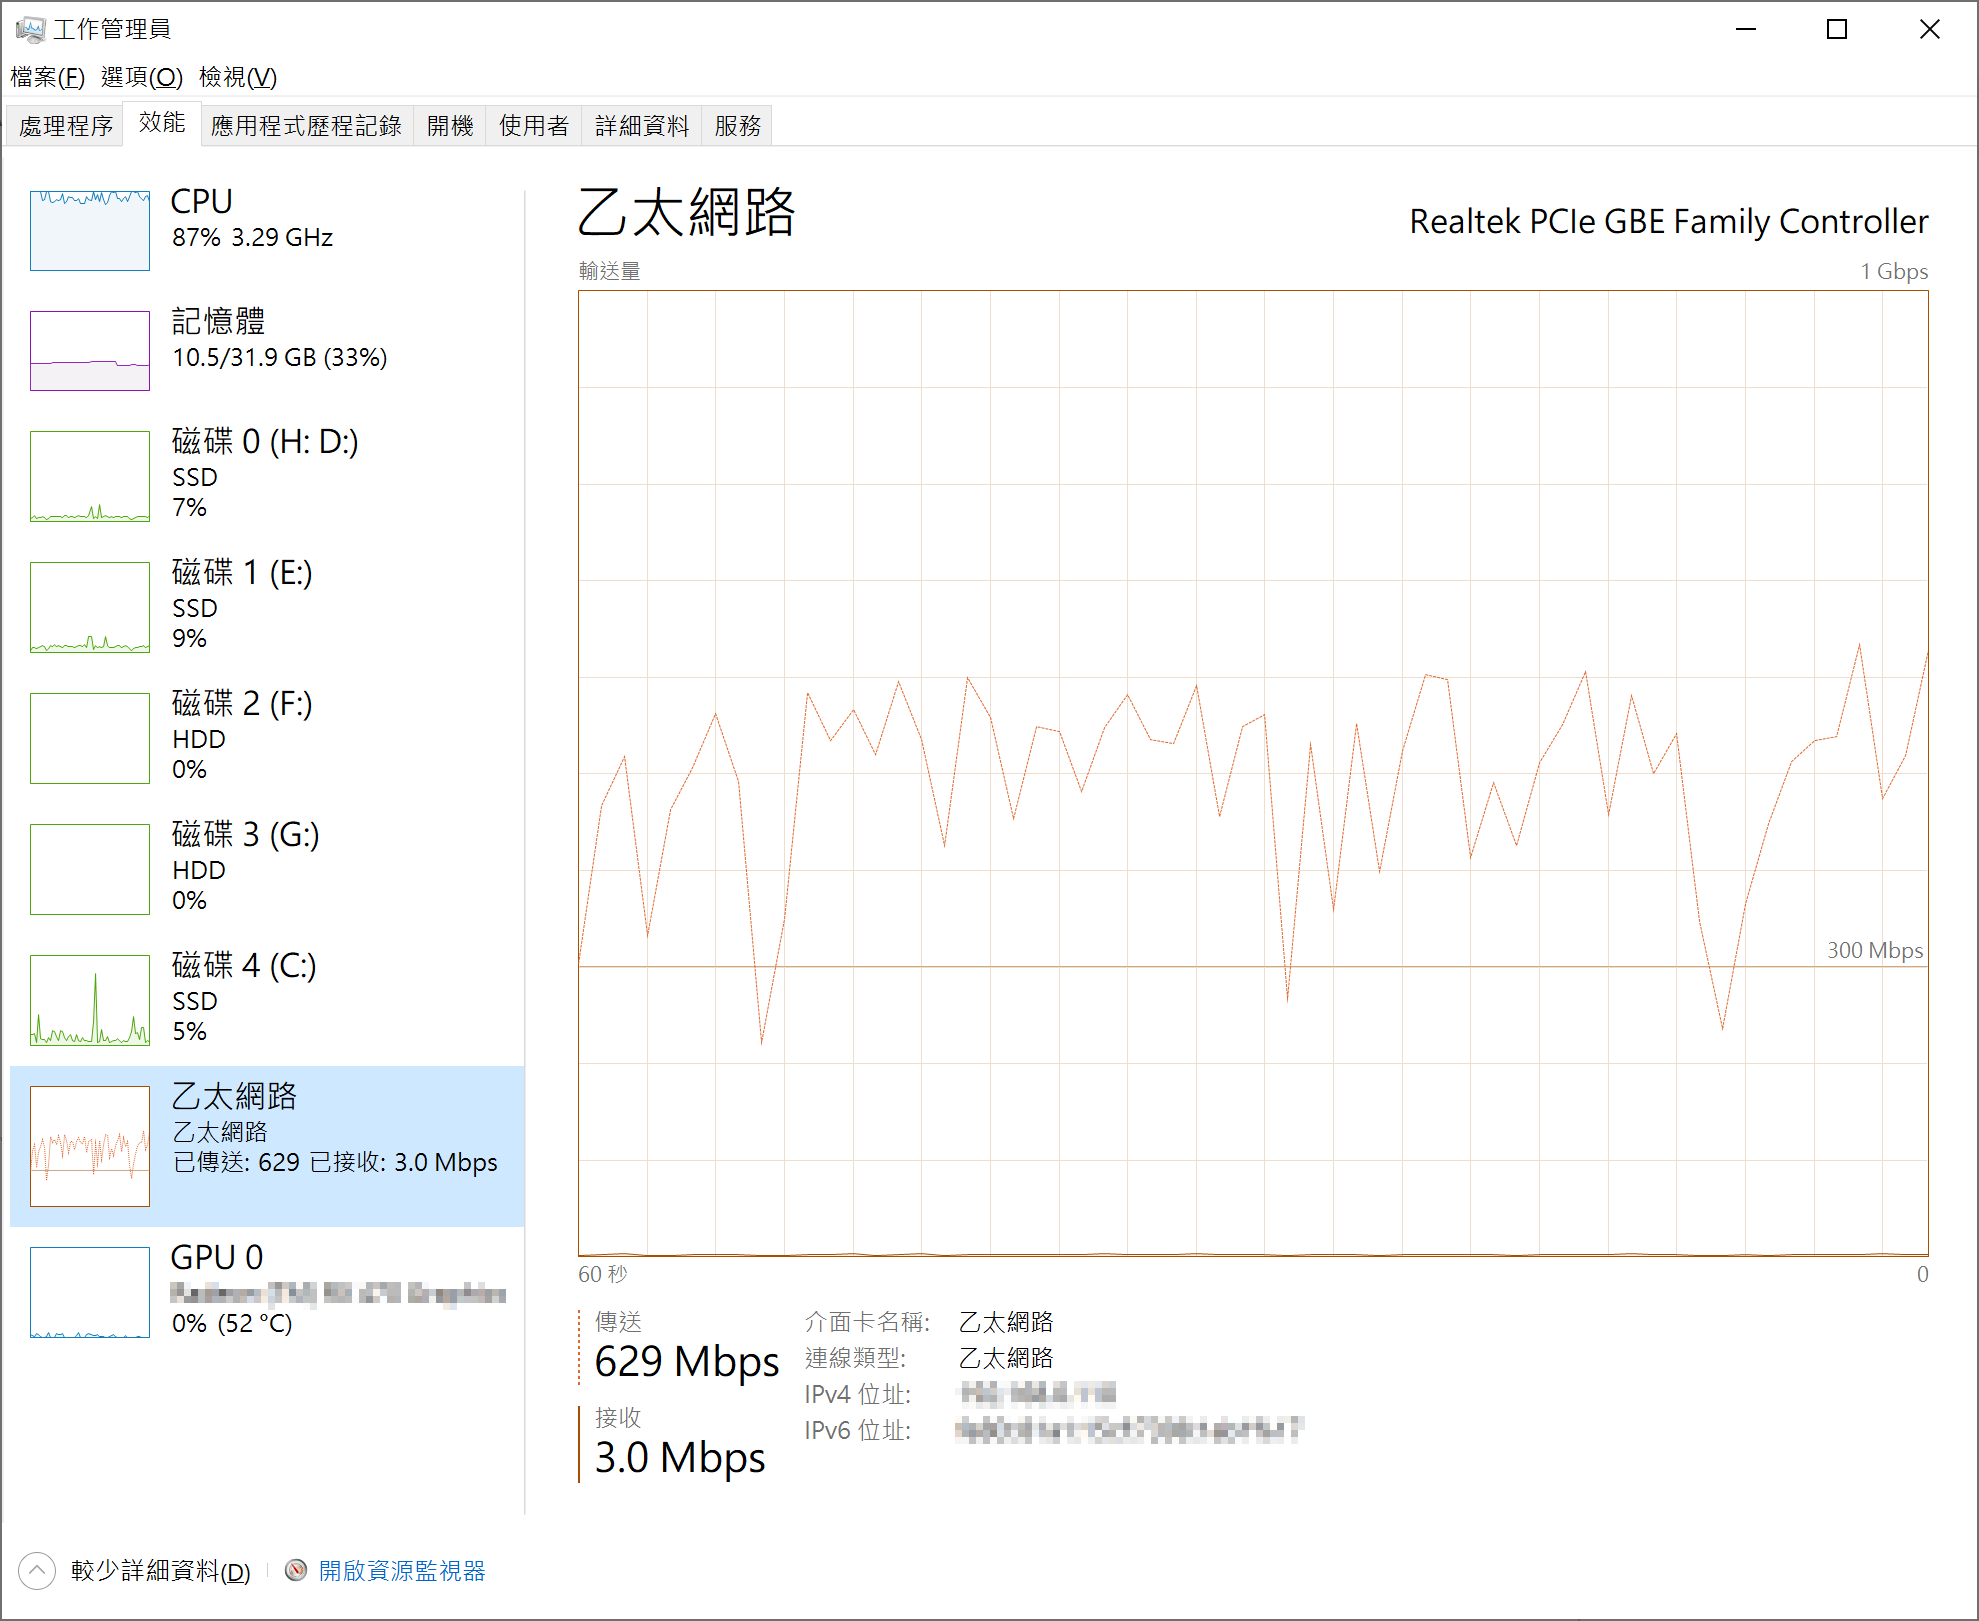
First use a wireless network AP to connect personal computers and NAS of Switch, it is quite apparent that the 100Mbps bandwidth is almost completely saturated.
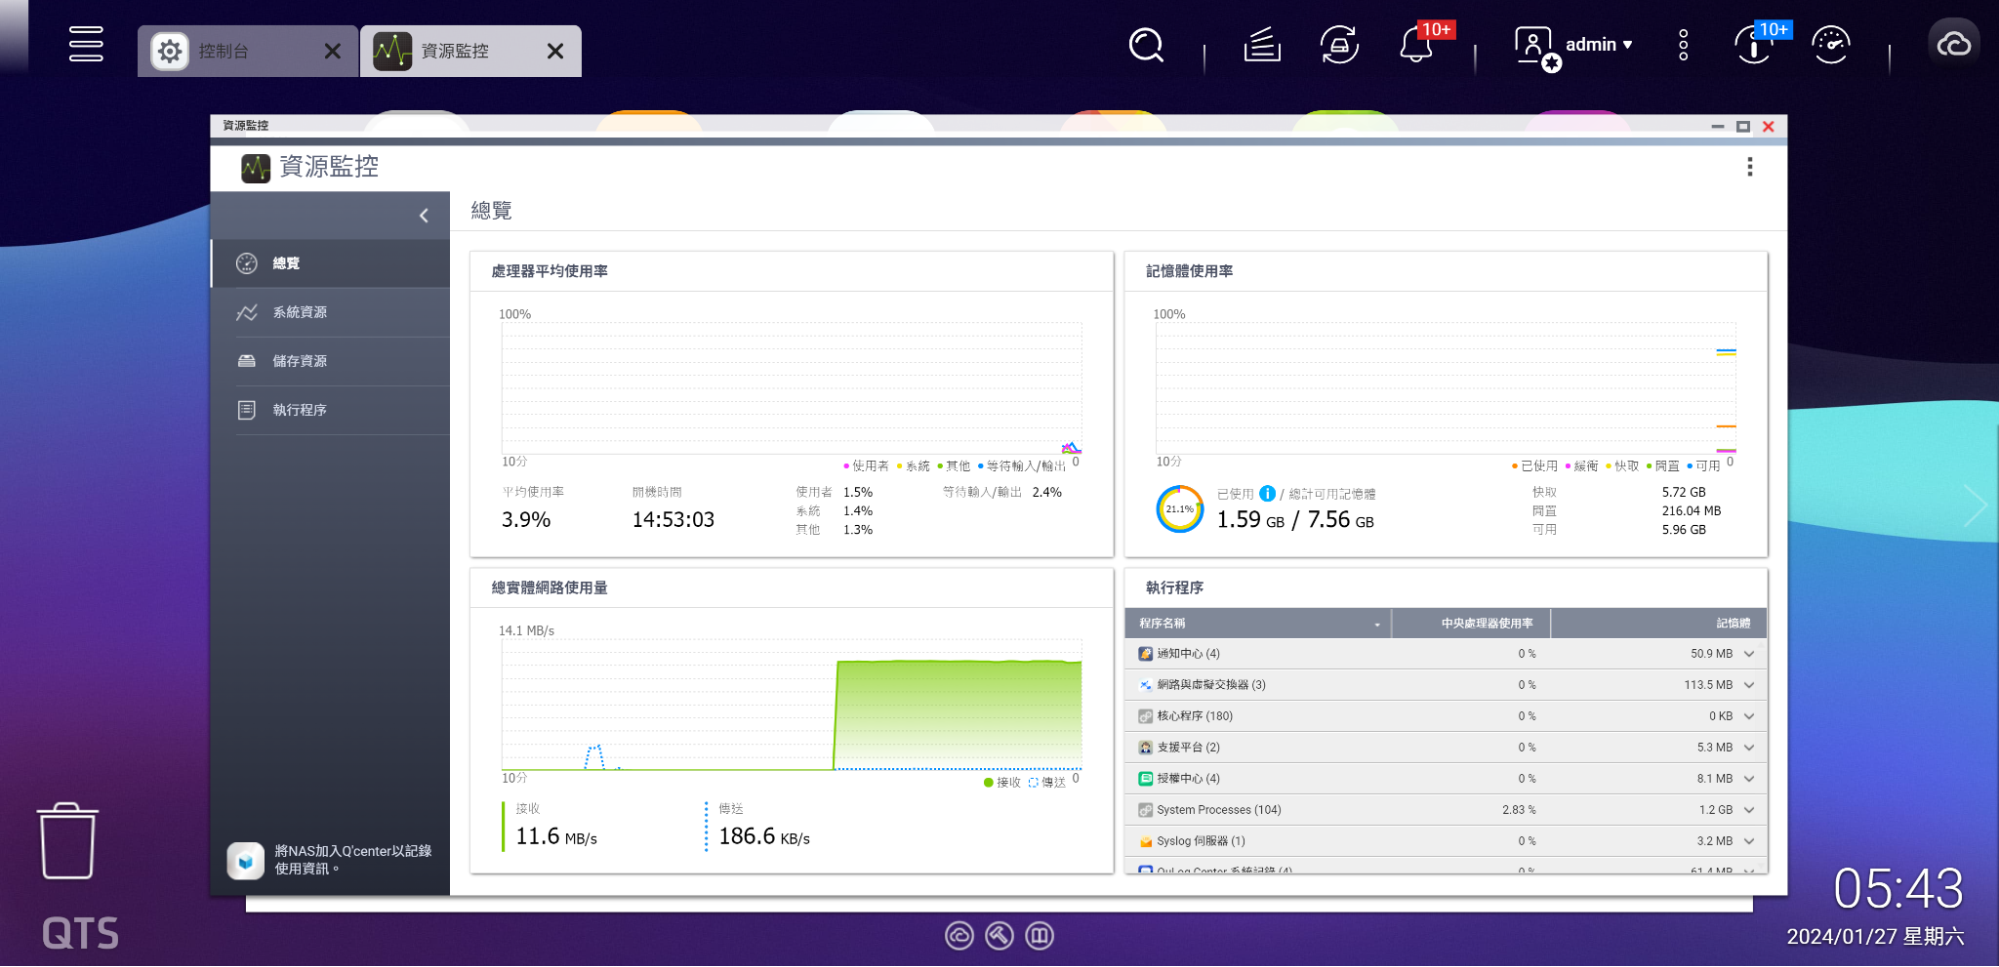
At this time, the same results can also be seen in the NAS ‘s Resource Monitor.
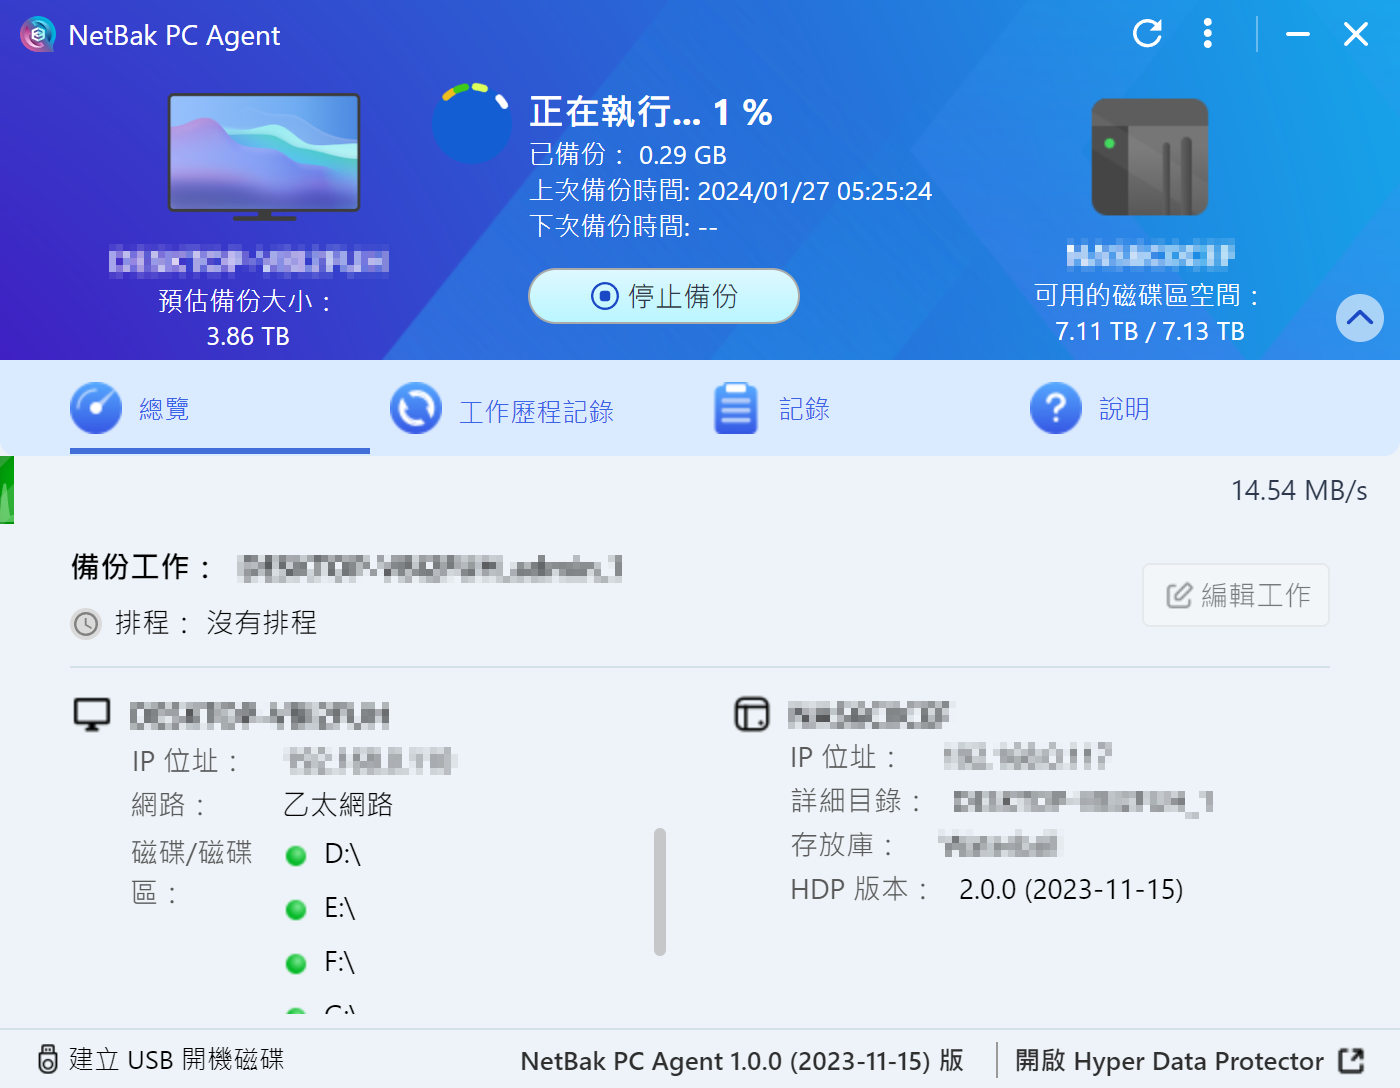
The speed is too slow, so the backup is stopped. Switch back to the GbE switch, and the transmission efficiency is instantly increased by several times.
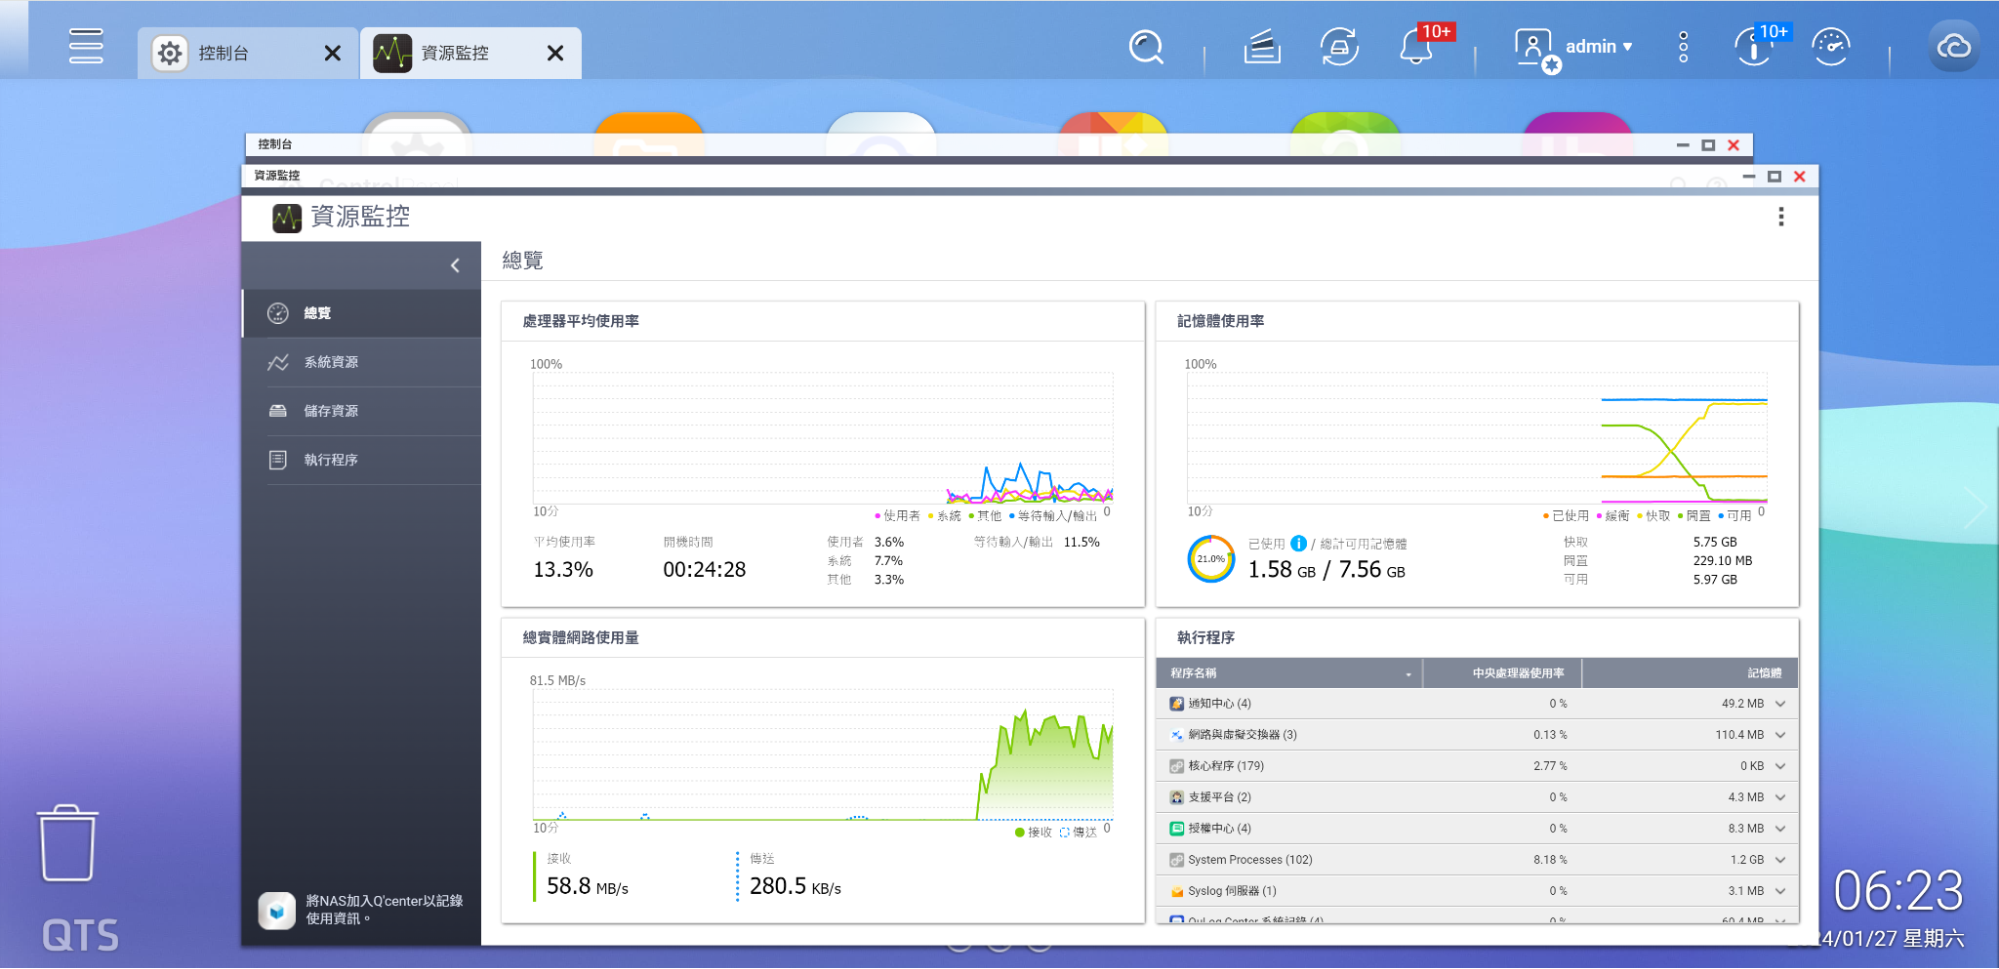
The NAS ‘s Resource Monitor will also show an increased transmission rate. For higher-end NAS models with more hard disk drives, to ensure the efficiency of the backup, 2.5GbE and even 10GbE are basic requirements, and QNAP provides a complete selection of solutions in the Networking Switch, allowing QNAP NAS to unleash its full potential.
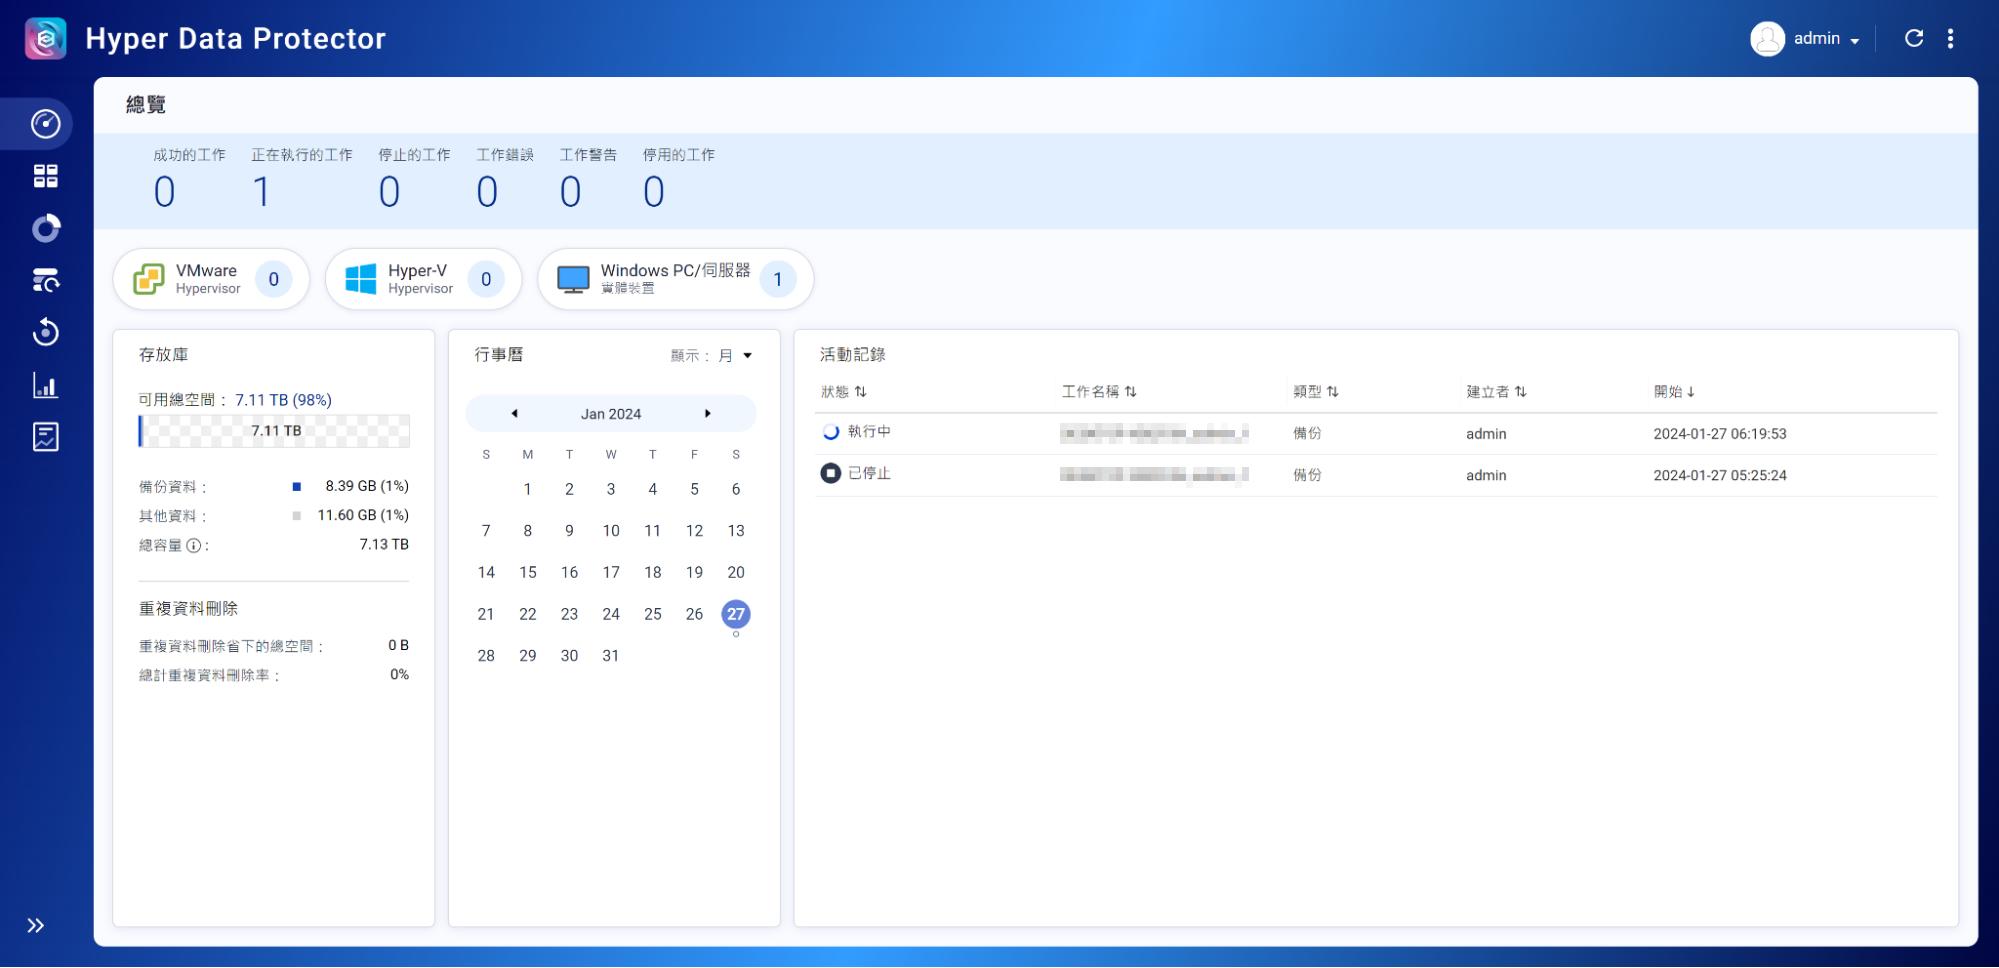
Ongoing backup operations can also be viewed in HDP.
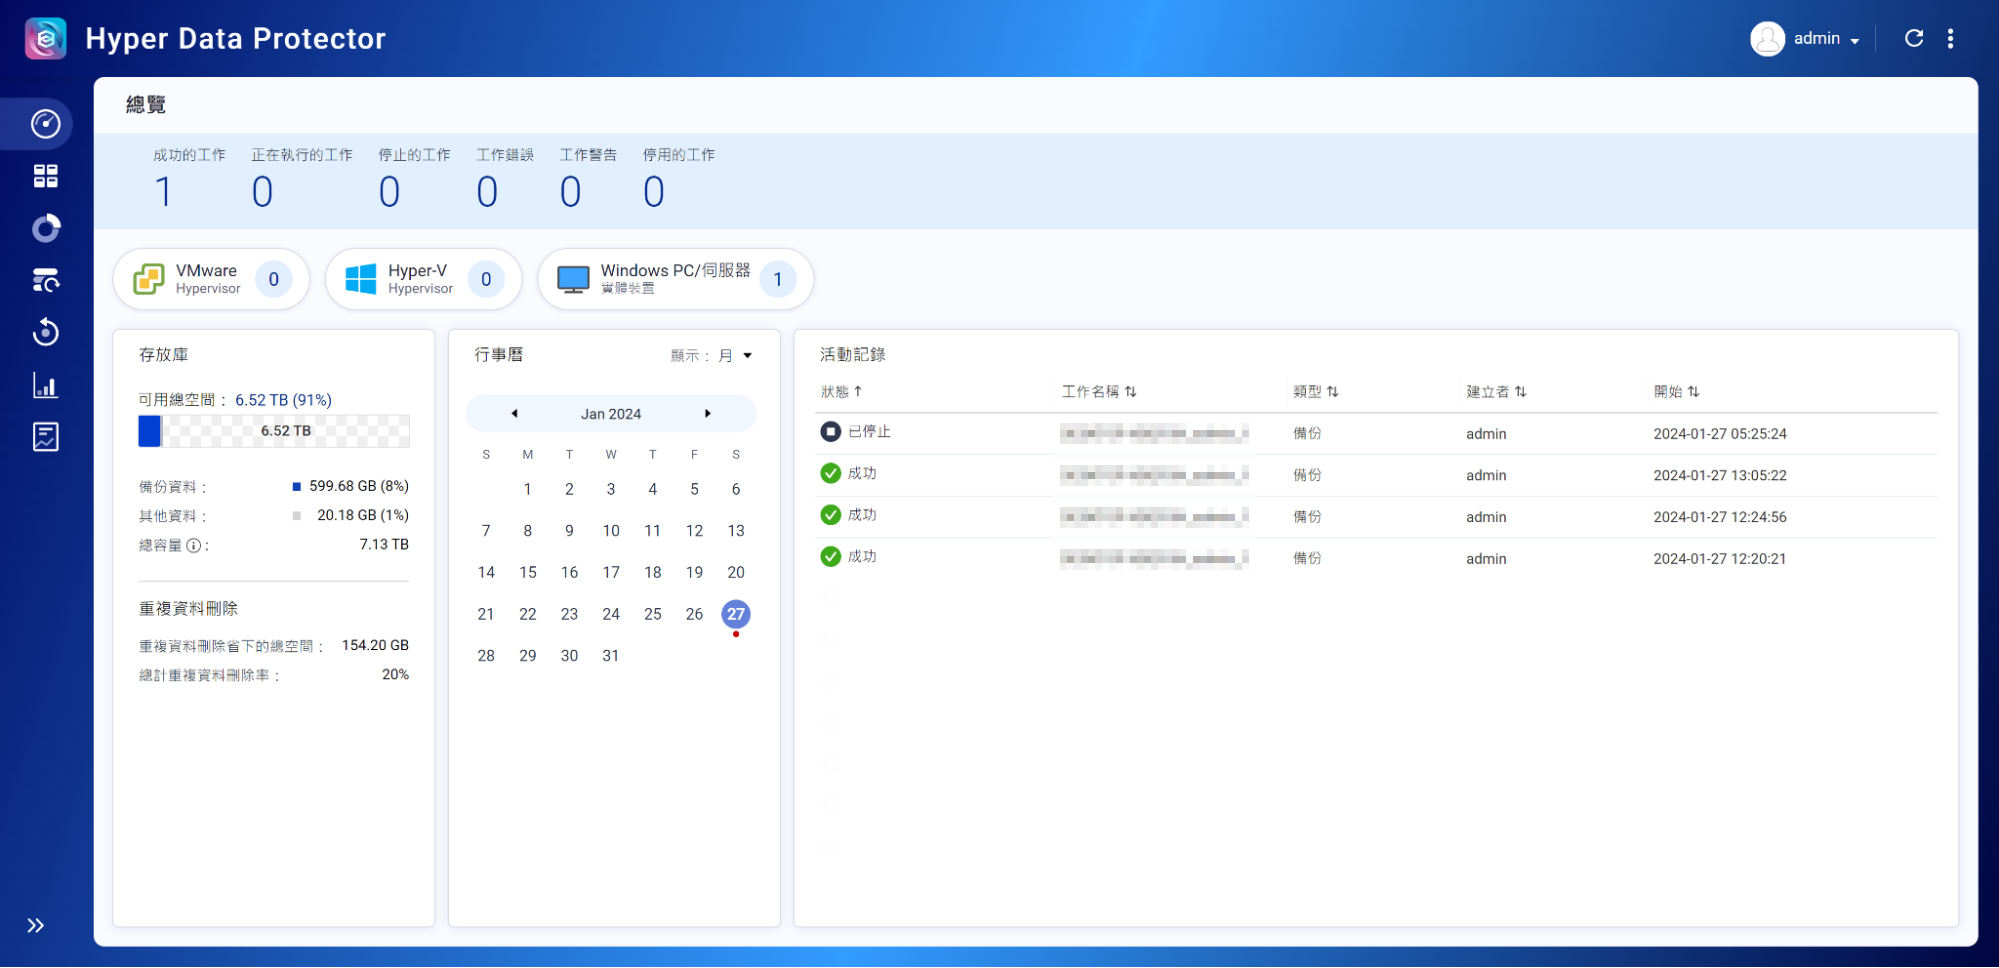
You can also view completed backup operations in HDP as well.
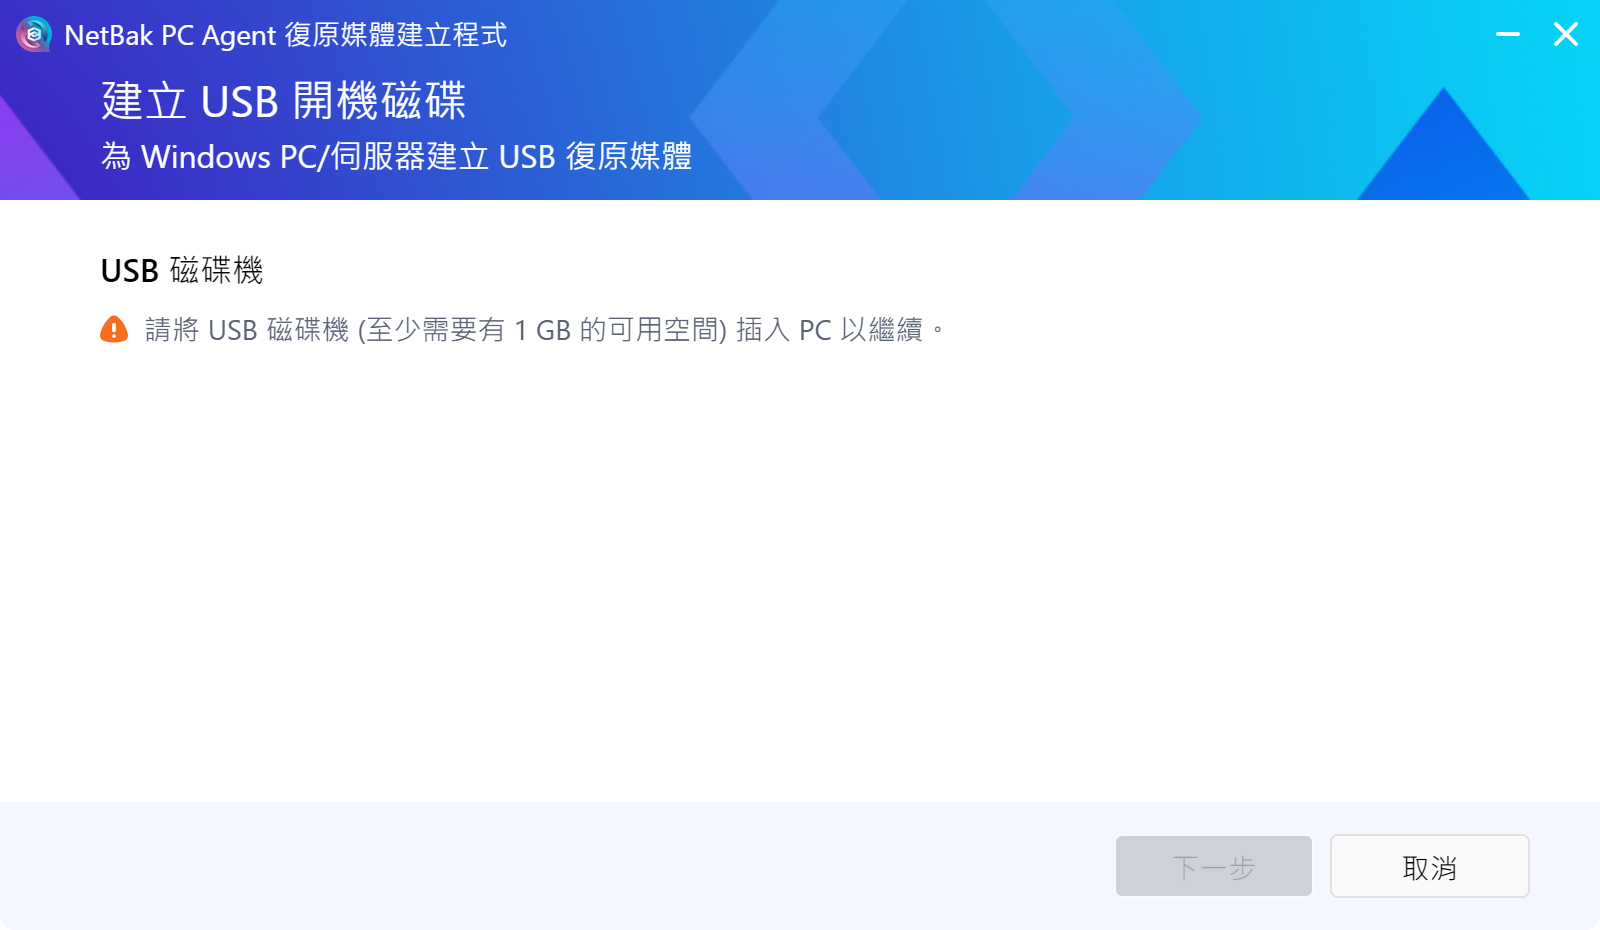
If you need to restore personal computers or servers, you must create a USB boot disk, which only needs to be created once, and then you can use any backup version to perform restore operations. It is recommended to immediately create a USB boot disk after completing the first backup, to ensure that when the personal computer or server cannot start or operate normally, you can restore at any time. The USB boot disk itself will not storage any backup data, the data are downloaded from HDP during the restore process, so a network connection with HDP must be established during the restore process.
Insert the USB disk into the PC, then open NetBak PC Agent and activate the ‘Create USB Startup Disk’ at the bottom left corner.
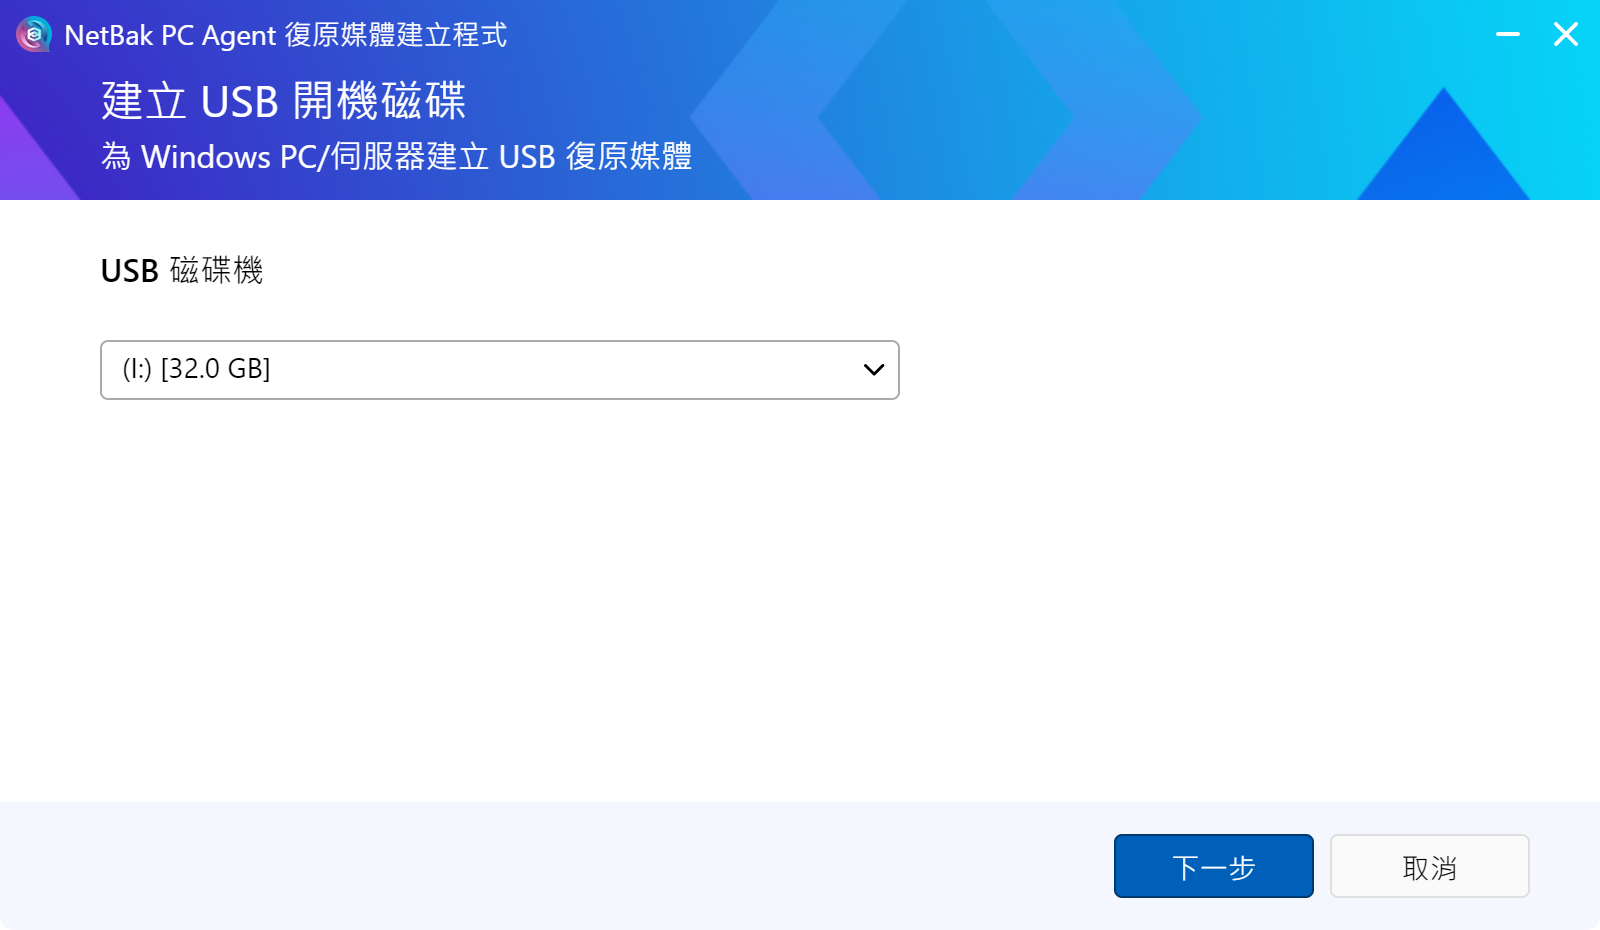
Select the USB drive, the minimum remaining capacity must not be less than 1GB.
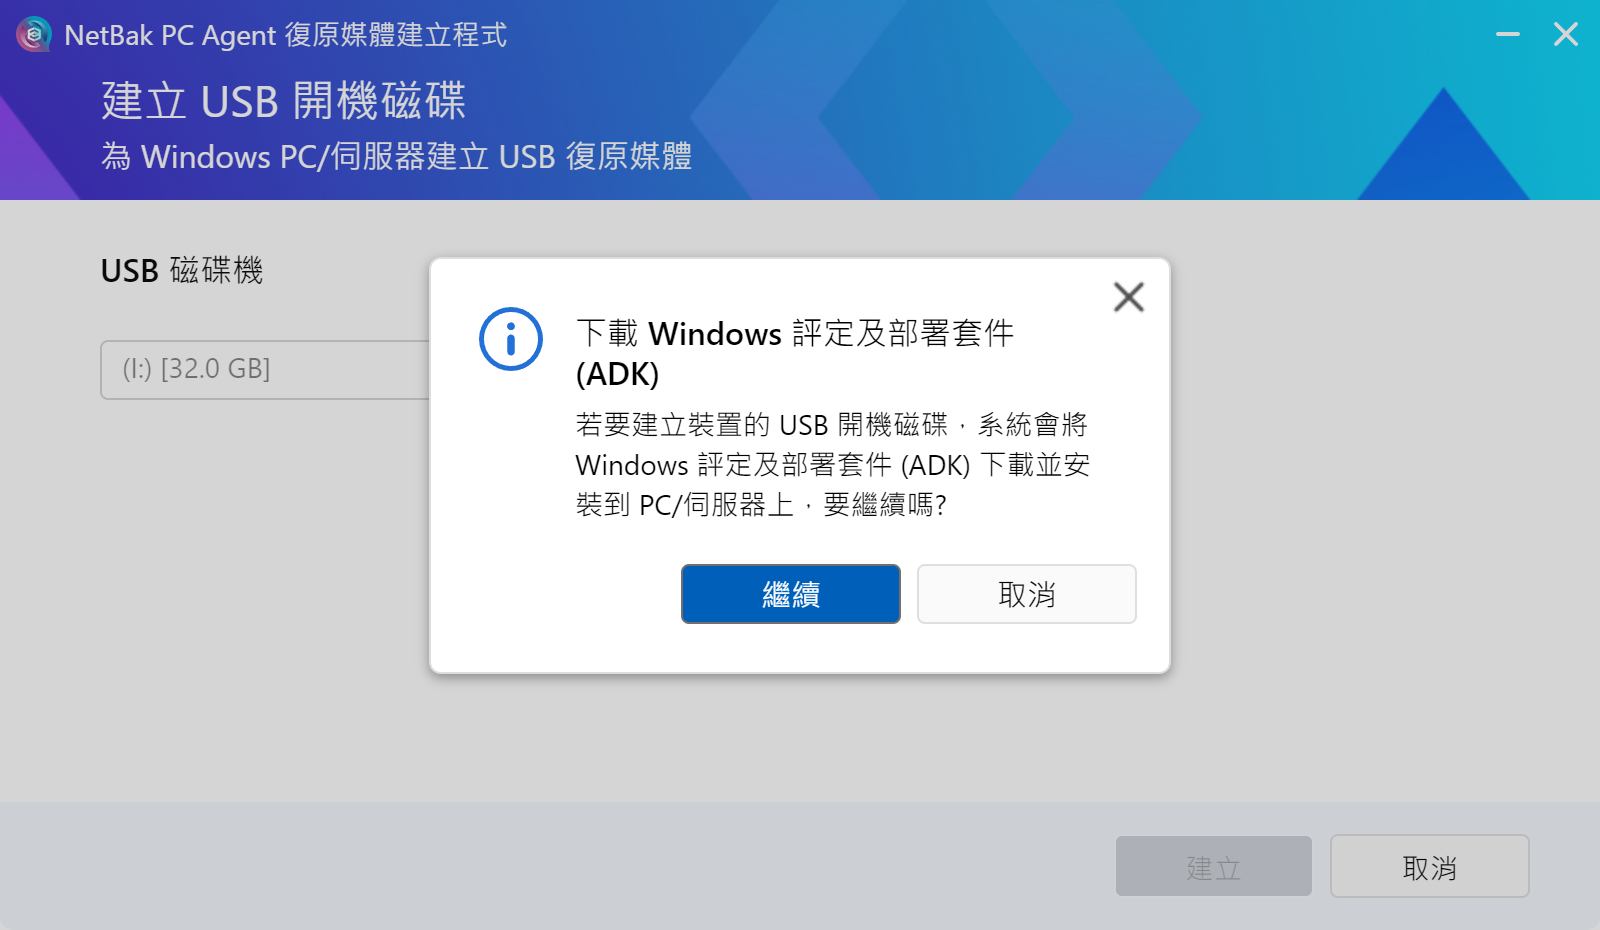
If the system requires downloading the ‘(Windows Assessment and Deployment Kit)'(ADK), proceed to download and install it.
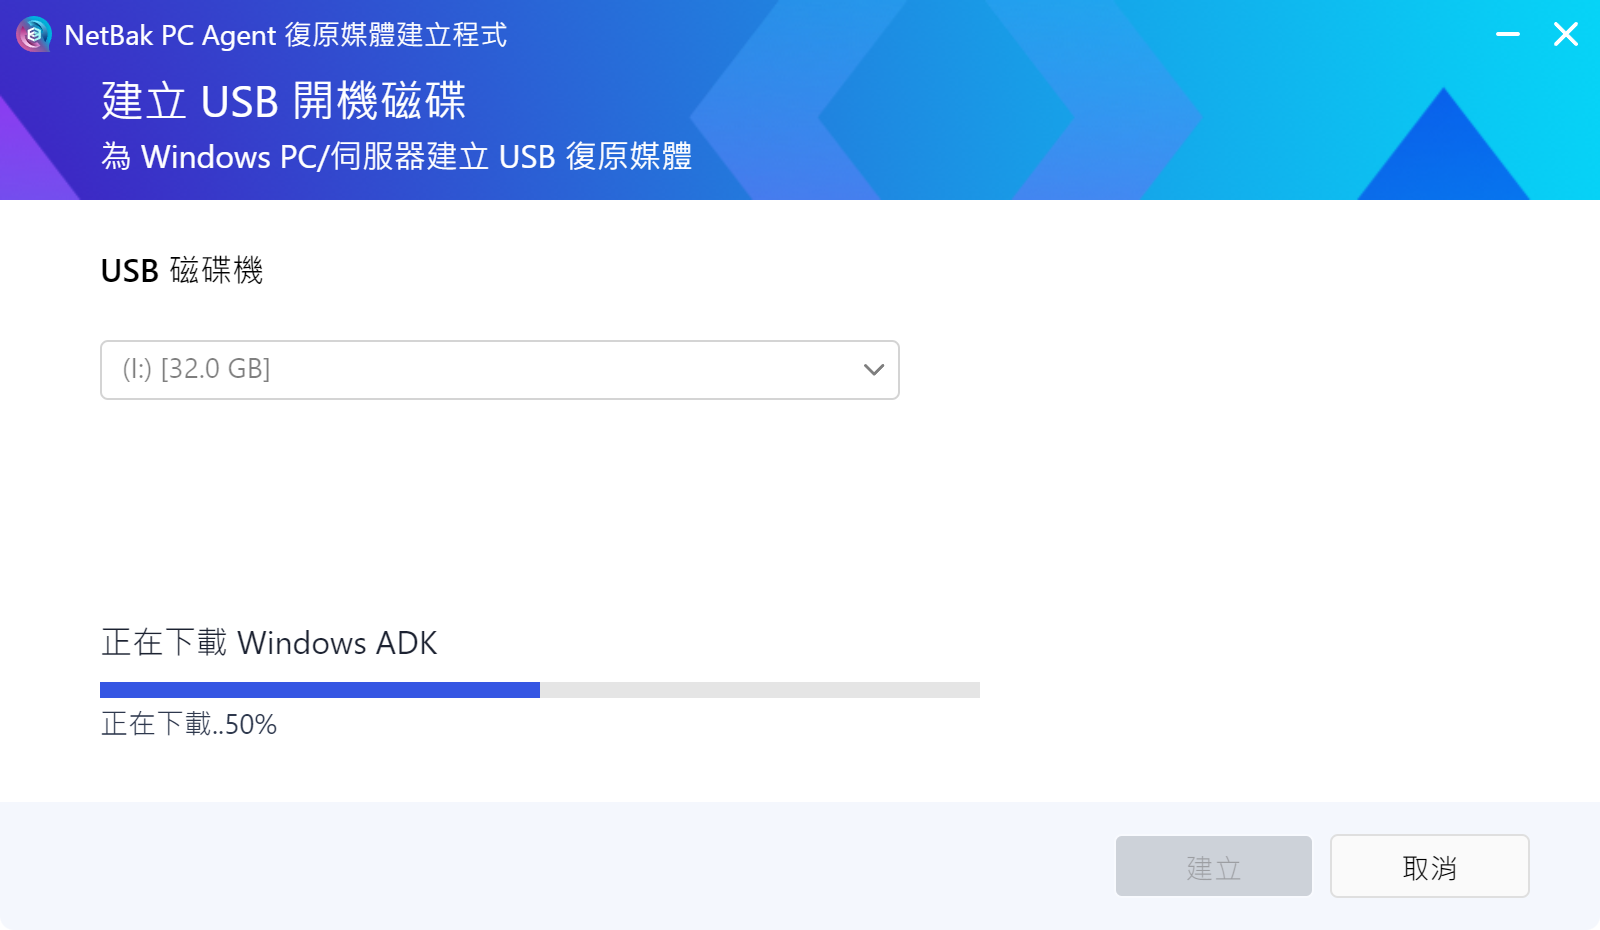
Automatically download ADK from the network.
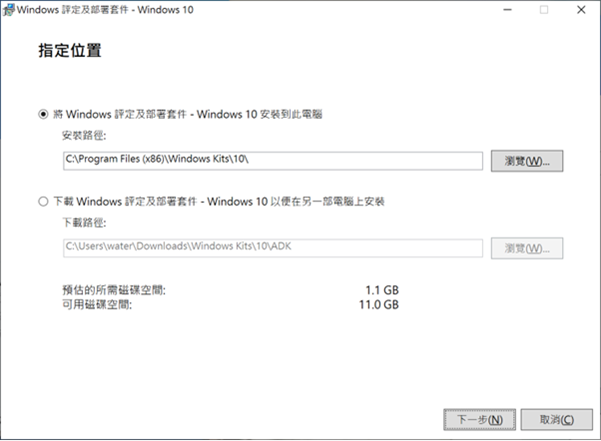
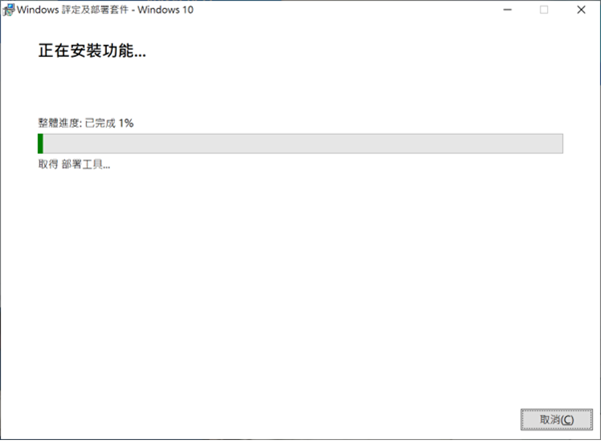
Install ADK onto the personal computer.
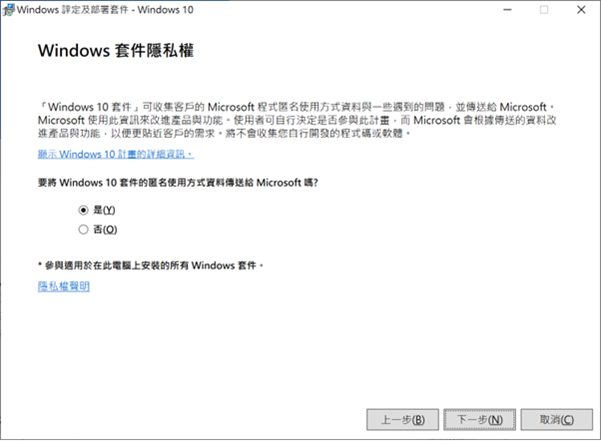
Select privacy settings.
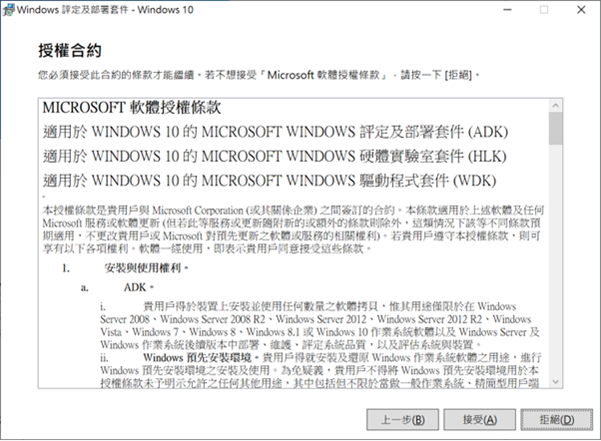
Accept the License Agreement.
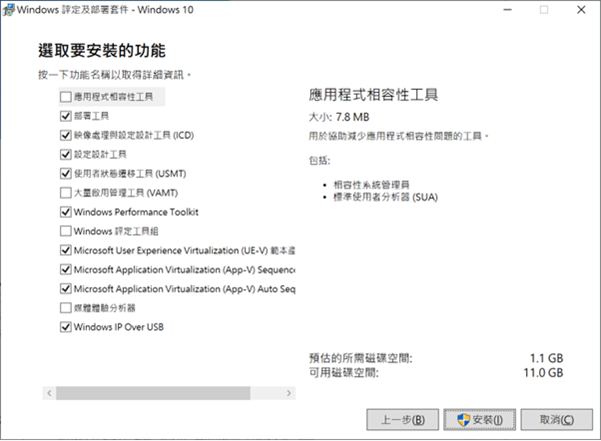
Accept the default Windows ADK features.
The system requires downloading the ‘Windows Pre-installation Environment’ (PE), proceed to download and install it, and accept the Windows PE default features. After creating a USB boot disk, NetBak PC Agent will provide instructions on entering the BIOS to select the USB boot disk for device restoration, now you can remove the USB boot disk from the personal computer.
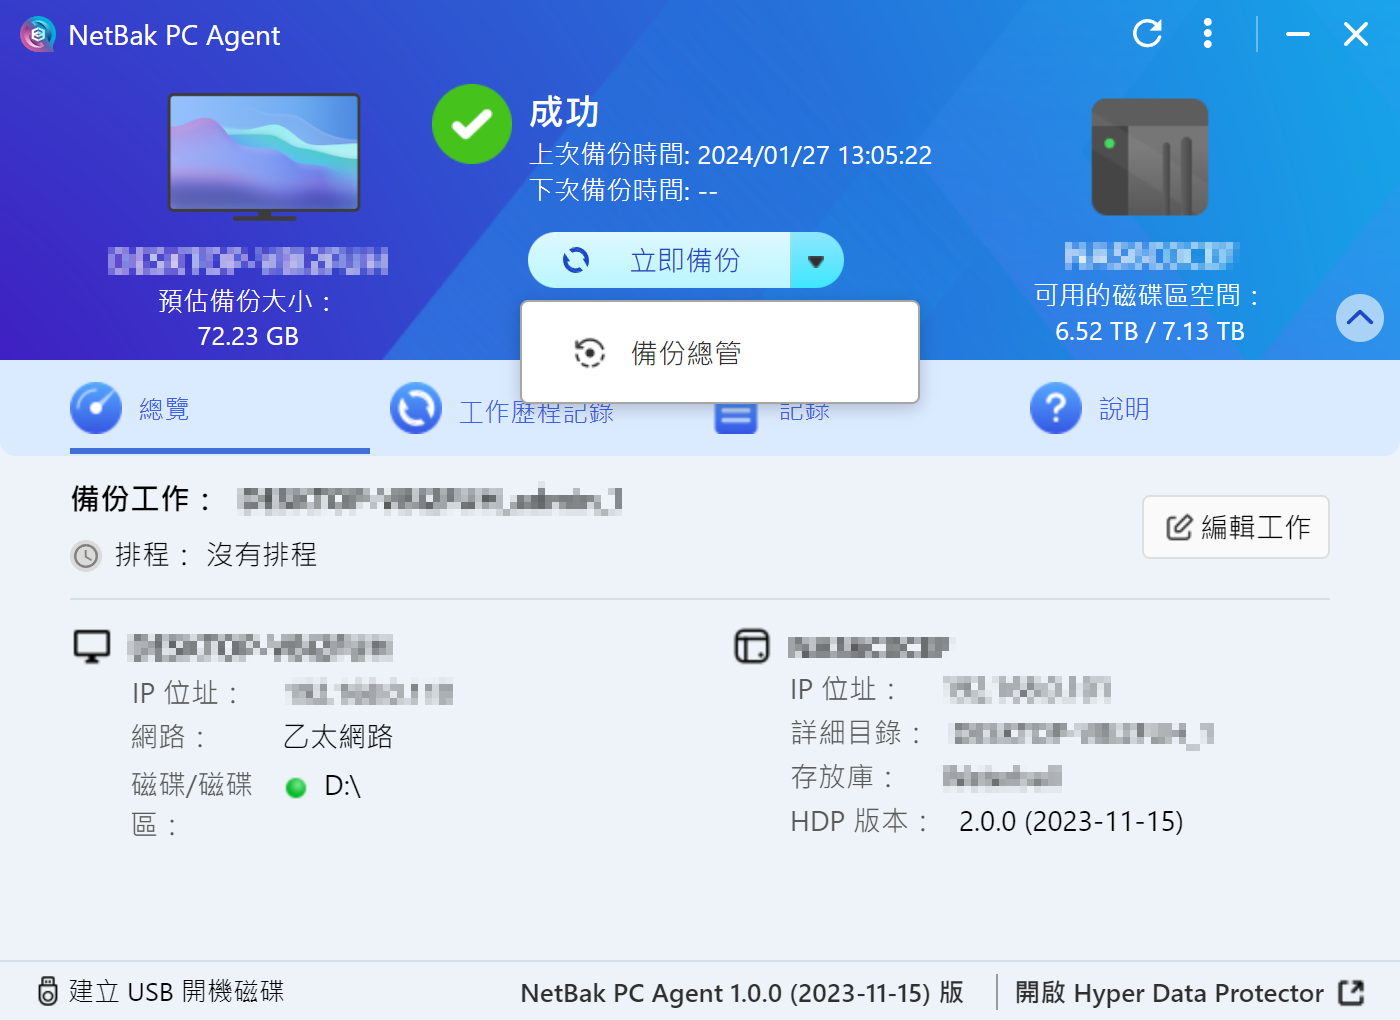
Hyper Data Protector (HDP) Backup Manager can manually transfer individual files and data folder to restore on personal computers or servers. You can directly enter the Backup Manager from NetBak PC Agent.
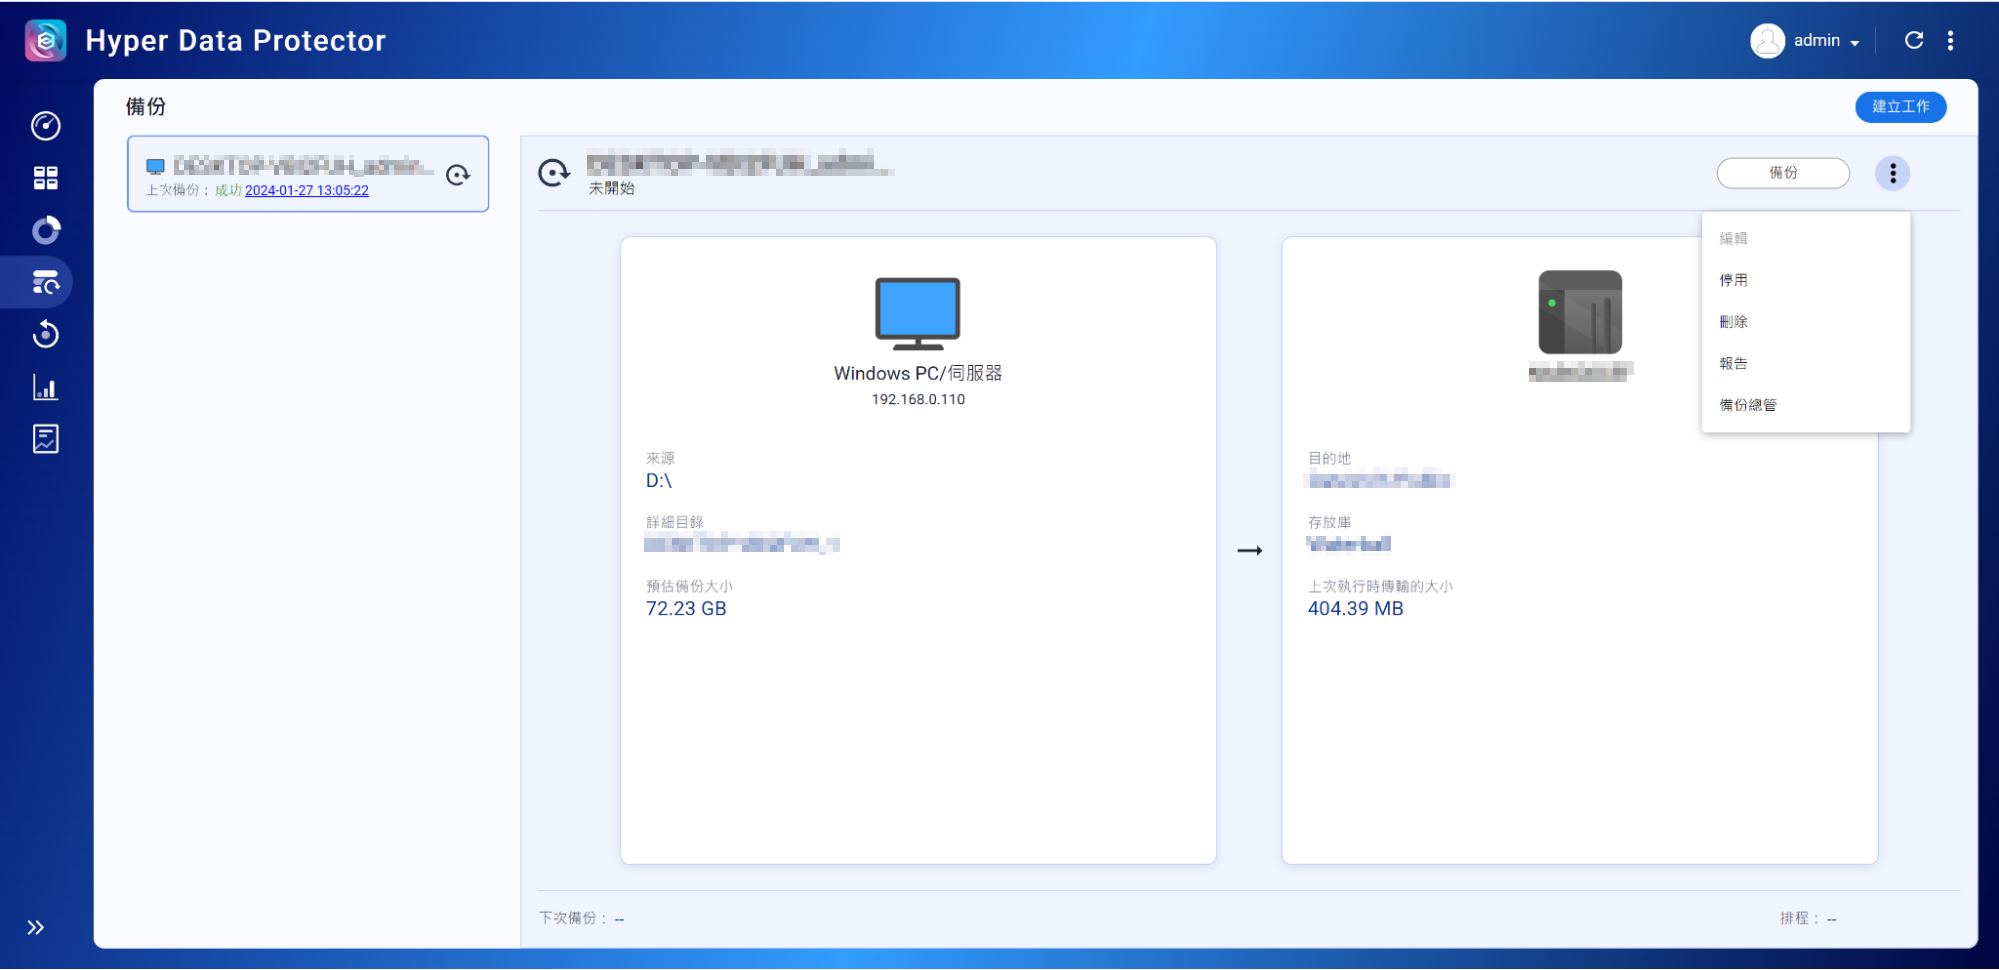
Alternatively, you can enter the Backup Manager from the drop-down menu in the upper right corner of the HDP’s backup list.

The HDP Backup Manager will display the backup timeline on the homepage, showing all backups and the content of each backup in chronological order. To restore files or restore to data folder to Windows personal computers or servers, first select the backup version, then click on [Month], and choose the timeline display unit, open the date selector and select the year and month, hold down the SHIFT key and scroll the mouse, you can scroll left and right on the backup timeline to find the backup version. The Backup Manager will display all backed-up files and data folder, select the files and data folder, click on [Download], and you can use the files and data folder just downloaded to replace the original files and data folder.